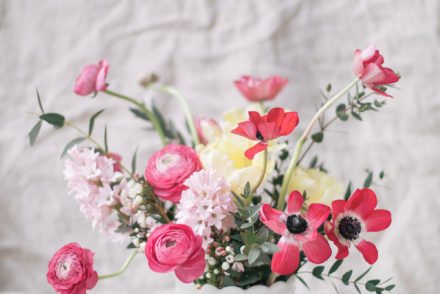
It feels like forever ago that Myron and I got together to spend the afternoon playing with flowers and creating a couple original fall floral designs. Myron is so talented at what she does and spending the day learning from her couldn’t have been a more inspiring experience for me. Today Myron is back to show you how to create this low and lush fall inspired arrangement that would look stunning on a table, in an entryway or on a mantel. Though Canadian Thanksgiving is over, American Thanksgiving is fast approaching, so those of you who are American, I think that trying this arrangement out for your Thanksgiving tablescape would be a great idea! And for those of you who are simply interested in floral design like myself, it’s a beautiful fall piece to try your hand at.
PS: How to Make a Fall Floral Bouquet
 What You Will Need:
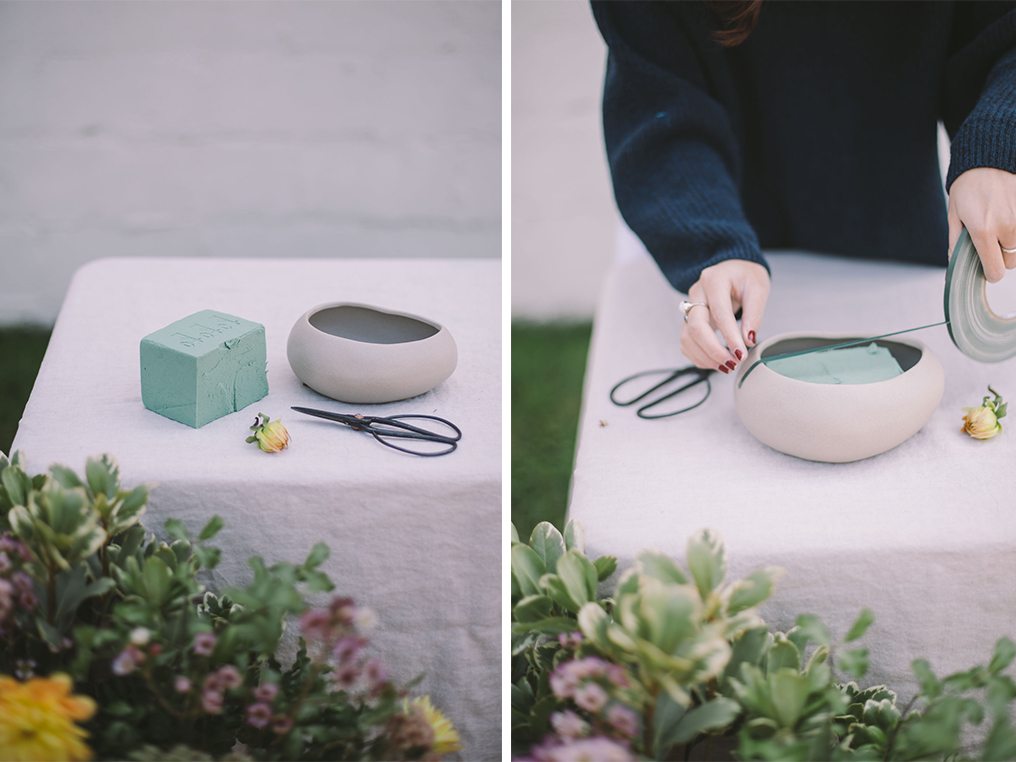
-Low ceramic vase (like the one pictured above)
-Floral foam
-Floral tape
-Shears and floral knife
-Fall foliage, garden roses, dahlias, ranunculus, hydrangea and wax flowers
Step 1: Soak the floral foam with water. Once the foam has fully absorbed in the water, cut the appropriate size to fit the container with a floral knife. Place the floral foam into the vase.
Step 2: Using your floral tape create a grid-like pattern along your vase, this will help keep the flowers in place just as the floral foam will.
 Step 3: Organize your flowers by kind so that when you’re working you can easily select which flower to use next.
 Step 4: Select the foliage for your arrangement and make sure to trim the stems short as this is a low and lush arrangement. Firstly you are going to want to create a base using a few different types of foliage to cover the foam. The overall shape of this arrangement is a half-moon so be mindful to add more foliage to the sides (one higher and one lower and keep it low in the middle. Also, make sure to add the best looking pieces of foliage to the front of your arrangement.
*keep in mind is that one of the most basic and important things is to fully cover the foam inside the vase.
 Step 5: Next it’s time to start adding the flowers. The garden rose, dahlias and ranunculus are our focal flowers while the bits of hydrangea and wax flowers helped to add extra depth and fill in holes after the focal flowers were placed in the arrangement. When your base was built with the foliage, there should be a high point on one side and a low point on the other (half-moon shape) Place garden roses in accordance with this shape. In simple terms, insert a rose at the highest point, a rose at a low point, and then close to the lower point we insert another rose.
*To make an extra beautiful looking rose simply blow hard in the center to open it up or gently use your thumb and index finger to pull back a few of the petals.
Step 5: Place the dahlias in the gaps between roses, being mindful to not go too overboard with the flowers.
Step 6: add a few ranunculus and their long stems, hydrangea pieces and wax flowers to add a more garden inspired feel.
Step 7: Finally, adjust the details of our arrangement to complete!

d

d