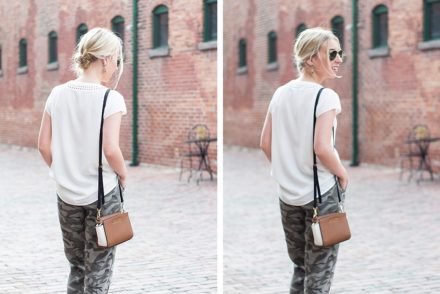
 Happy Monday, Friends! How was your weekend? We spend Sunday at my mom’s celebrating her birthday with take-out Chinese food and ice cream cake. We’d normally take my mama out for a nice day date and dinner, but of course, we can’t with the current restrictions. We still had such a lovely time enjoying our classic celebratory foods and each other’s company. I’m also pretty sure Edwin ate a bigger slice of ice cream cake than I did. Goodness, does that boy ever love sweets. Other than that we kept this weekend pretty low-key with my sister staying over so we would have our traditional viewing of The Holiday and make Christmas Fettucini.
Anyway! Enough about my weekend. I’m super excited to share today’s blog post all about how to make your own DIY hot cocoa bar at home. After sharing our baby shower last week, I realized that I’d taken so many photos of this hot cocoa bar that it deserved its own post. I know there is a lot of hot cocoa bar inspiration out there, but I was so happy with how this turned out and thought to myself, “what’s a little more hot cocoa inspiration going to hurt?” The answer my friends, is none!
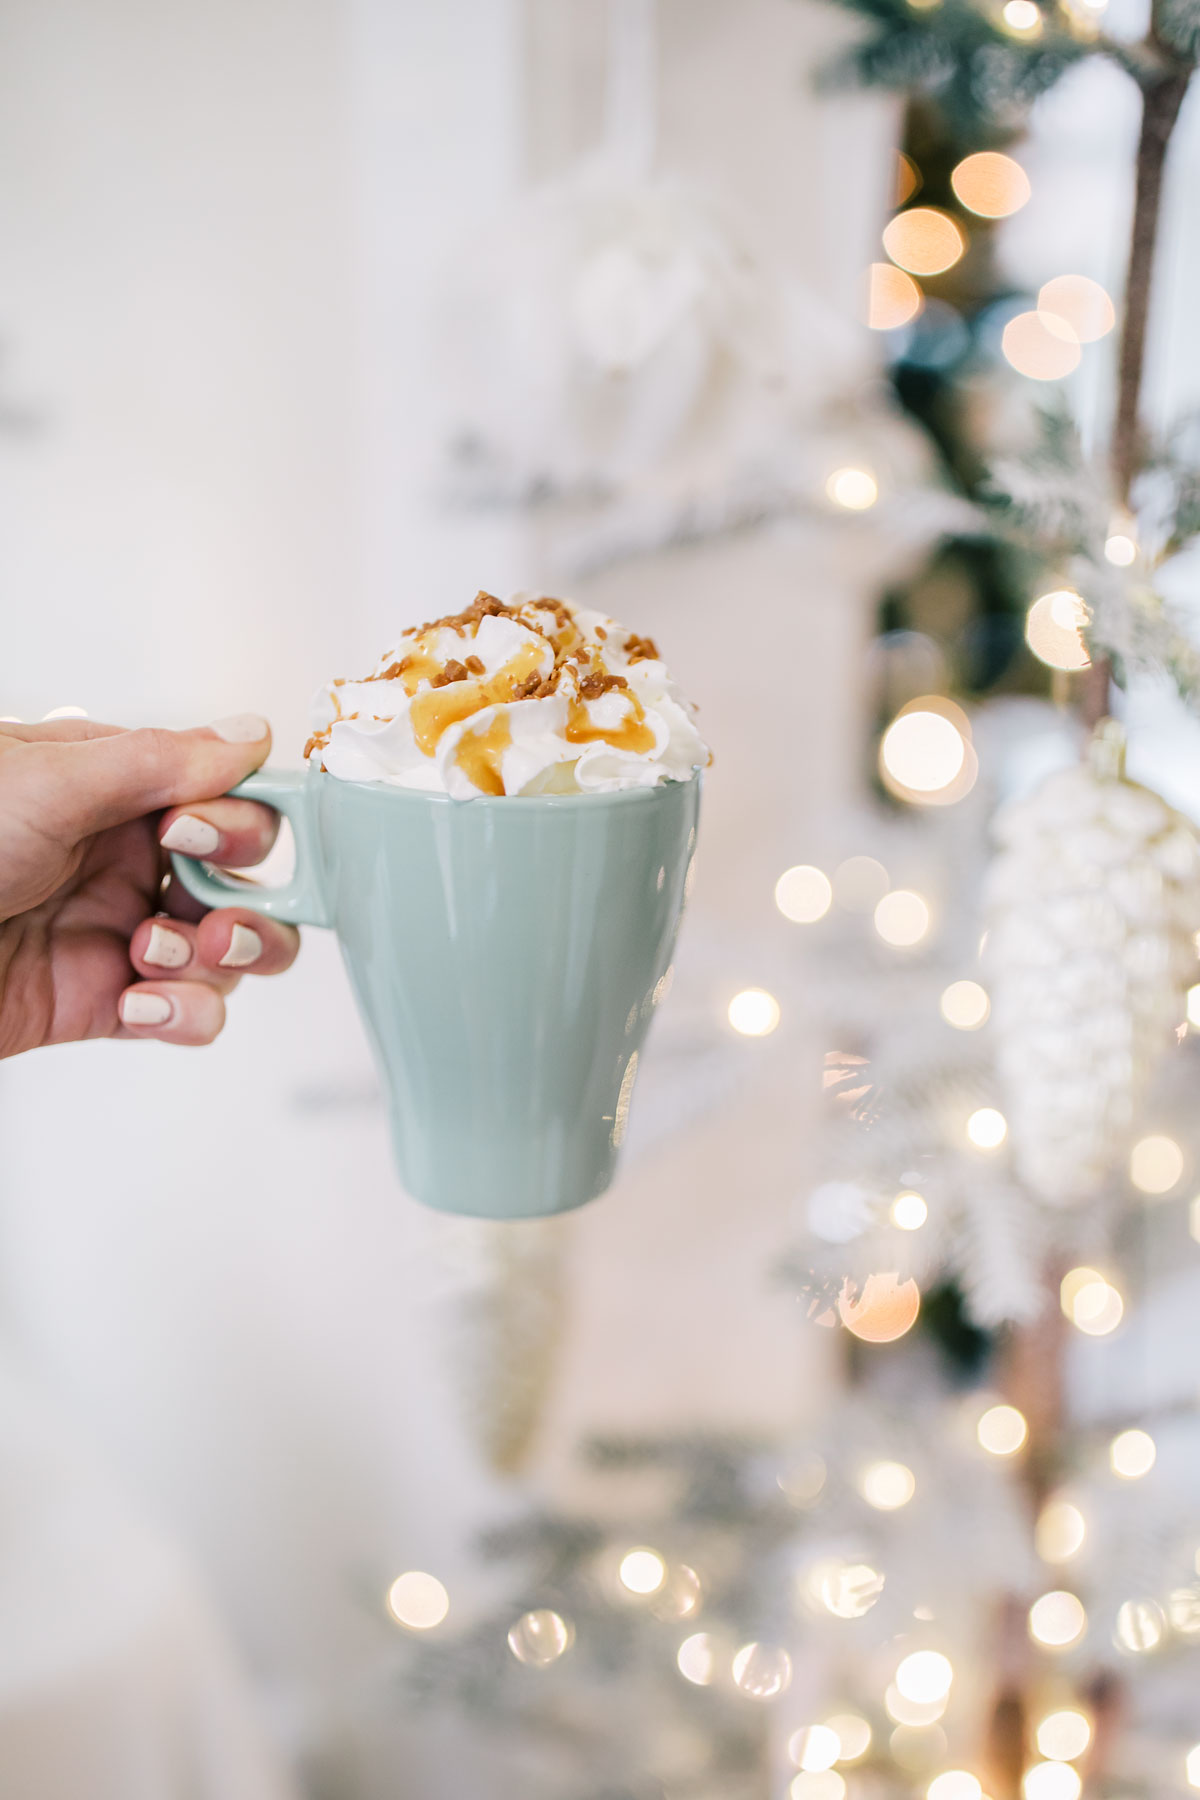
I love this hot cocoa bar so much in fact, that I am keeping it up for the entire holiday (and most-likely winter) season as it brings me joy every time I look over at it. Plus, is there anything more fun than coming in from a day of playing outside in the snow and warming up with a hot chocolate coupled with all of the fixings? I know Edwin and I have both thoroughly been enjoying this little treat station although I’m pretty sure he’s eaten his weight in mini marshmallows at this point.
Keep reading to see how I put this hot cocoa bar together and hopefully, you’ll find some inspiration for yourself!
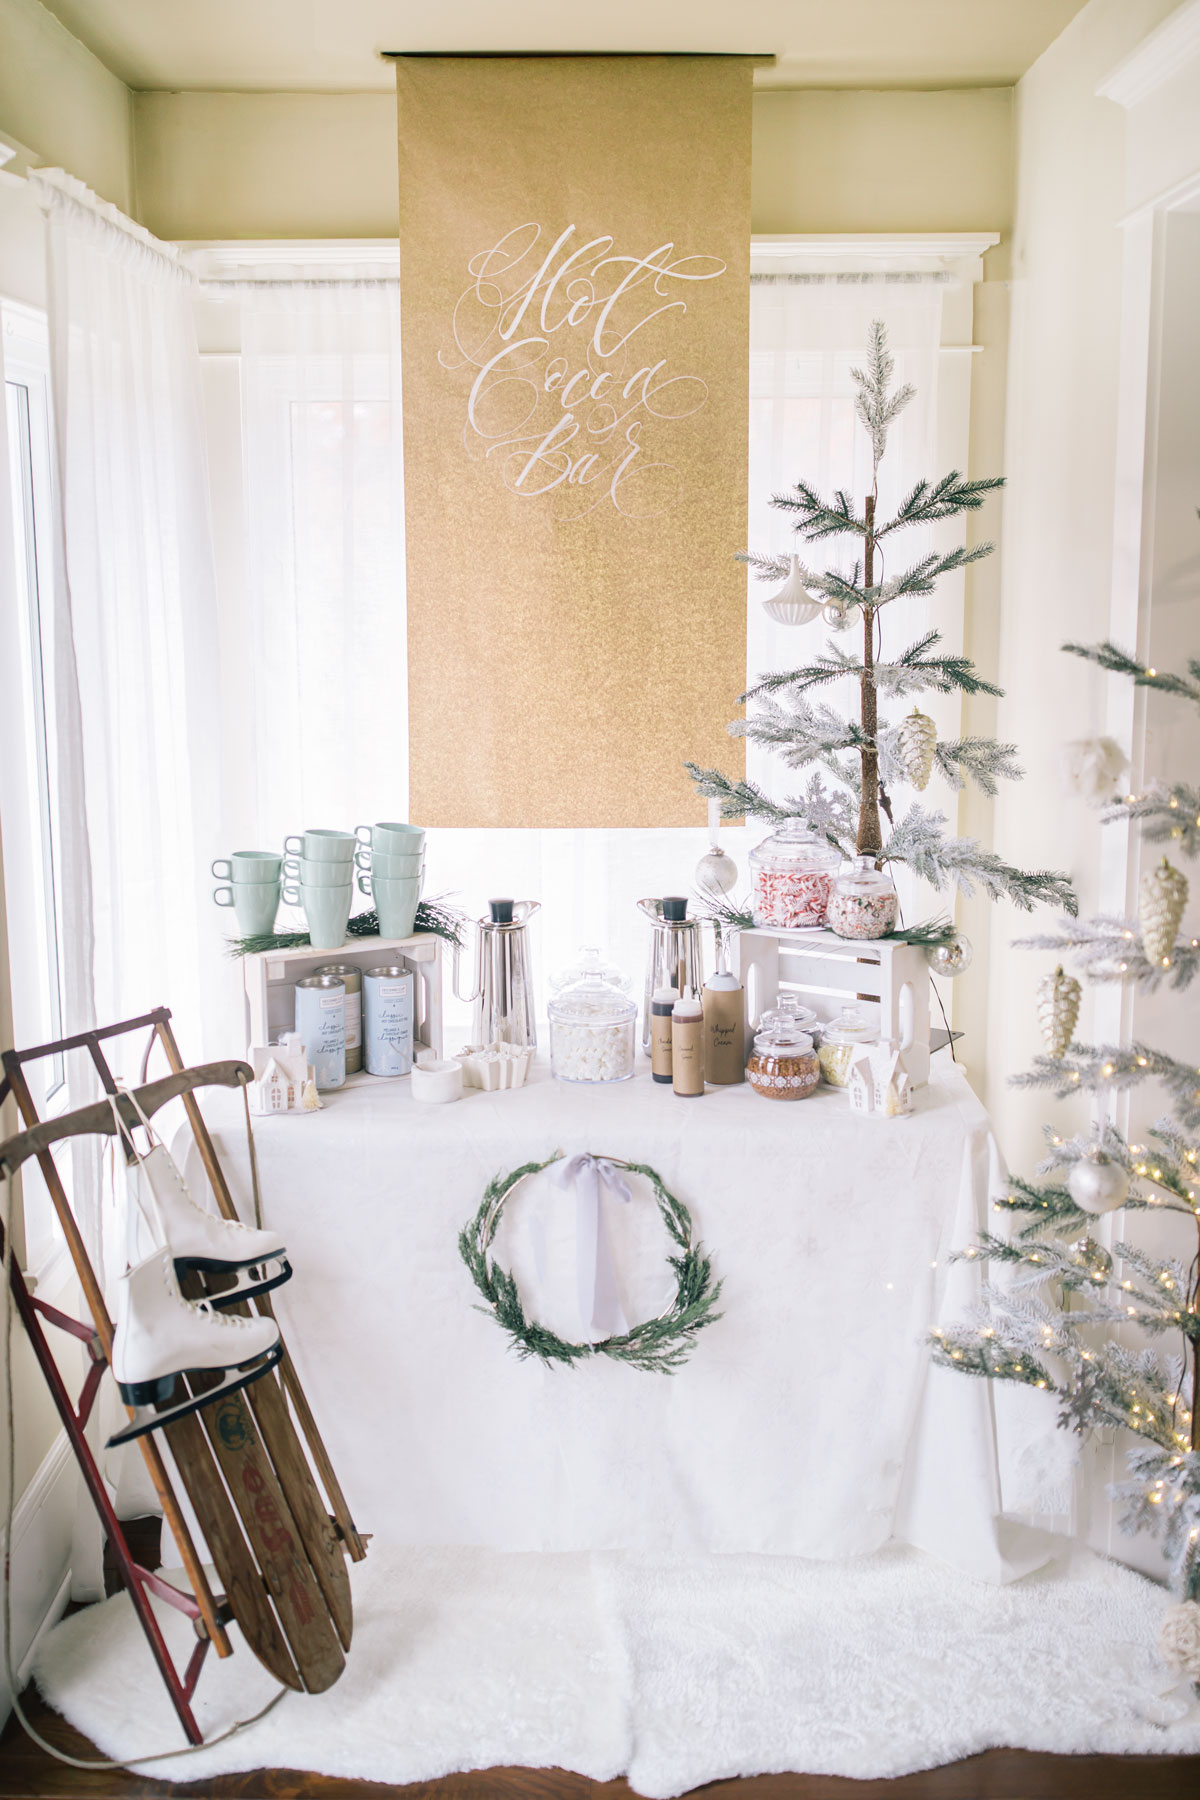
 First things first, the table. If you’re making a rather large hot cocoa bar like I did then you’ll want to use a good sized table. Really, any table will do and we simply used a plastic foldable table that I usually use to shoot blog content on. To make it a whole lot prettier, I added a white table cloth with subtle snowflakes embroidered on it. I also think an old wooden table, bar cart, or even setting a hot cocoa bar up on your kitchen island would work perfectly!
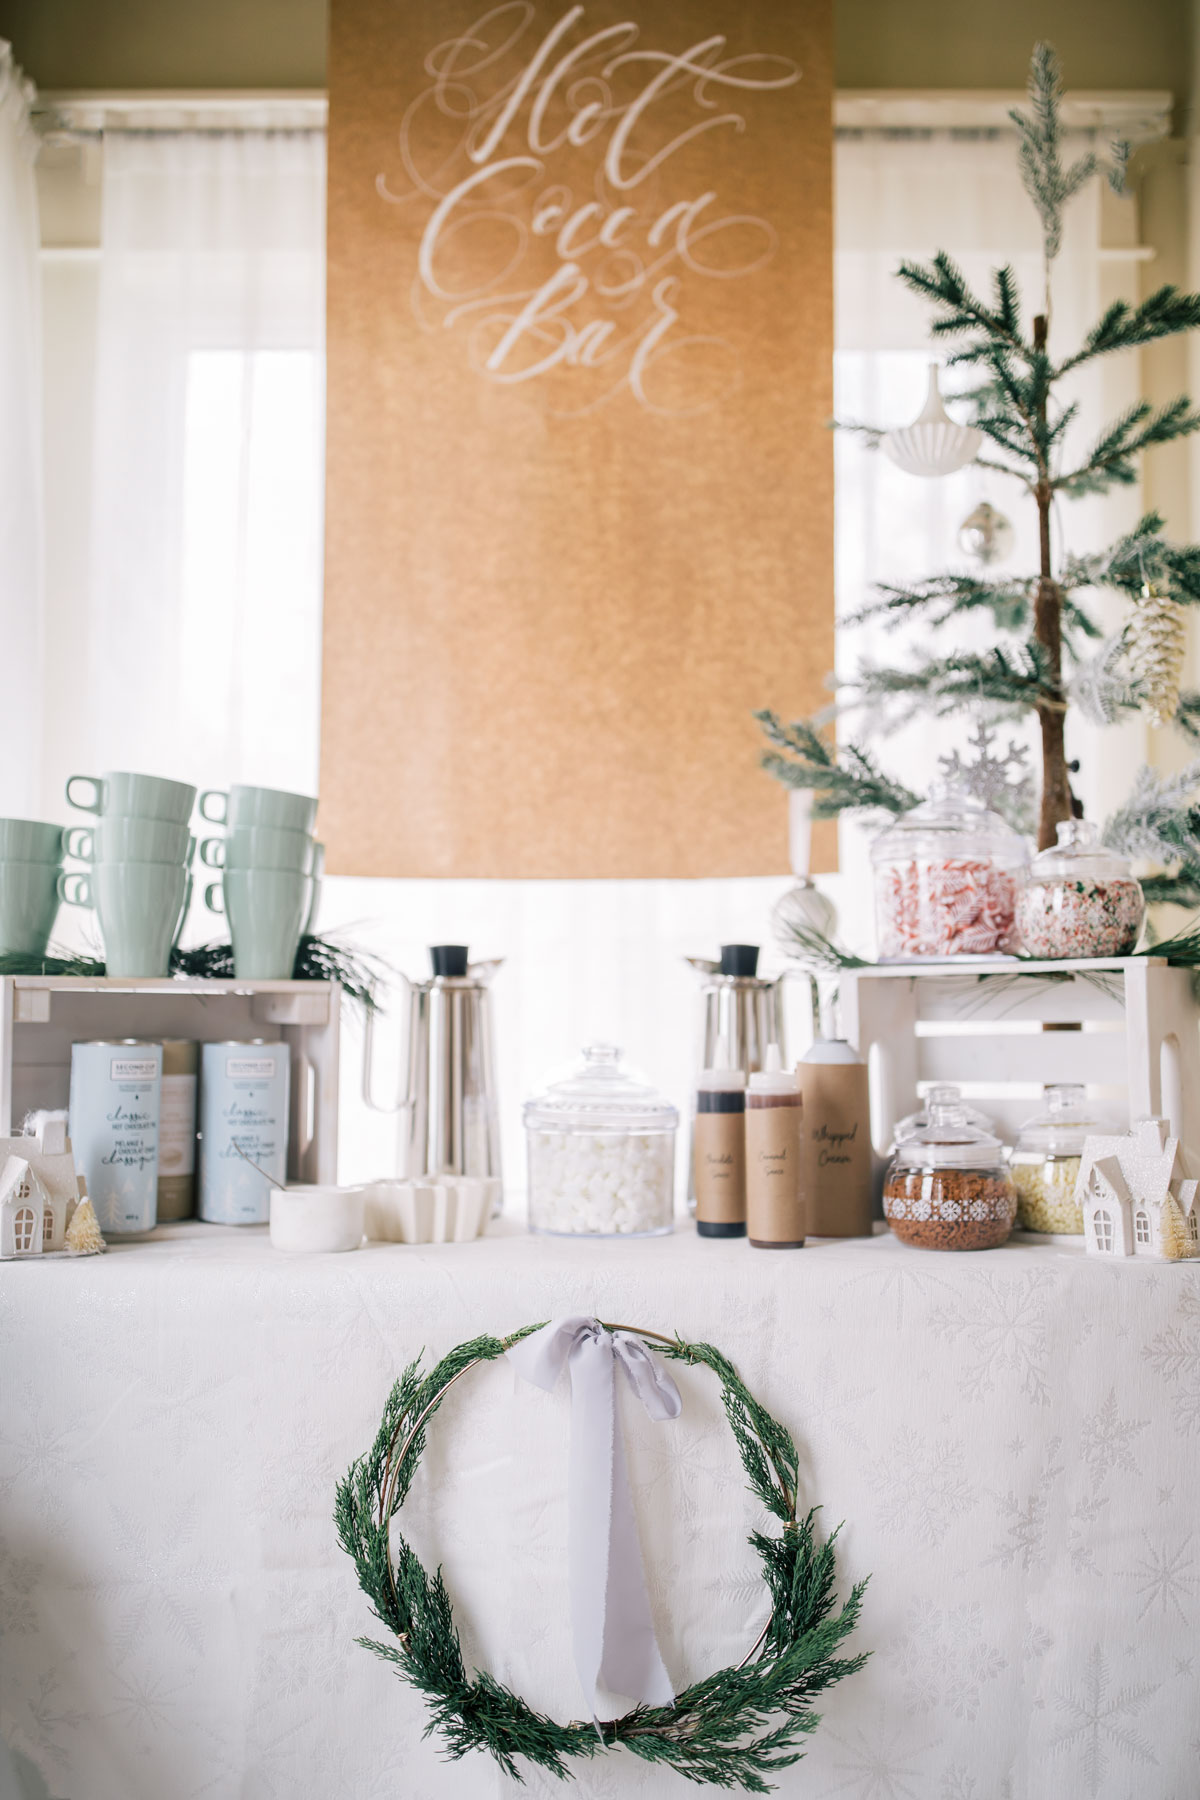
 After the table was set up I knew I needed to add some height to it for interest and dimension. I used 2 white wooden crates on each side of the table to achieve this. Before setting anything else up, I also added a simple homemade wreathe using a gold hoop and winter greenery. I added some green pine to the top of the crates then a small faux tree for some added height (this was Jamies Idea and I think it looked great!).
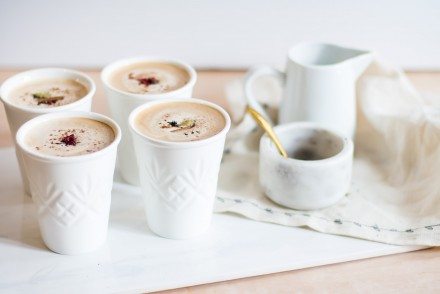
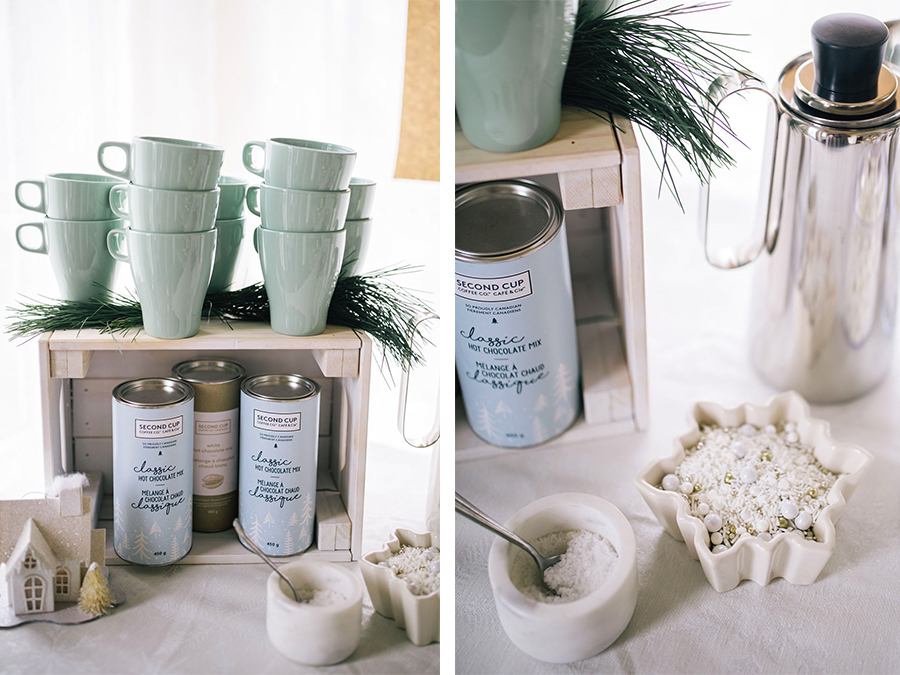
On top of the crates, I placed matching mugs that I found at Ikea for .99 each (what a score). Inside the crates on one side I put the hot cocoa mix (we used Secon Cups hot chocolate mix in white and milk chocolate because 1. I had a gift card and 2. The colour of their packaging matched out theme). You can use any type of hot chocolate or make your own hot cocoa whenever you are feeling like it (it’s always better homemade in my opinion!). I also bought 2 kettles but these aren’t necessary unless you’re having a hot cocoa bar for a party and are needing to keep the mix nice and hot.
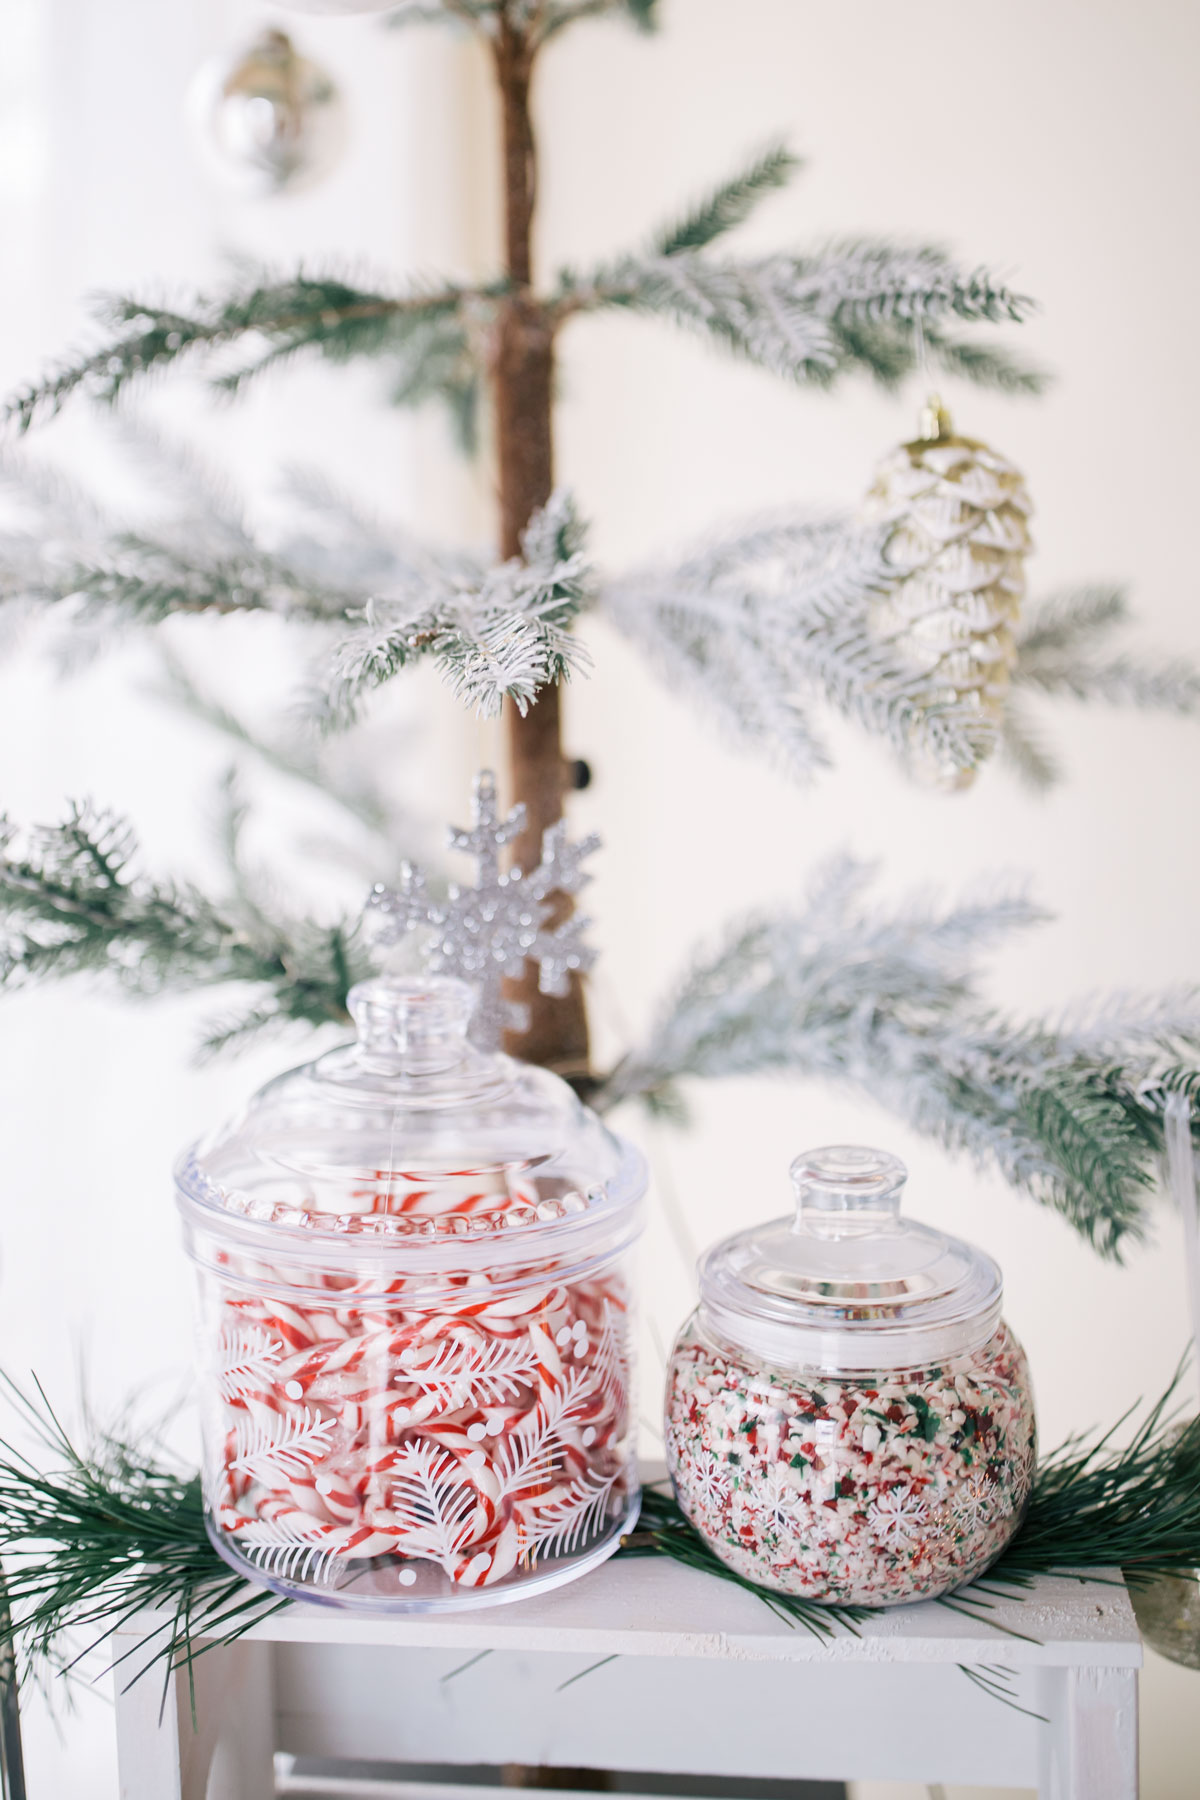
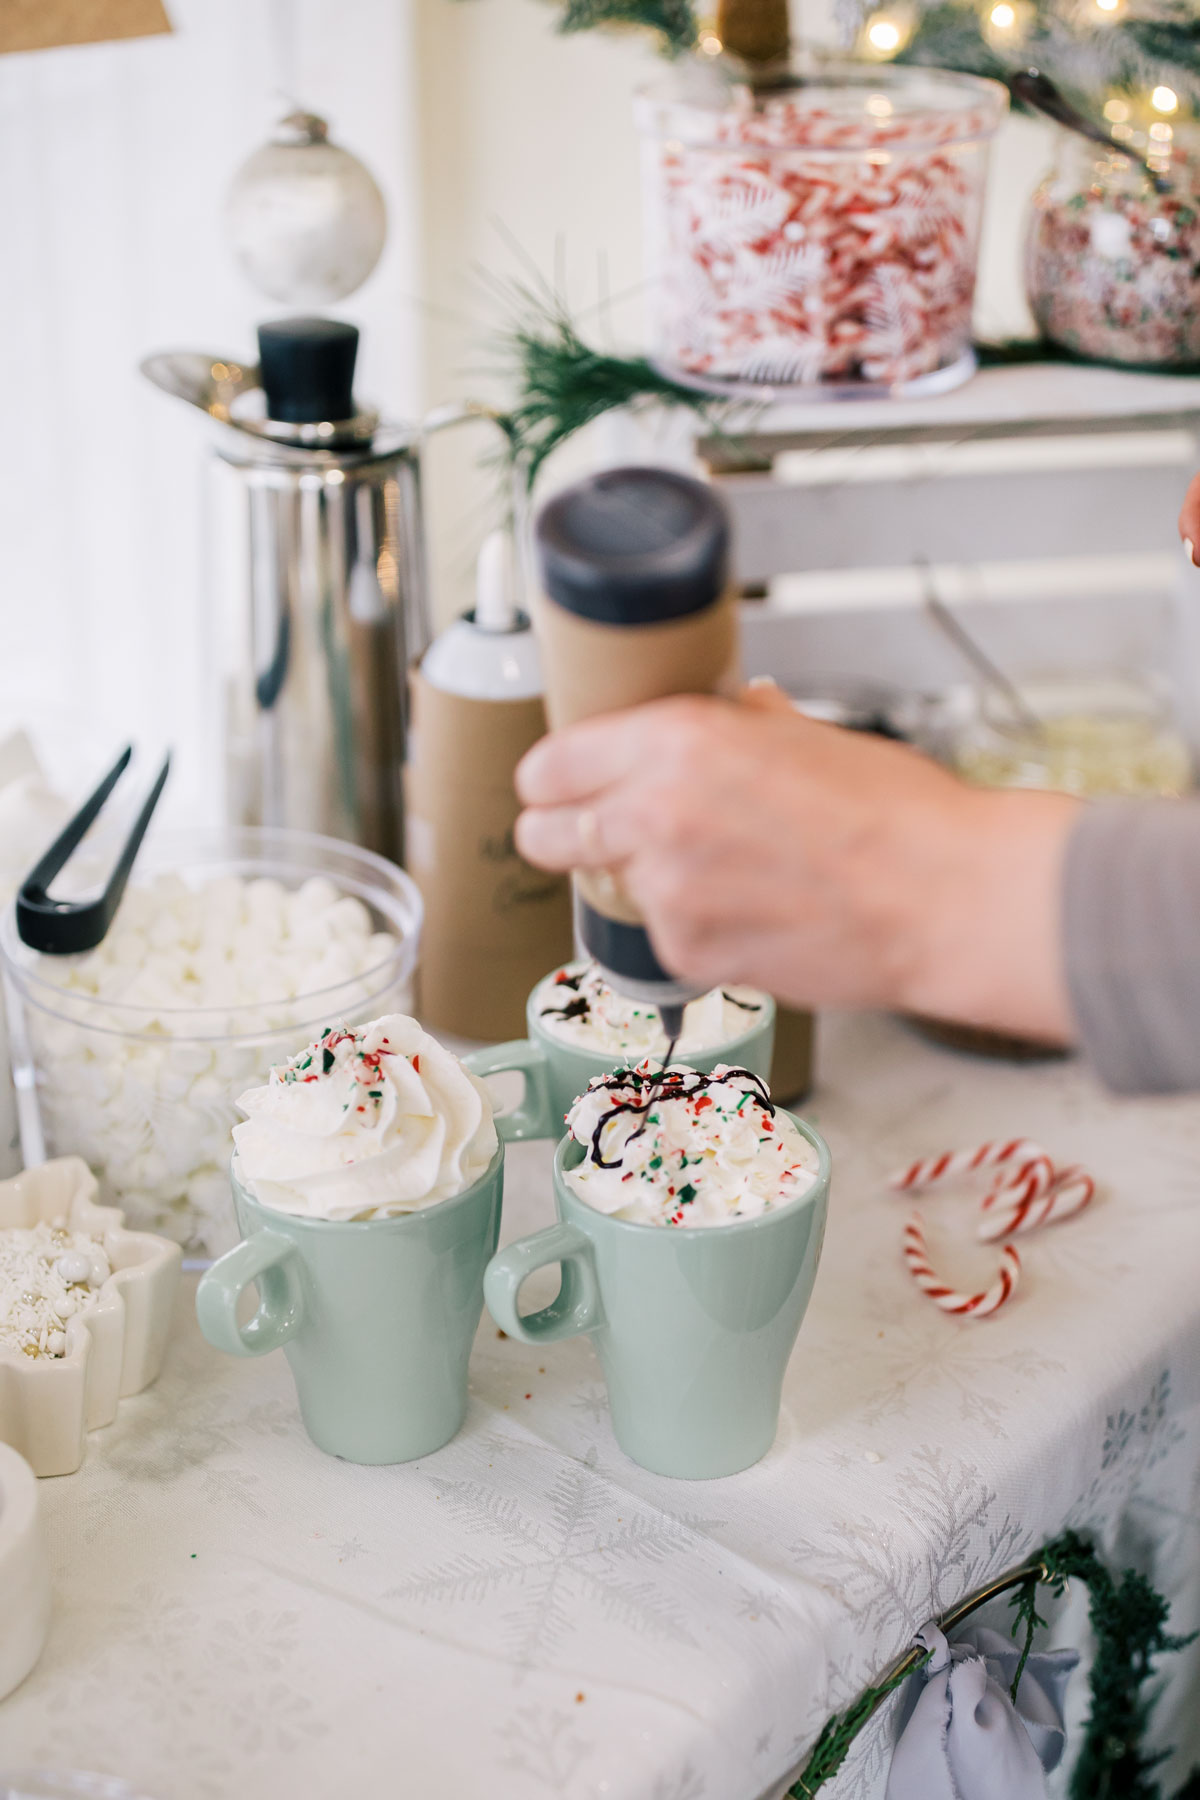
 To hold the hot cocoa toppings, I found plastic containers in two sizes with the sweetest holly and snowflake prints from The Superstore. They were $2 and $4 each. For toppings, we did big and little marshmallows, candy cane bits and small candy canes, toffee bits, chocolate curls, and mini white chocolate chips. There was also fleur de sel and fancy sprinkles (everything was found at Bulk Barn).
 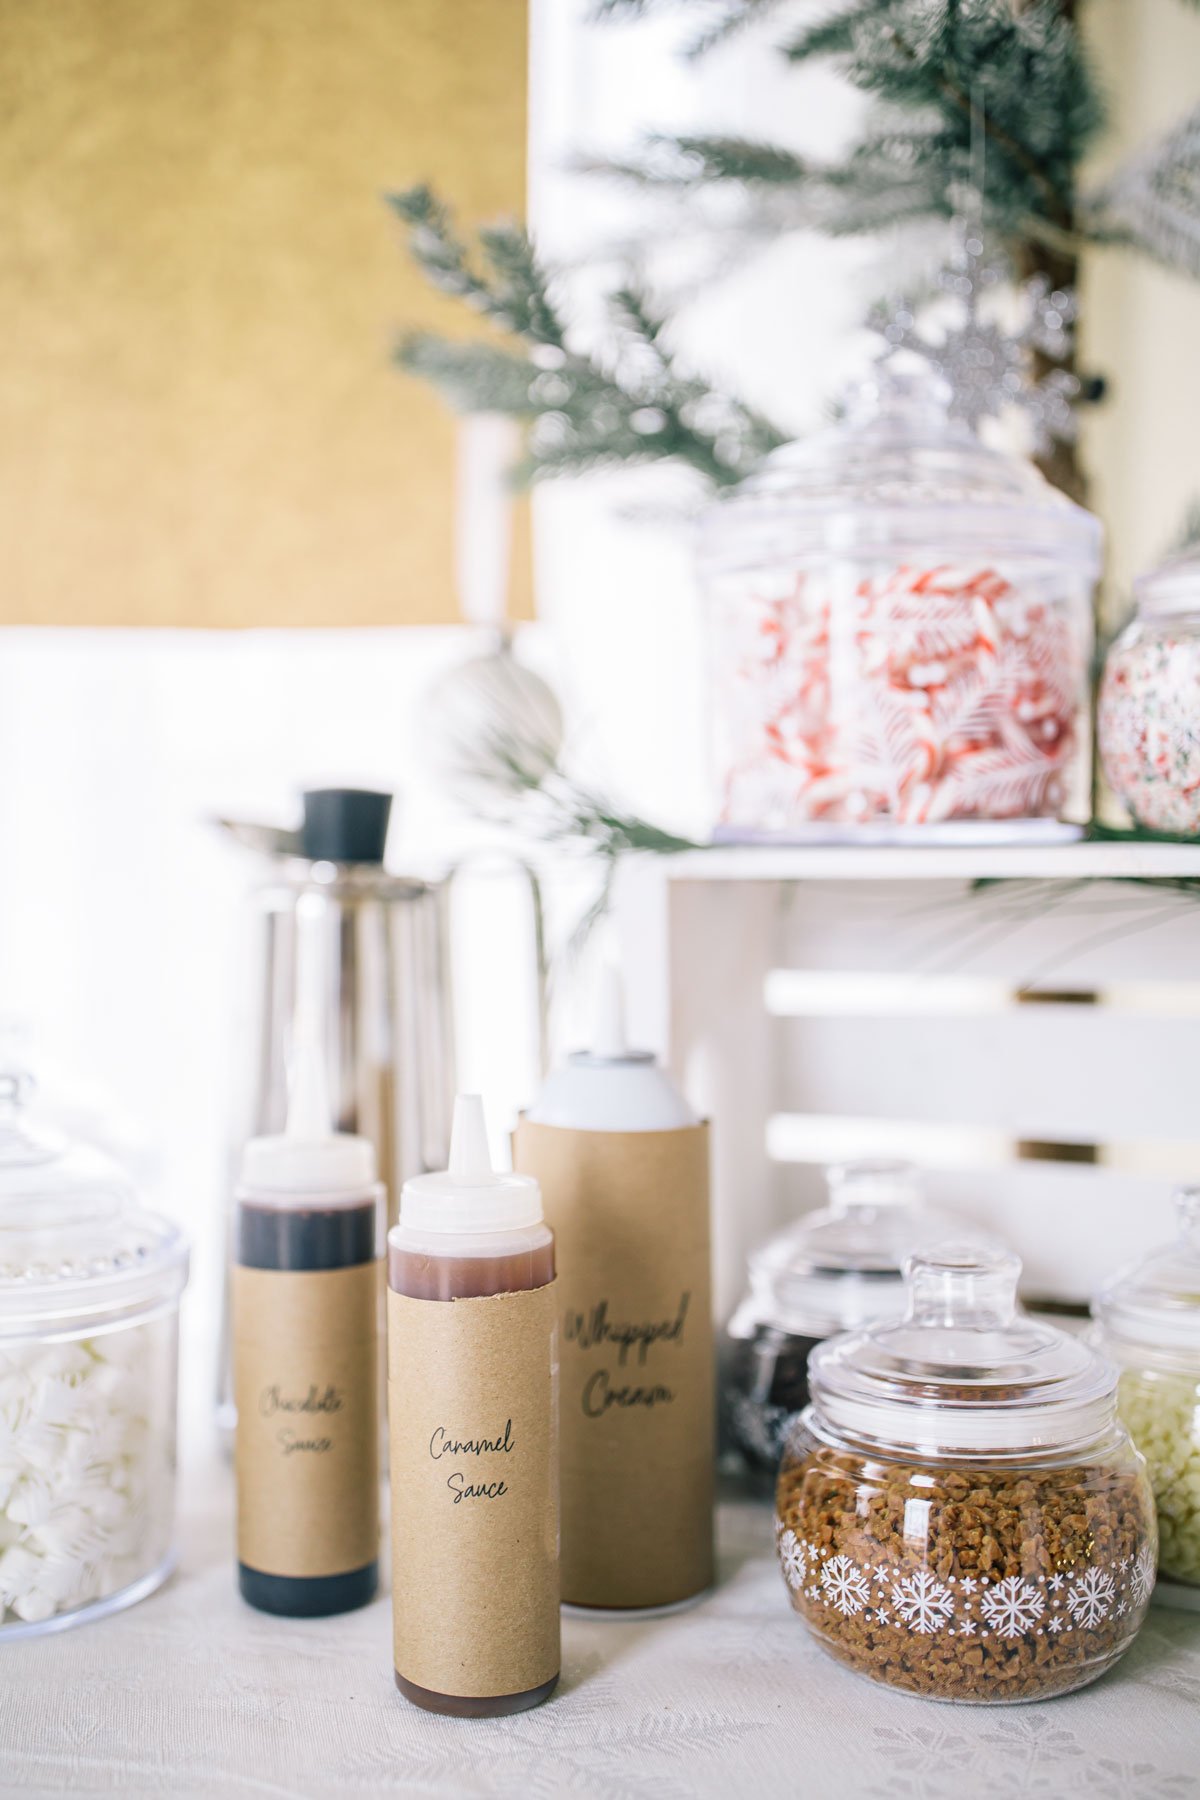 Additional toppings included chocolate and caramel sauce and whipped cream. To make the sauces and whipped cream look a little more elevated, I transferred the sauces into plastic squeeze bottles that I wrapped in craft paper. I left the whipped cream in its can but did still wrapped it in craft paper. I printed the coordinating topping names on additional craft paper and taped it on the bottles, but you have good penmanship you can totally write it on yourself too!
 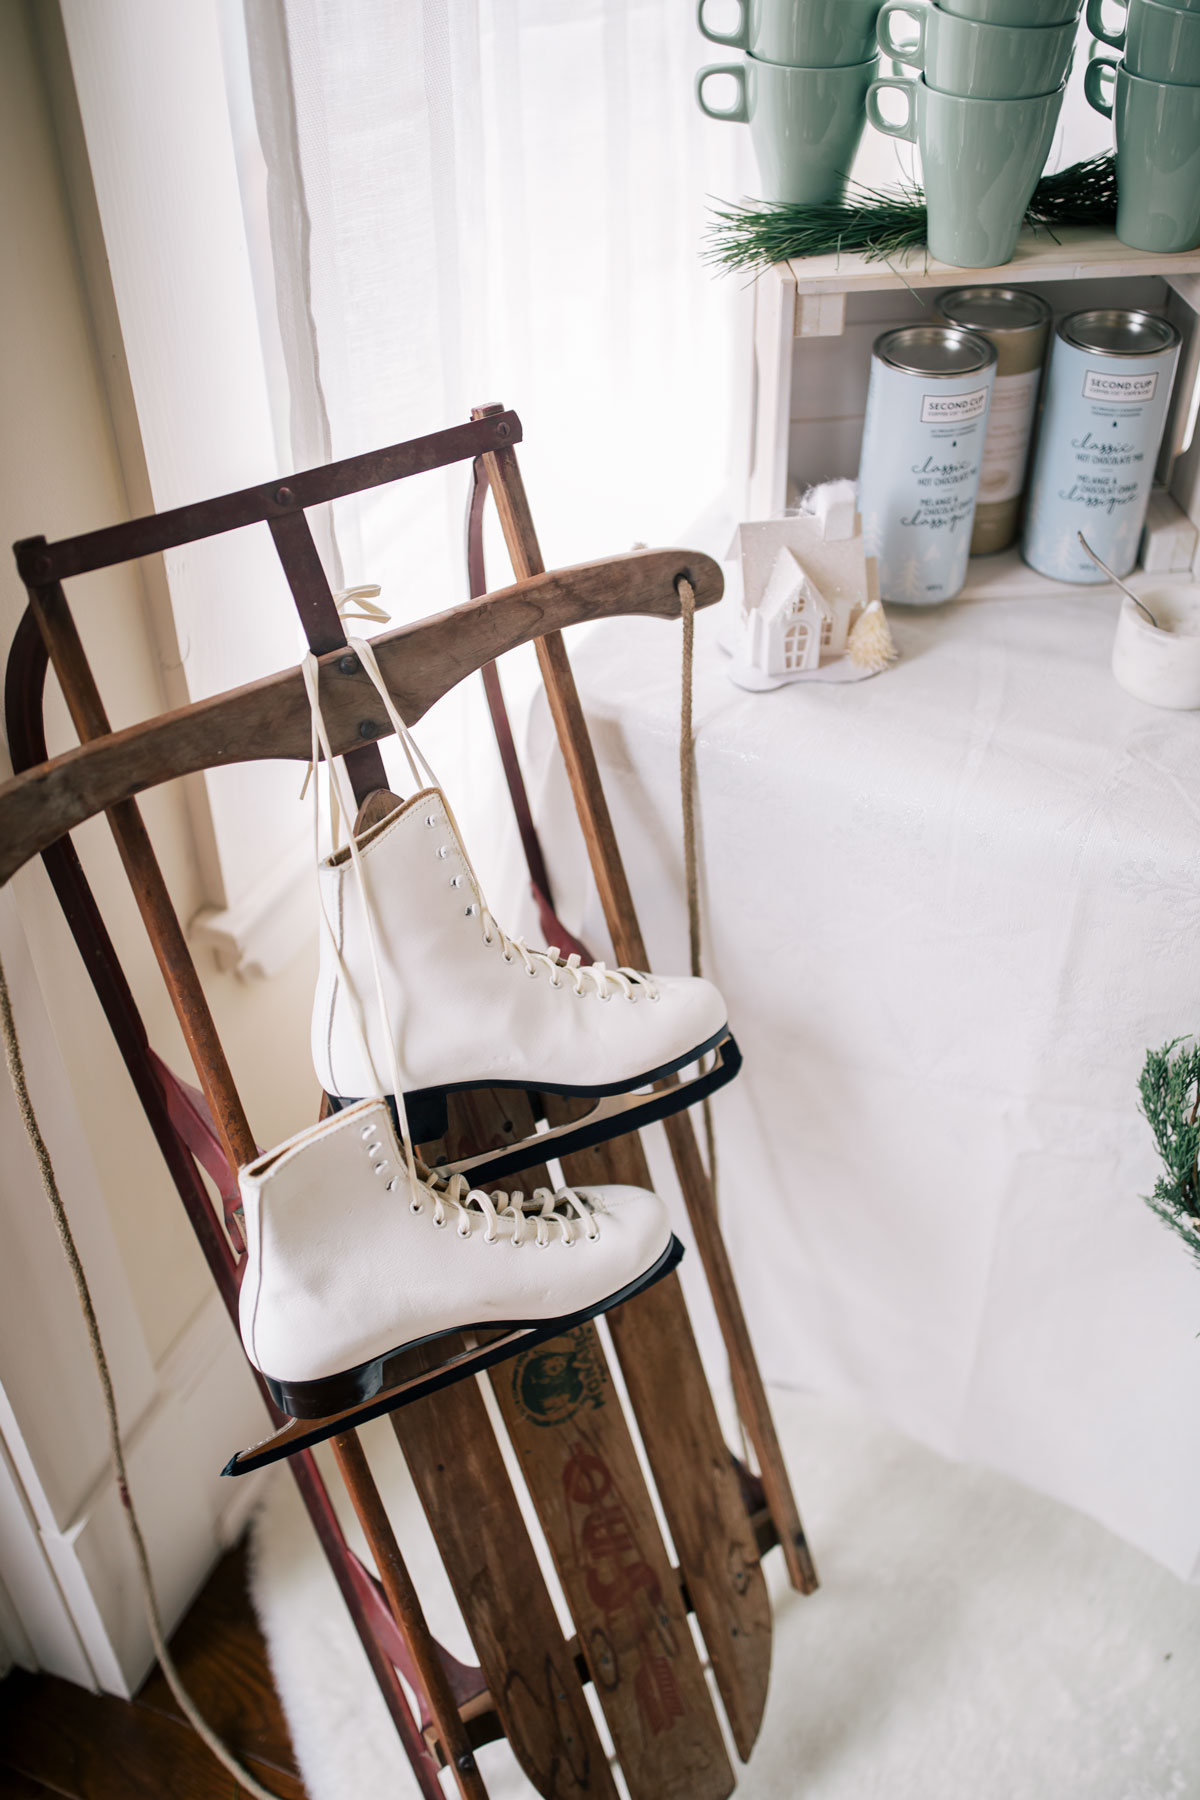 The final touches included jazzing up the hot cocoa bar with two wintery houses on either side, leaning a vintage sled with skates on one side of the floor against the bar, and a larger faux tree on the other. I also laid a couple of faux sheepskin rugs on the floor to add some extra cozy vibes. I think one of my favoruite parts of the hot cocoa bar was the custom “hot cocoa bar” sign I had made by the lovely Lisa from Scribble and Script. It was written on craft paper and we secured it to the ceiling with painter’s tape. I think it truly added the most special/magical element! I also love that I can roll this up at the end of the season and use it for years to come.
 Hot cocoa barista over here!
 & There you have it! How to make a beautiful yet inexpensive hot cocoa bar at home that you can enjoy all winter long!