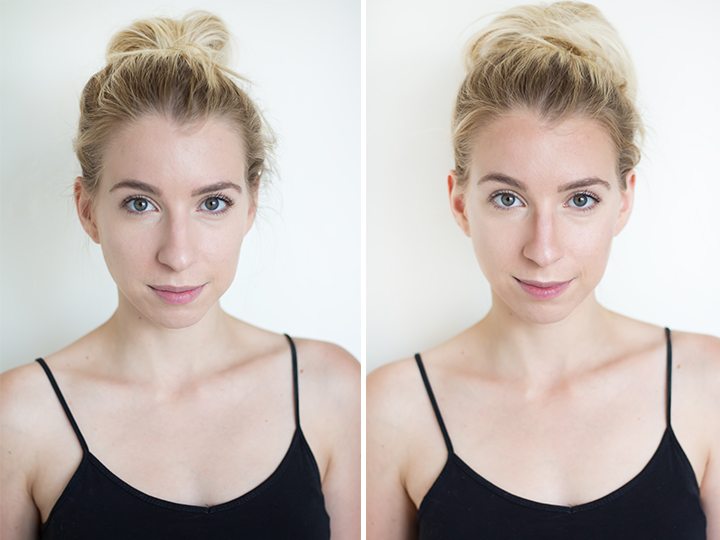
For the longest time my makeup routine has been one of the simplest daily rituals that I have. It usually consists of a bit of BB cream, concealer, blush and mascara, adding more makeup depending on the occasion. I love natural and dewy looking makeup and skin but I always connected contouring with that of looking fake or too done up so I’d never really took the time to learn. Recently I have come to realize that if done correctly contouring and highlighting is a great way to elevate my natural features while still looking like myself. I got some great tips from one of my girlfriends at work the other day and have watched about 50 YouTube videos on the subject. With a little bit of practice I think that I’ve found exactly what works for me.
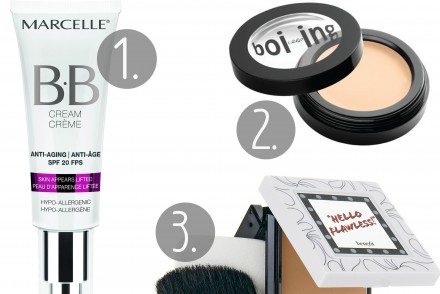
Step 1: Before I begin to contour my face I apply foundation and concealer to even out my skin tone. For this particular look I used Makeup Forever Ultra HD Foundation and Benefit’s Boi-ing Concealer and blender with the Beauty Blender.
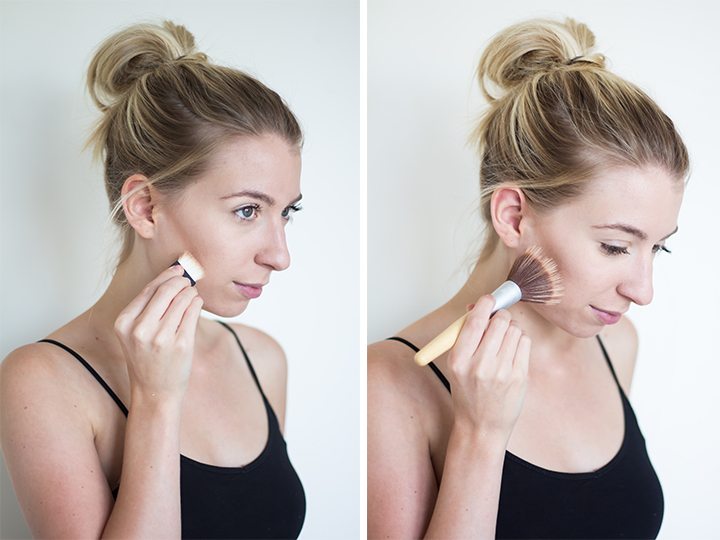
Step 2: Using a brush similar to this one (mine came with my bronzer) I began by using a small amount of Benefit Hoola bronzer and made a faint line from the top of my ear all the way down underneath my cheekbone. I used the same brush to swipe in a back and forth motion until I felt that my cheek bones looked well sculpted and defined. After I was happy with the bronzer I used a big fluffy brush to blend the bronzer out so that the lines were no longer visible and the bronzer looked natural.
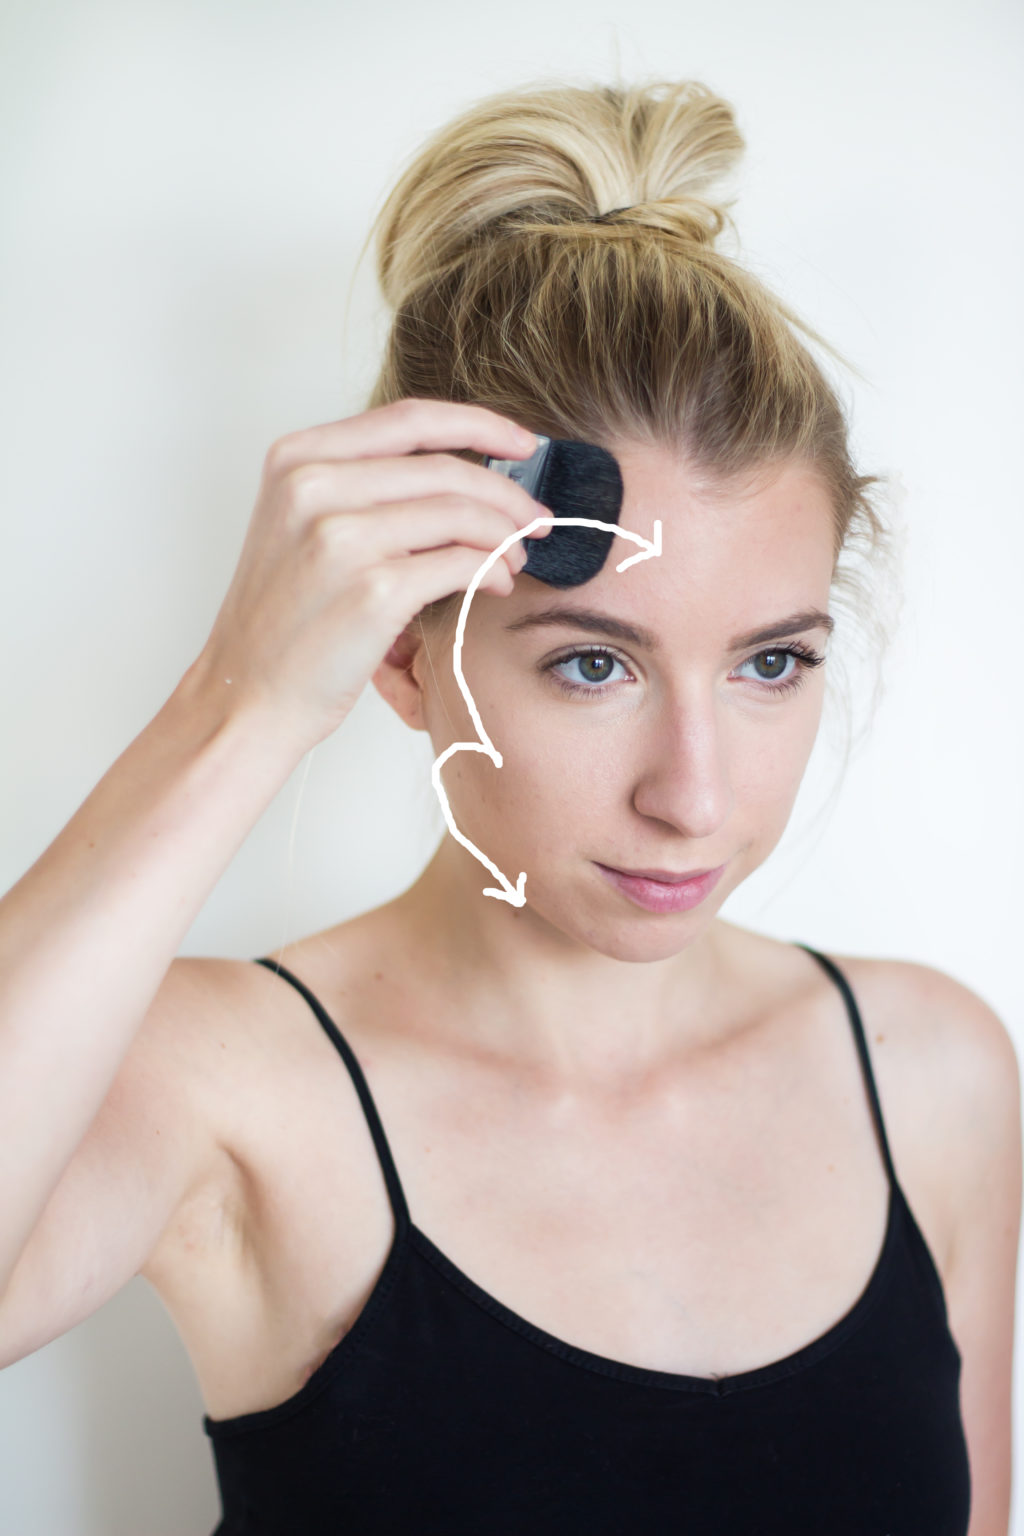
Step 3: Using a larger brush (I had it on hand from this powder) I mapped out a 3 shape from the top of my hairline, to my cheekbones and down to my jaw line. I did this a few times over on each side and then blended out again with a fluffy brush.
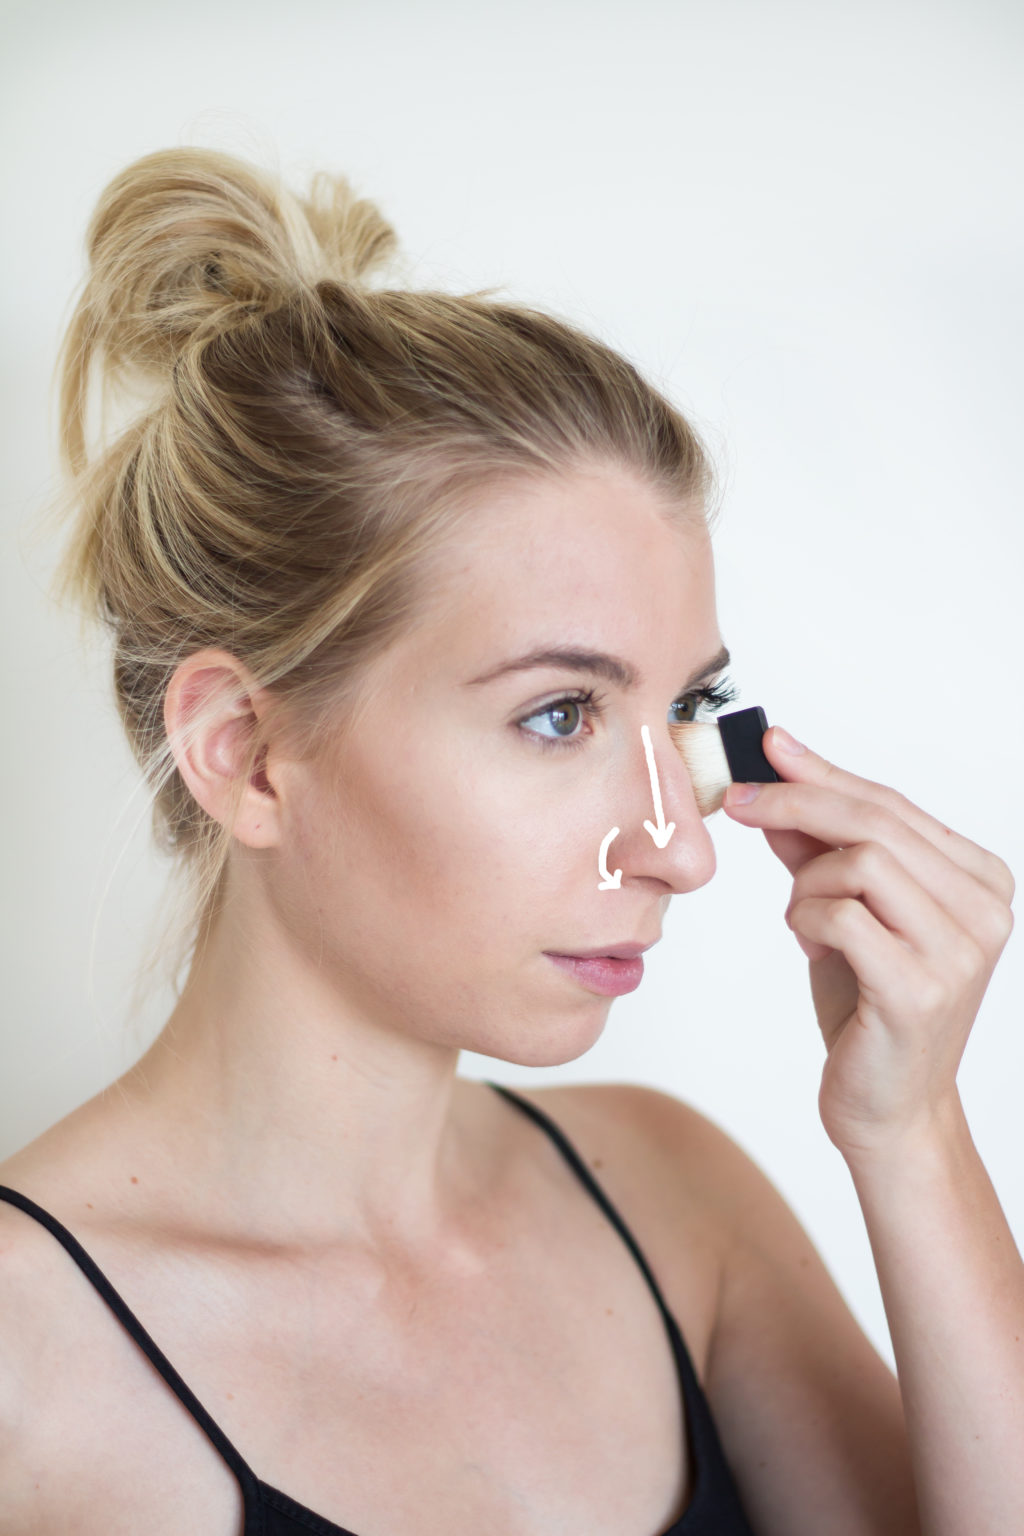
Step 4: This is an optional step if you are looking to give your nose a bit of a slimmed down appearance. Using a very thin brush I made two faint lines on both sides of my nose and also brushed some bronzer around my nostril area. I then used the same fluffy brush and blended out very well.
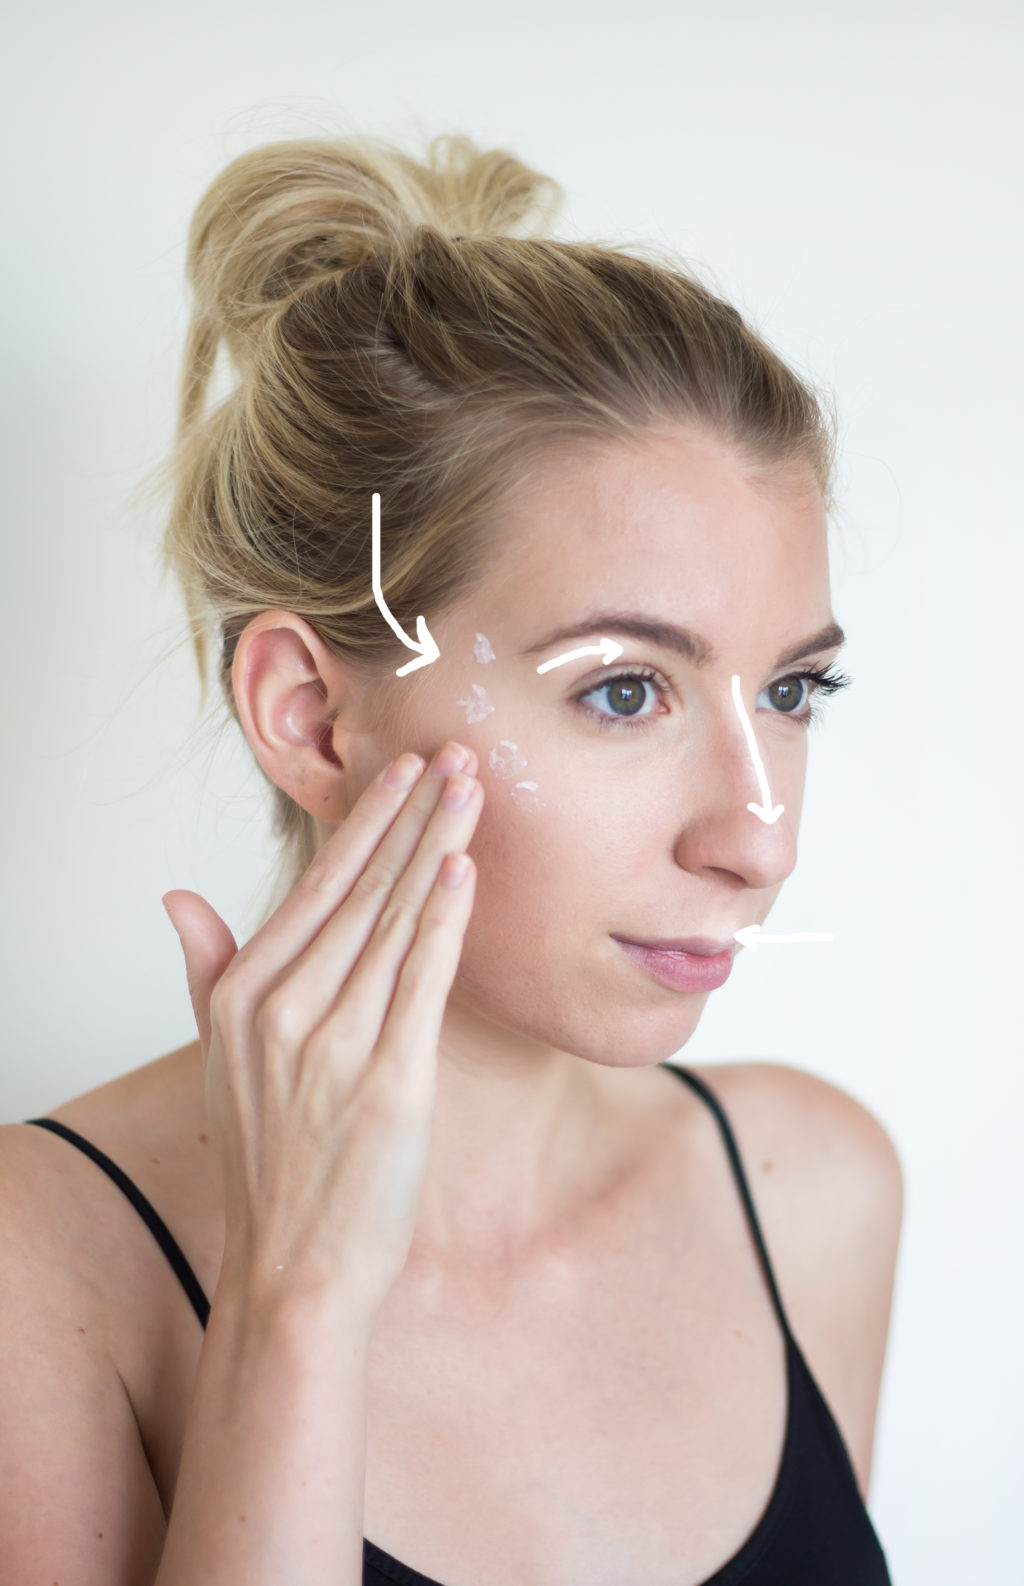
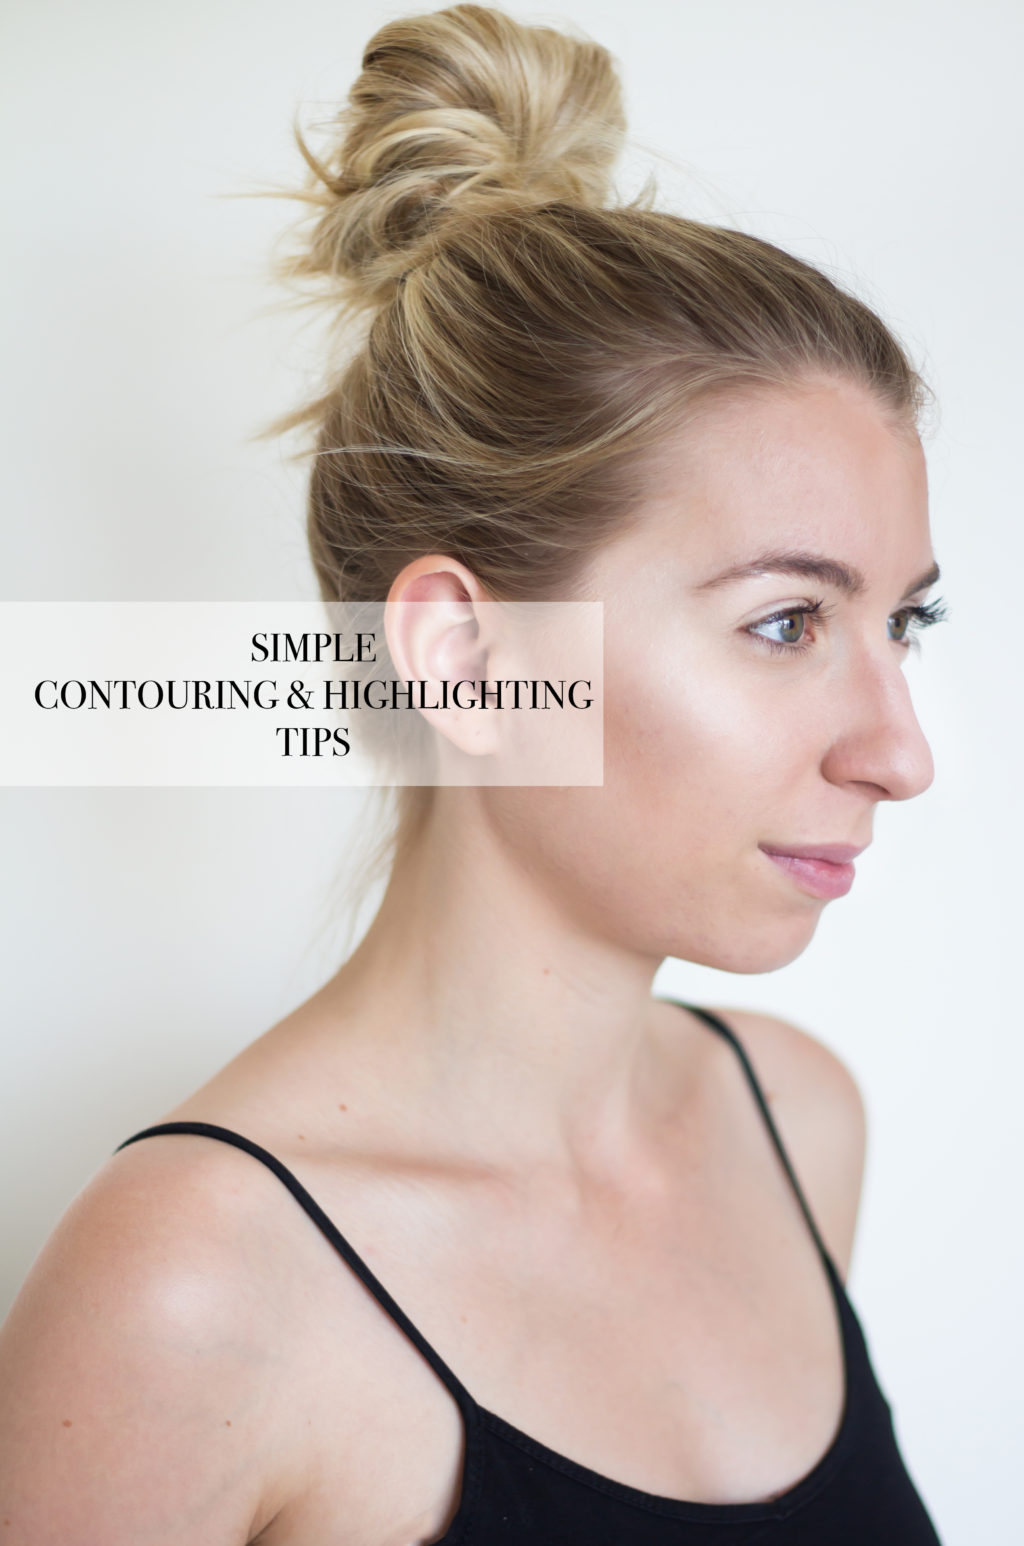
Step 5: I highlighted my face in 4 major areas:
1. Above my cheekbones and up to my temples, just above where the bronzer was brushed.
2. On my brow bone
3. A very small amount down the bridge of my nose
4. A small amount on my cupid’s bow