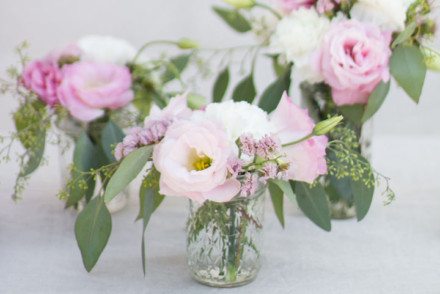
 Playing with flowers has become one of my greatest loves over the last couple of years. I now consider floral arranging to be among one of my favourite hobbies, and when I’m stressed out or want to simply relax, I find myself heading to our local shops to buy flowers to make arrangements at home.
Because I’m not a certified florist, I’m unable to buy my flowers at a wholesaler which is unfortunate, BUT if you live in Toronto like I do, the best place to buy flowers at an affordable price and in small(ish) quantities are at the flower shops on Avenue and Davenport. Full disclosure, If I buy a few bundles of different flowers as I did here it runs me around $50. However, I was able to make around 3 full arrangements that I could disperse around our home or gift to friends. So really, it only costs around $17 for one of this specific arrangement.
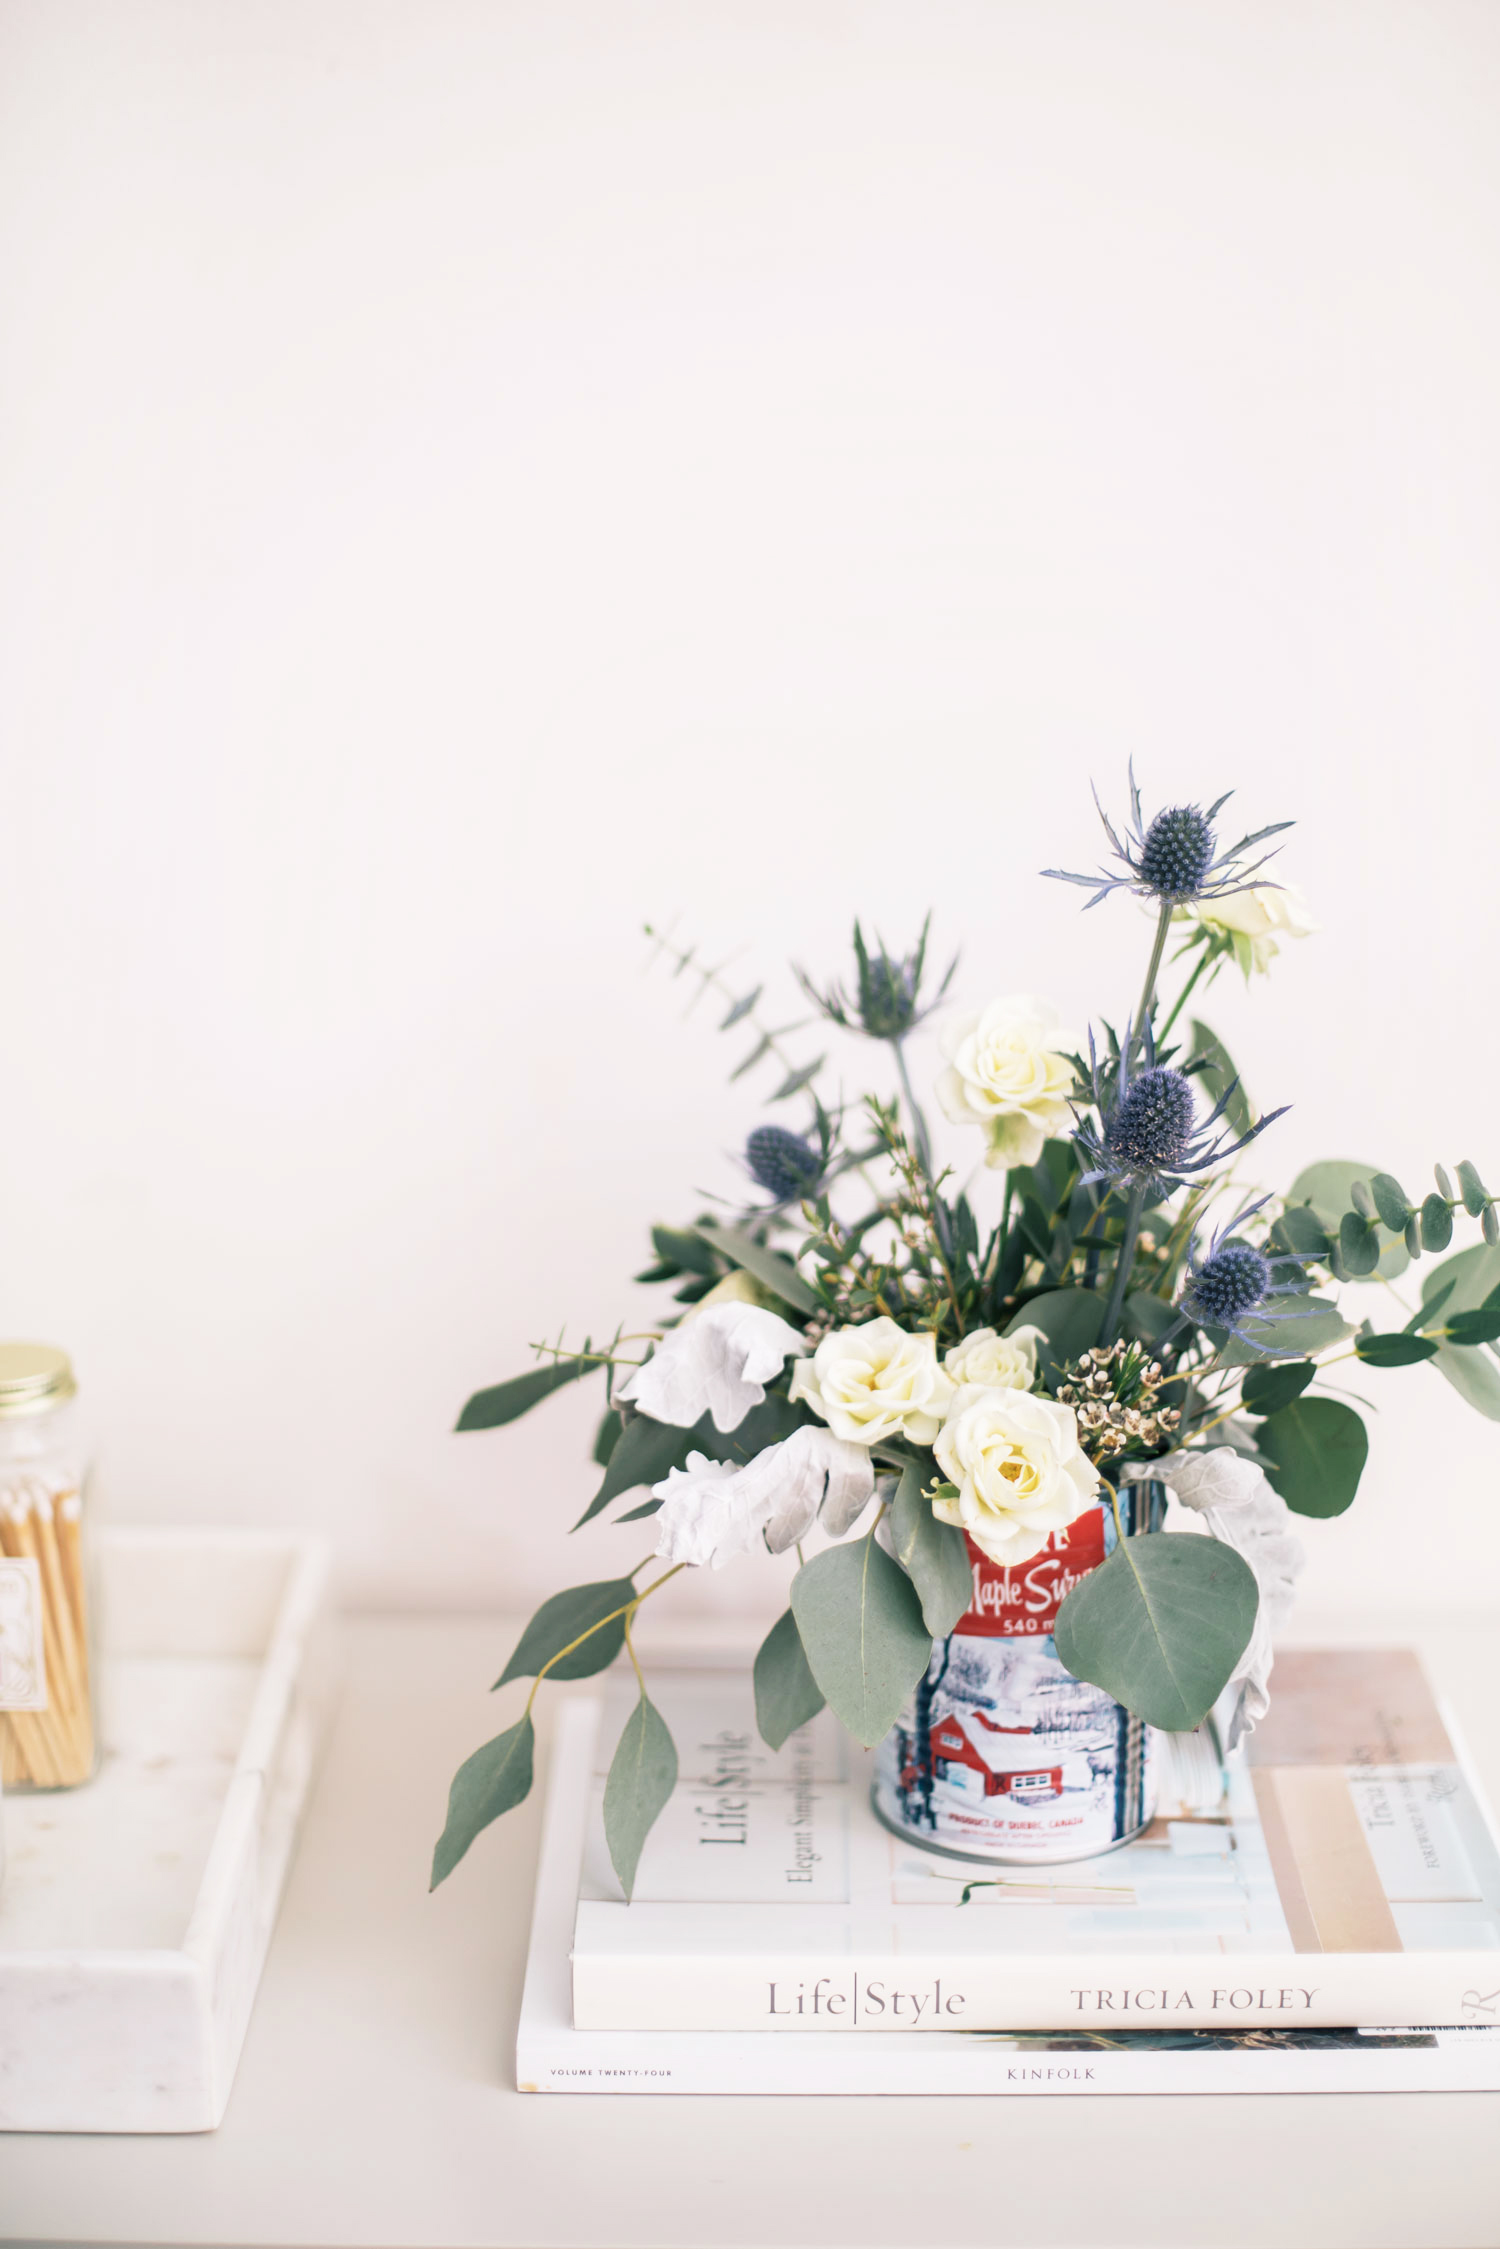
I’d been wanting to make a winter-inspired flower arrangement since arriving back in Halifax. It’s been so cold and dreary in Toronto and I was feeling like our home needed some life brought back into it. My sister was actually the one who suggested using this maple syrup tin as a vase and I loved the idea. You can really use whatever vase you like but I love that this tin offers a wintery but not Christmasy feel. This arrangement, though it may look complicated was actually very simple to put together and I was so proud with how it turned out that I wanted to share a little tutorial today so that you too can add a little freshness into your home this winter.
PS: If you like this tin, you can buy the maple syrup at your local grocers or buy one of these maple syrup candles (that smell AMAZING) and repurpose it as a vase once it’s used.
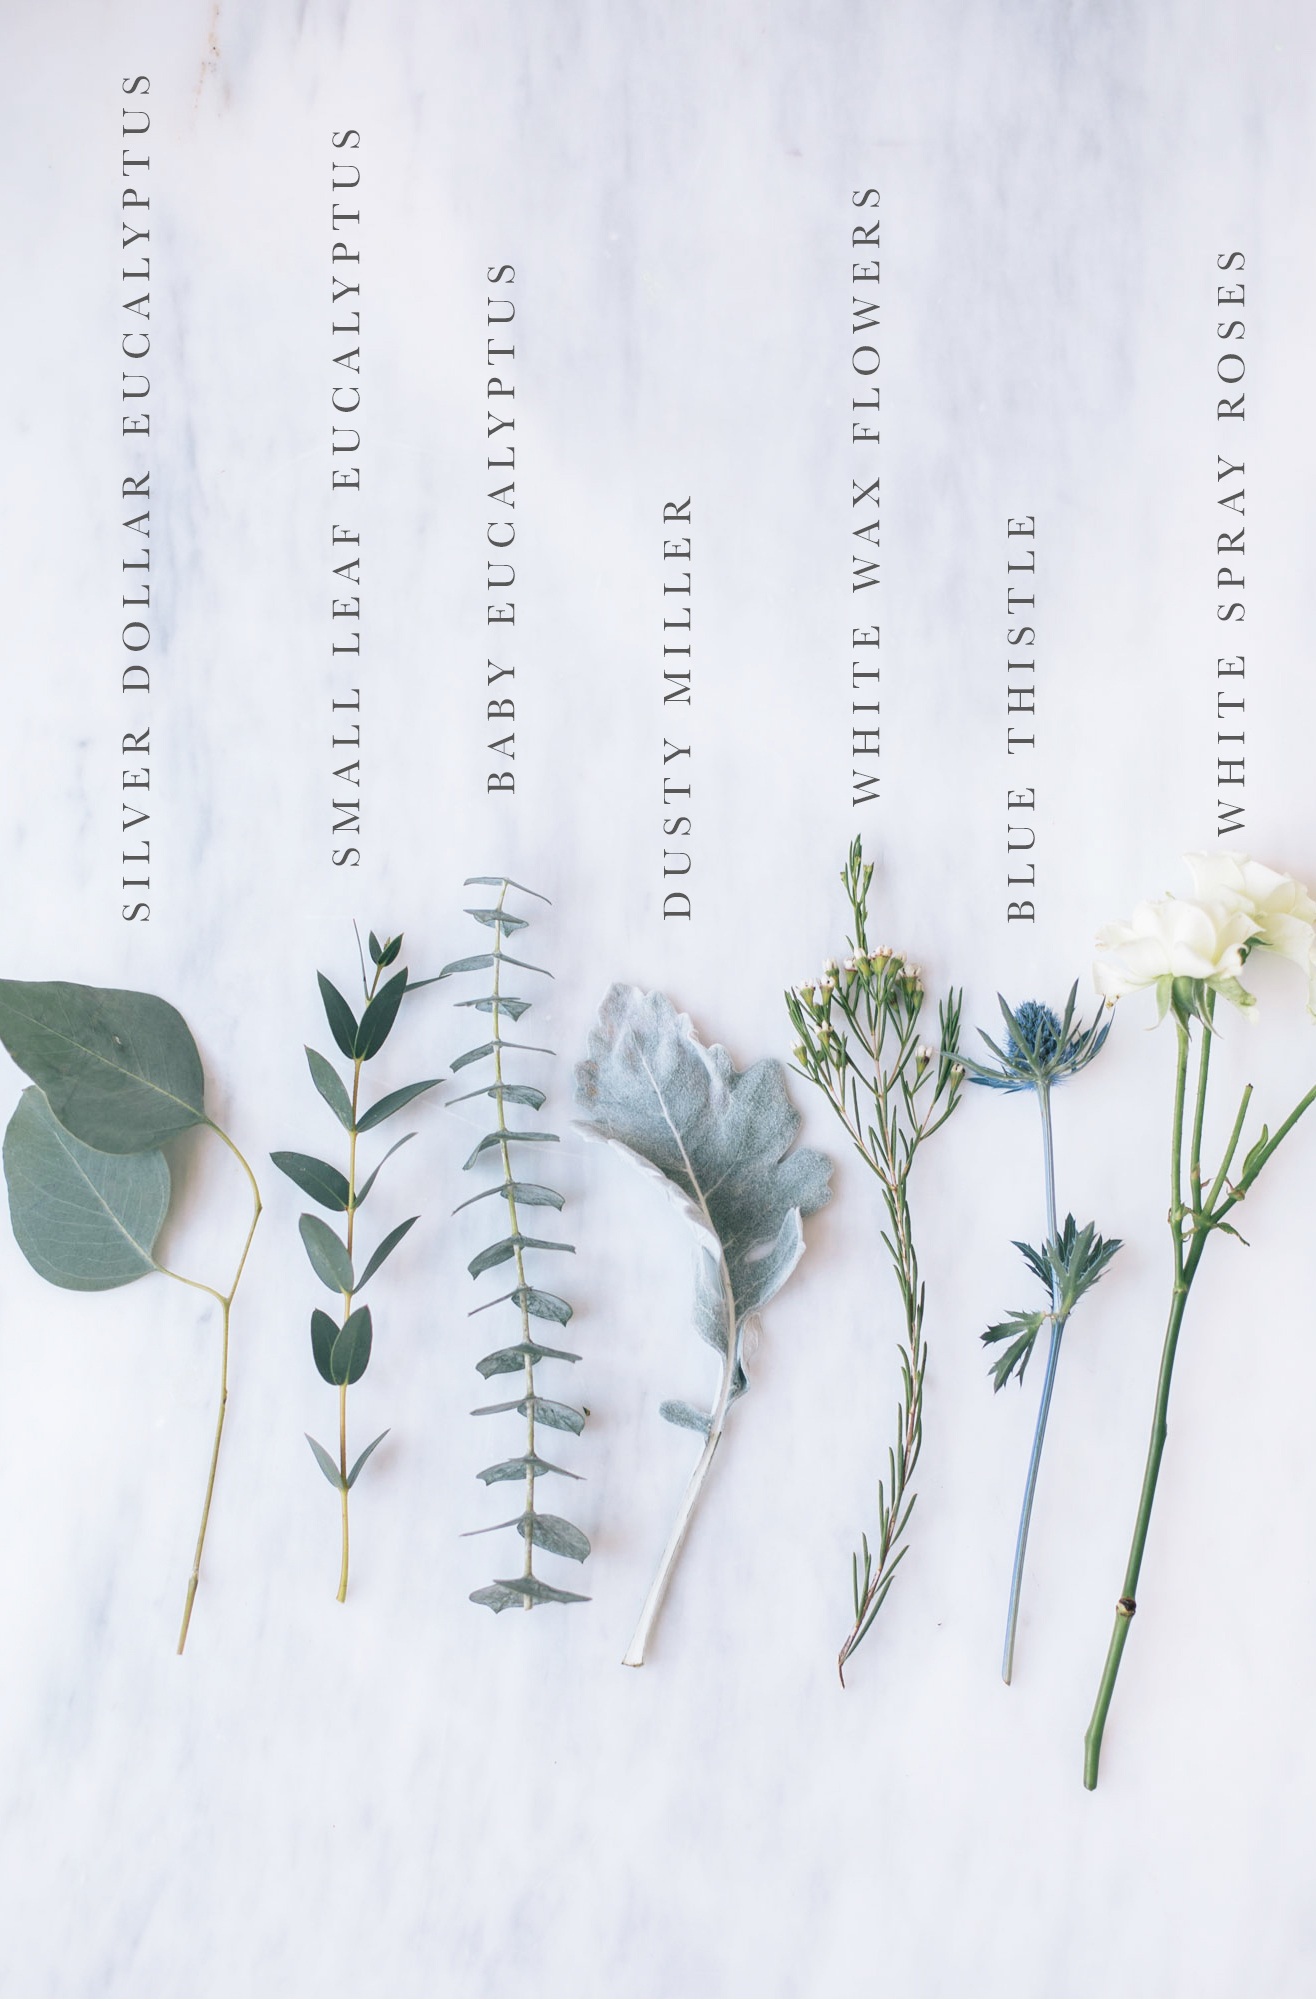 Flowers and Greenery Used:
– Silver dollar eucalyptus
– Small leaf eucalyptus
– Baby eucalyptus
– Dusty miller
– White wax flowers
– Blue thistle
– White spray roses
What You Will Need:
– Tin or small vase
– Scissors or floral shears
– Floral tape
 Step 1: Fill your vessel (tin or vase) with fresh, cold water. Using your floral tape, create a grid pattern at the top of your vase. Doing this will help keep the flowers in place.
Step 2: Before you place any stems in your vase, make sure to trim them and clear away leaves on the stem that look like they will go into the water. Loose leaves in the water will cause bacteria to grow and your flowers won’t last as long. b
Step 3: Begin your arrangement by filling it with your greenery. We’re making a garden inspired arrangement here so the goal is to have it look wild and free and not “too perfect”. I started my base with the silver dollar eucalyptus as it hangs nicely over the sides to create that flowy effect. When you are building your base, be mindful to have one side of the greenery reaching tall as though it’s growing upwards and then the other side will hang lower. In the middle, fill your vase with shorter pieces of greenery so that you achieve that wavy, flowing shape. After I placed my silver dollar eucalyptus in the vase I followed up with the small leaf eucalyptus as it is a great filler. I then added the baby eucalyptus, keeping some pieces longer and some shorter, followed by the dusty miller which I mostly tucked in around the sides. You will be using a lot of greenery here to create a shape you are happy with. In this case, I’d say that the arrangement is 80% greenery.  Step 4: It’s time to add your flowers, yay! I began with the largest flowers which are the spray roses. I trimmed some short, kept some tall and left a few bunched together. This helped create interest and dimension in the arrangement. I also pulled the middle of the petals out of a couple of the roses to show off their beautiful centers as you can see in the photo above.
Step 5: Finish by adding the blue thistle (I trimmed these tall and short as well) and tuck in a few of the wax flowers.
Keep in mind that your arrangement does not have to look exactly like mine. As a matter of fact, it will probably look a lot different and that is a good thing! Have fun experimenting with shapes and styles you like! I guarantee that whatever you come up with will look beautiful!