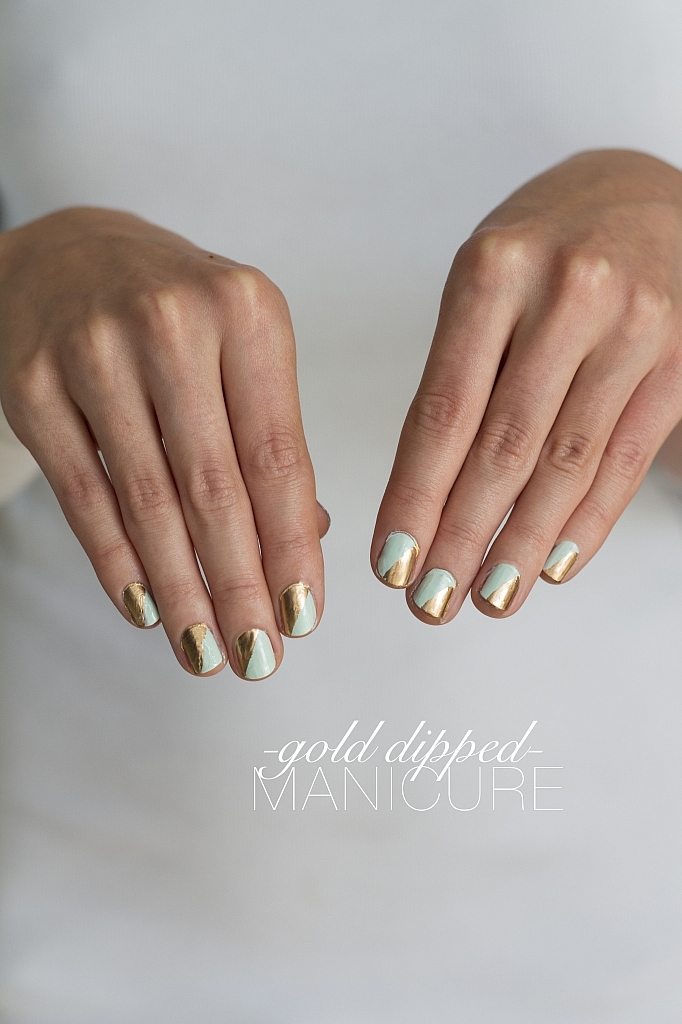
What could be more luxurious than a gold dipped manicure? Although the name may sound pricy and difficult, it is actually cheaper than a manicure at the salon and so easy! Liquid gold leaf is one of the items that I always have on hand as I can use it for just about anything I want to add a little glamour too…including my nails. So when I found the perfect shade of blue by Butter London at Blossom Lounge I knew instantly that it and the liquid gold would make for the prettiest of summer nail art. Read below to learn how to do this opulent gold mani for yourself!
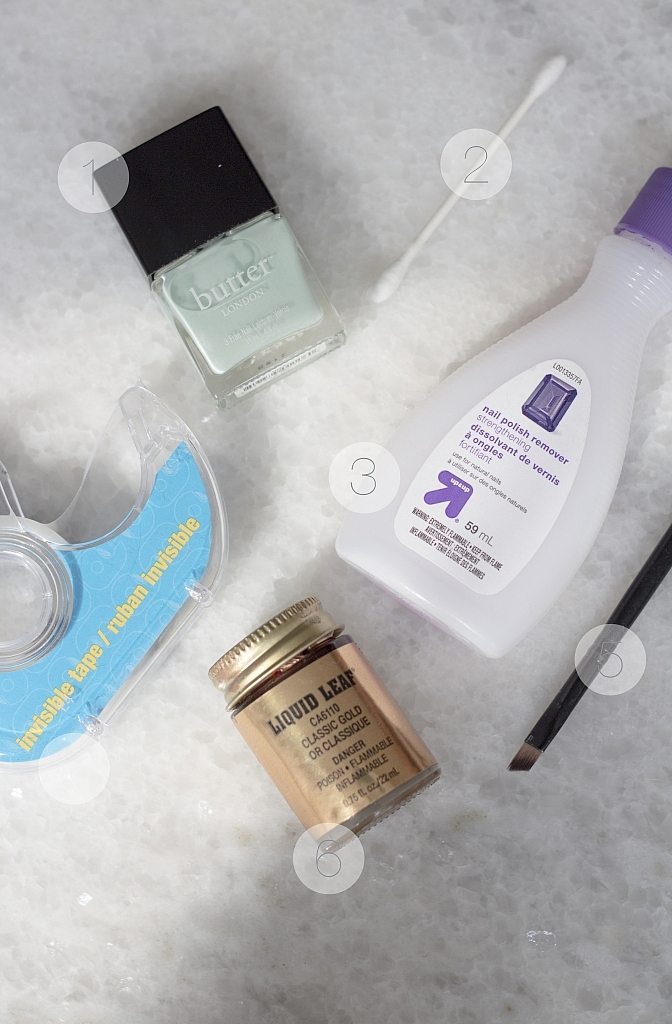
1. Butter London “Poole” Nail Polish
2. Q-Tips
3. Nail Polish Remover
4. Painters Tape
5. Angled Brush
6. Liquid Gold Leaf
Step 1: After shaping and buffing nails to your preferred shape, start by painting nails with a thin coat of nail polish. I did three coats of Butter London’s Poole nail polish to achieve a fully opaque look.
Step 2: Remove any nail polish mistakes by dipping a Q-Tip in some nail polish remover and gently rub it along fingers. Let nails dry completely before moving onto step 3.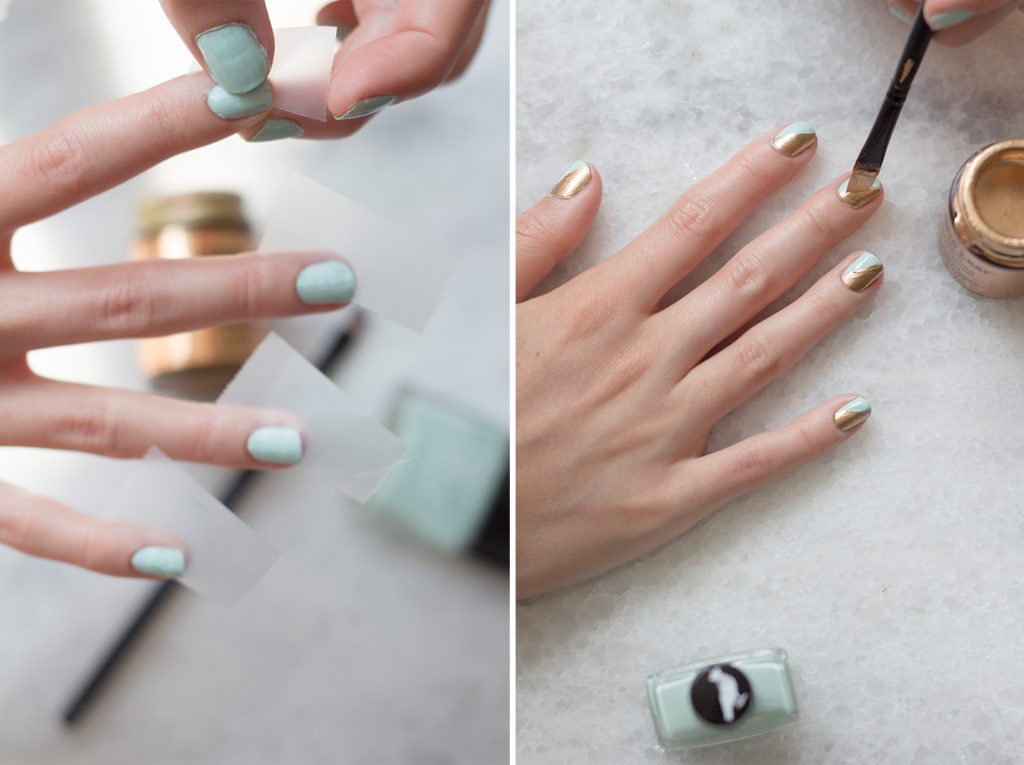
Step 3: Using painters tape (scotch tape shown here), tape a diagonal line from the middle top of your nail to the middle bottom. Press firmly on the tape to ensure no liquid gold will bleed.
Step 4: Using a very small amount of liquid gold, gently dab it onto your nails moving slowly and carefully. Allow the gold to dry fully and gently remove the tape. If there are any patches gently fix them using a small ammount of gold. 
