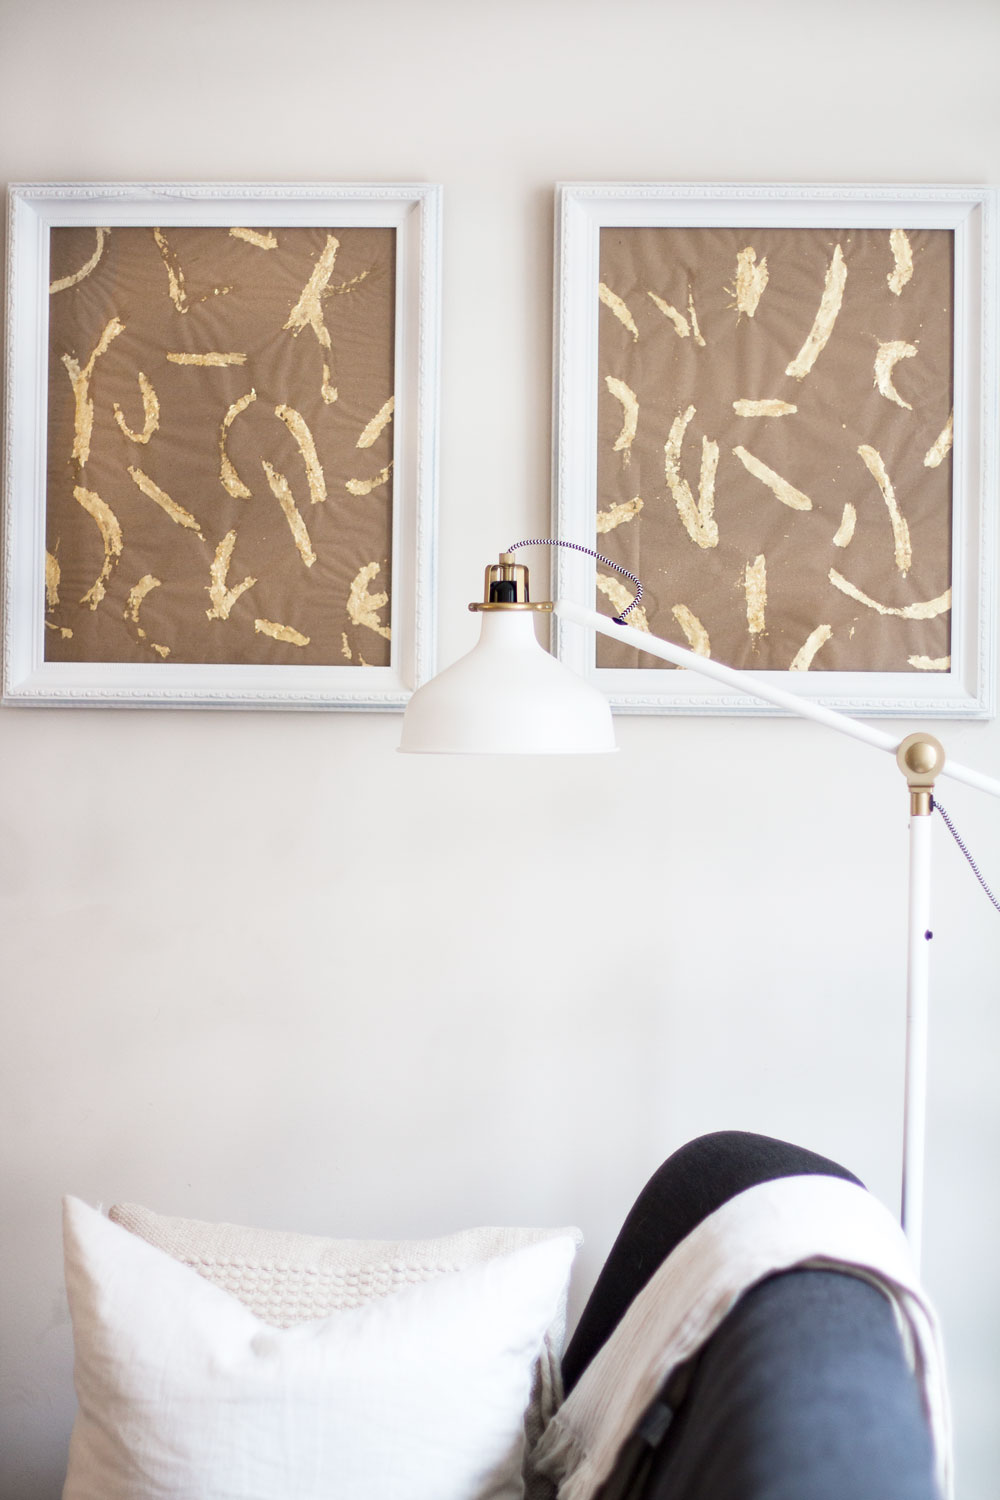
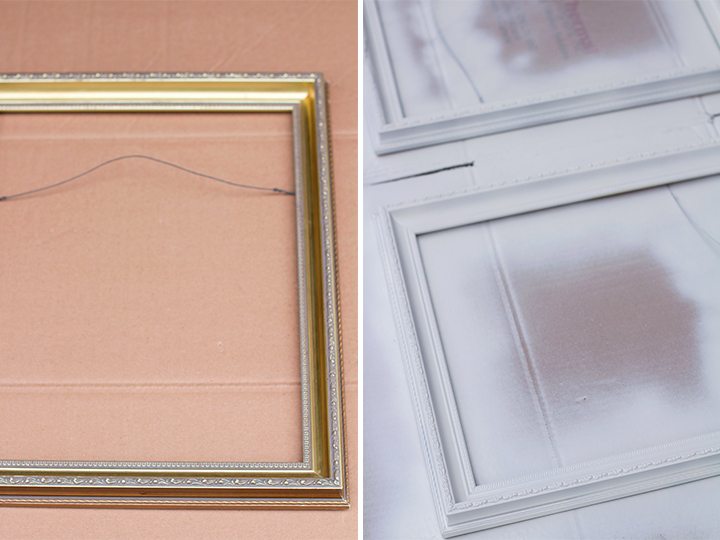
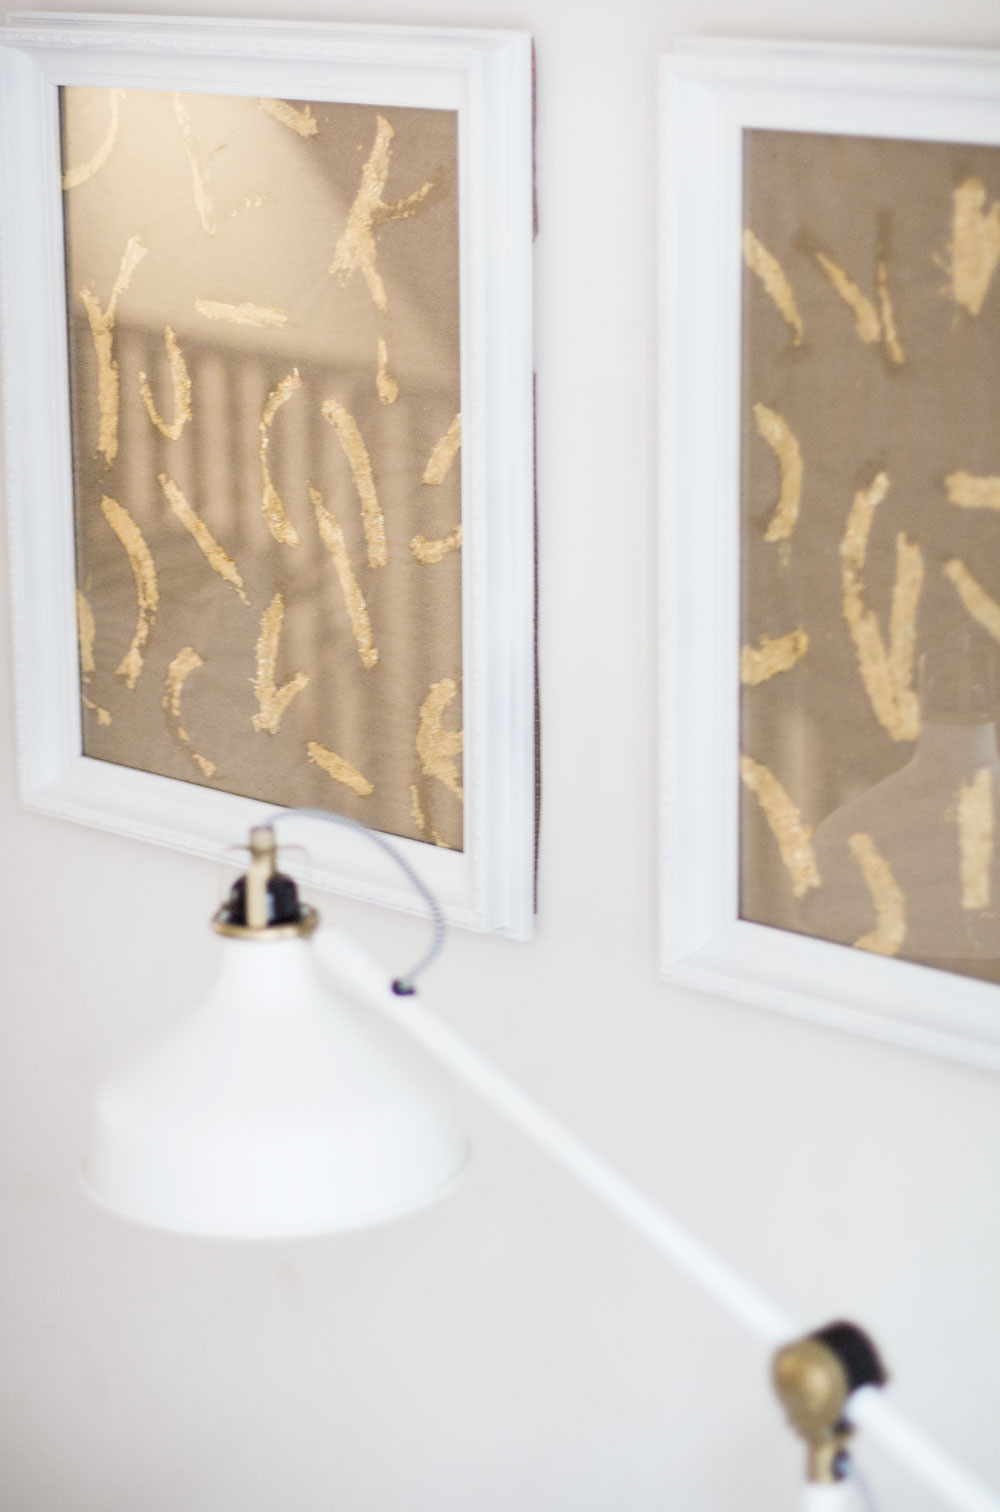
I last discussed my aversion for hanging pictures or anything for that matter on walls a few months ago when I was on the hunt for bedroom art. I’ll admit we still haven’t found anything that has jumped out at us just yet, and after we dove straight into working on the living room after Christmas, I figured I’d leave it on the back burner. After we redid our living room with Artemano I knew that we absolutely had to hang something up. First, I hung this Umbra mirror that I fell in love with instantly. It’s both stylish and practical and I love the geometric 3-d effect it lends to the living room. Secondly, I knew I wanted some sort of art but after the money that I put into the living room I couldn’t really afford “real art”. I found a couple of old, brass frames at Value Village for $13 and decided to rework them. Unfortunately the day that I was working on this little project was extremely gloomy so I couldn’t quite capture the process, but I will explain it the best I can below! The art I created isn’t perfect but I really love the how the white textured frames turned out. Also, I was super intimidated about un-matting and re-matting these frames at first but it was actually so easy (this video was extremely helpful!) I hope you like the living room art and that it gets you inspired to try to create something unique for yourself!
What You Will Need:
1. Old frames, or new ones in case you want to skip the matting process.
2. White matte spray paint
3. cardboard for the back of the frame (cut to size)
4. X-acto knife
5. staple gun
6. A cloth and Windex to clean the frames
7. Brown packing paper
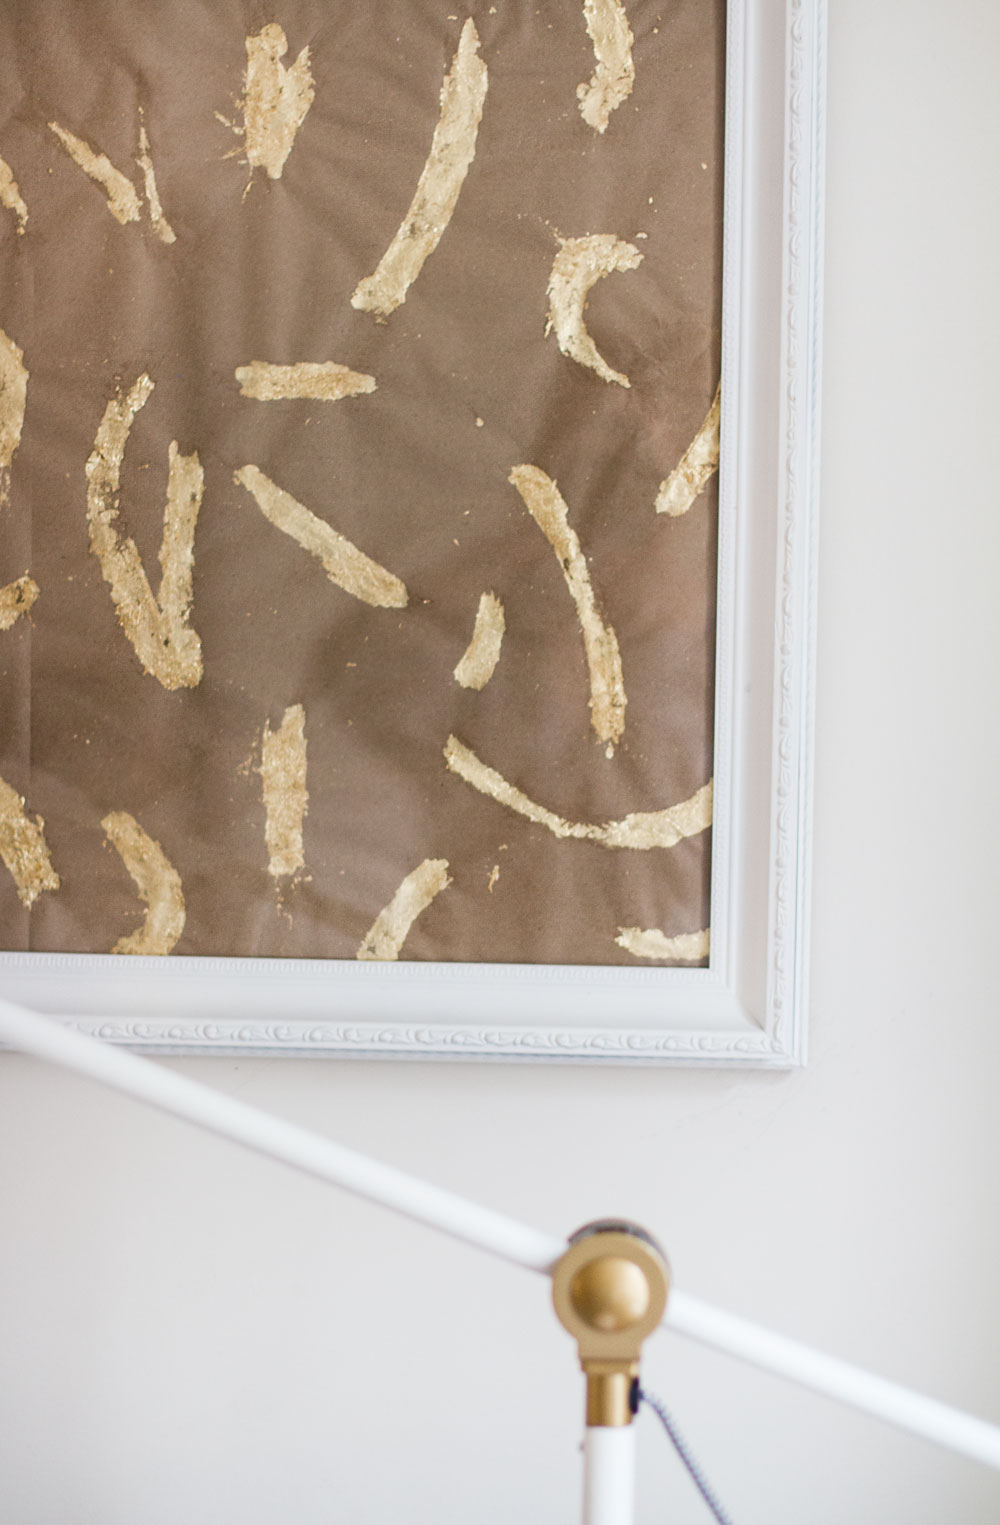
8. Gold Leaf (I used the gold leaf flakes)
9. crafting glue (I used Martha Stewart’s decoupage glue)
10. Scissors
Step 1: If you are using an old frame and have to remove the old picture and glass make sure to watch this video, or just go for it, it is pretty self explanatory once you get the tape off the frame. Also, be careful to not cut your fingers on the glass…I know from experience, haha!
Step 2: Clean the frames with a damp cloth, making sure that there is no dirt or partials left on the frame. Spray paint your frames outside or in a well ventilated area and allow them to dry fully.
Step 3: While your frames are drying, cut the packing paper to the size that your pictures will be.
Step 4: Using the glue, I made random a random brush stroke pattern on the paper and then used my gold leaf flakes to cover them. Make sure you read the directions on the gold leaf packet, but again it’s pretty easy! You can’t really mess up random brush strokes but you can totally make any type of shape you like for this!
Step 5: Once everything is dry and to your liking place the glass follow by the picture and then a piece of cardboard that is a bit bigger than the picture (so if touches the wood) over top. I taped the edge over with painters tape and then used a staple gun to secure the picture in the frame so that there would be no chance of it coming loose.