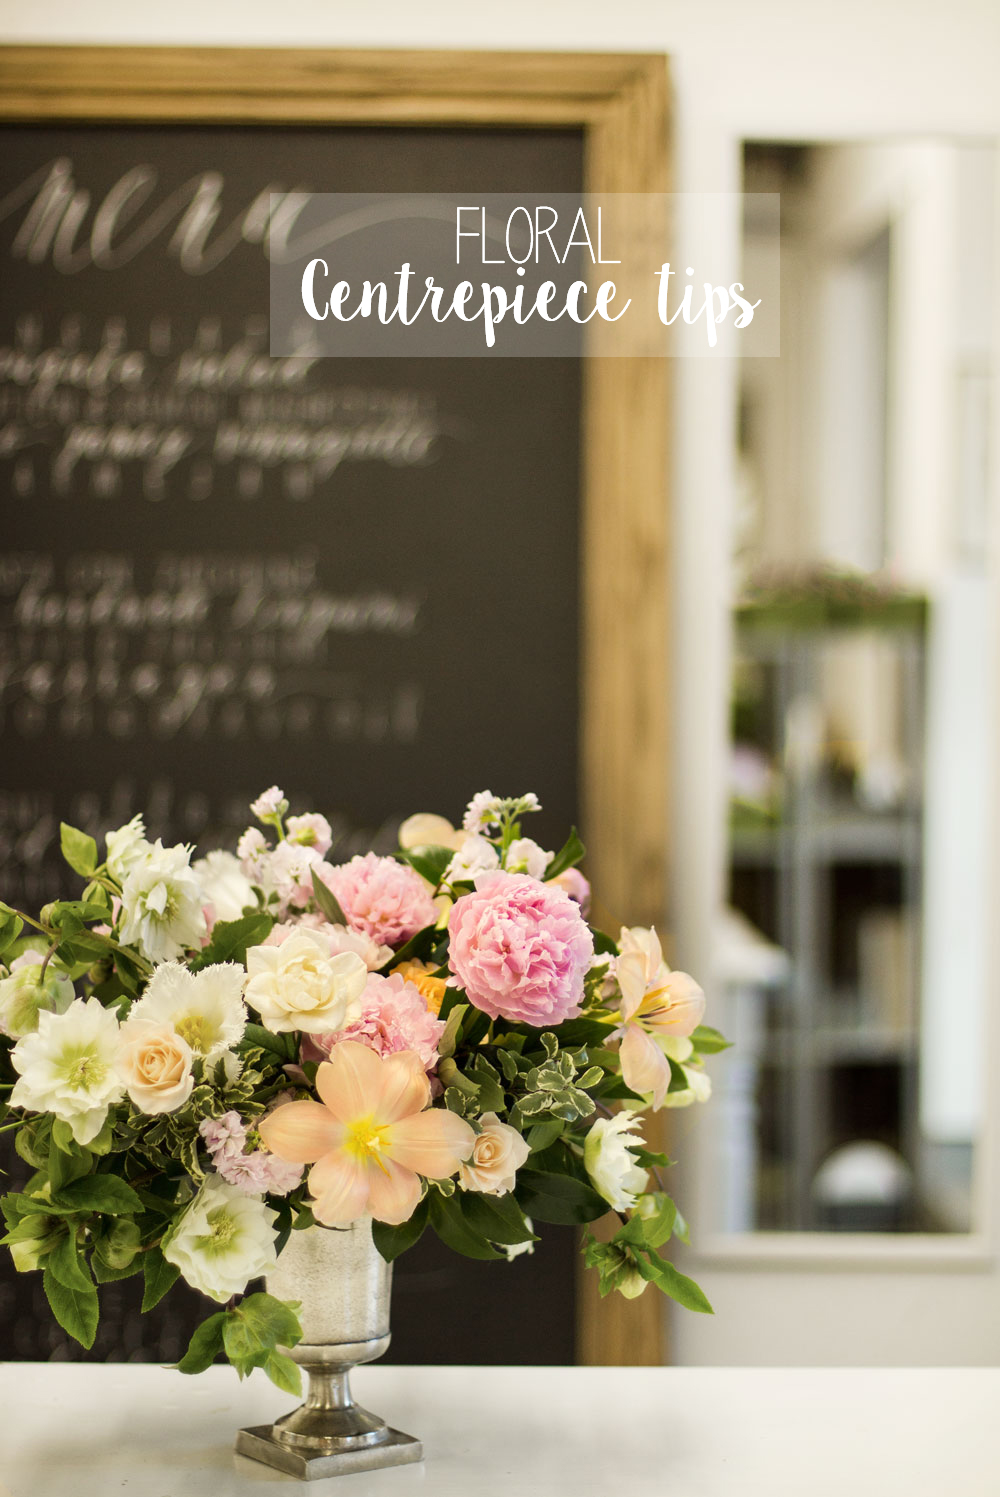
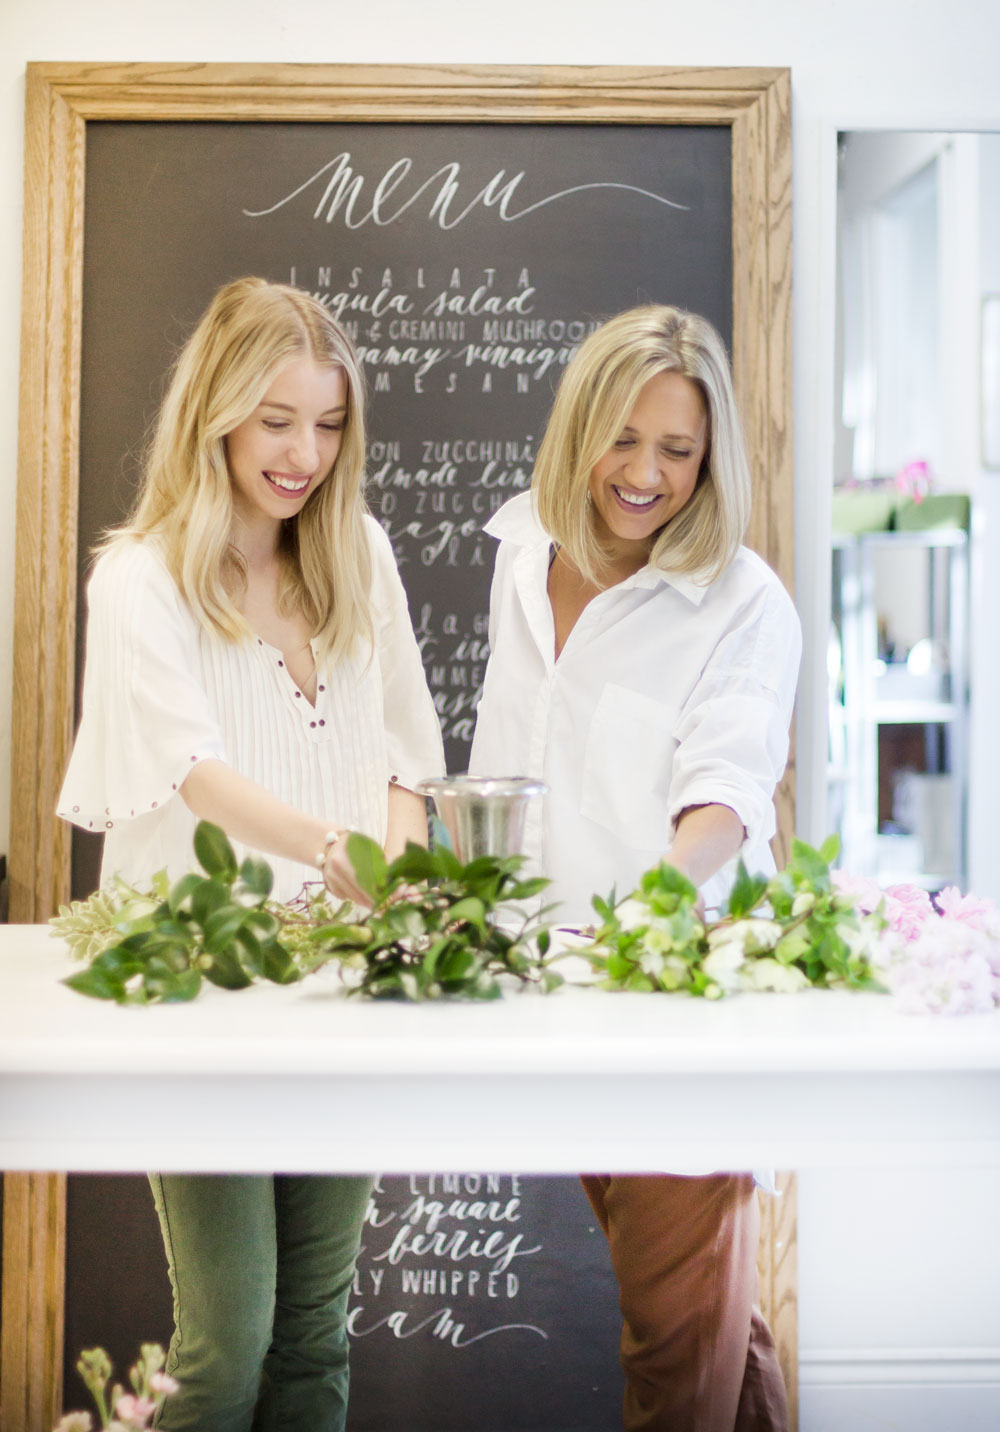
Valentine’s day goes hand in hand with flowers. Whether they are from a loved one, a gift to yourself or in the form of a centrepiece for a table, there’s nothing quite like having fresh blooms to brighten up your home. This year I knew that I wanted to create a Valentine’s Day inspired centrepiece but in all honesty I had no idea where to begin. So with that I enlisted the help of my friend Lisa, who owns one of the most beautiful floral design studios in Toronto, Sweet Woodruff.
Lisa and I met rather serendipitously months ago over Kijiji when I was selling a rug that I had purchased for our living room that was too big. I had already followed Sweet Woodruff via Instagram and was a huge fan of their work. When Lisa mentioned that she was the owner of the shop via e-mail I was thrilled to have connected. I had been waiting for the perfect opportunity to collaborate with Lisa and the Sweet Woodruff team, and with Valentine’s Day this Sunday I knew this would be the perfect opportunity.
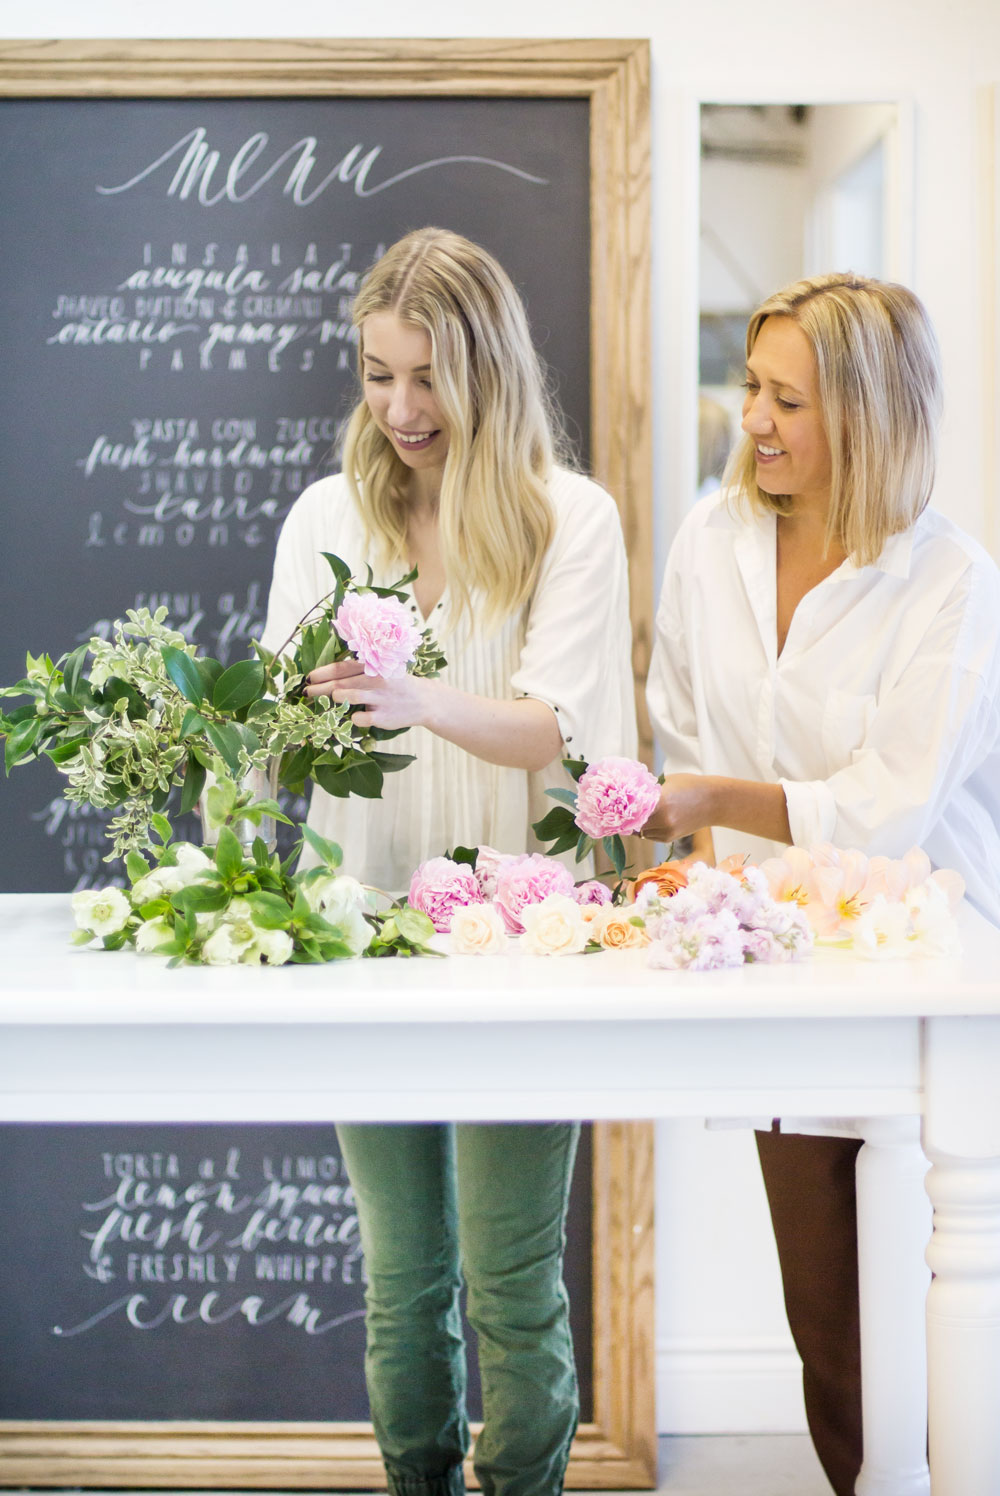
I’m beyond excited to share this tutorial on how to create this garden inspired Valentine’s Day centrepiece, but also because you can use this very helpful information as a guide for making any centrepiece or bouquet. Lisa and her team are seriously magicians when it comes to flowers, so in my opinion this tutorial is like opening the floral version of Pandora’s Box. I hope you are as inspired as I am!
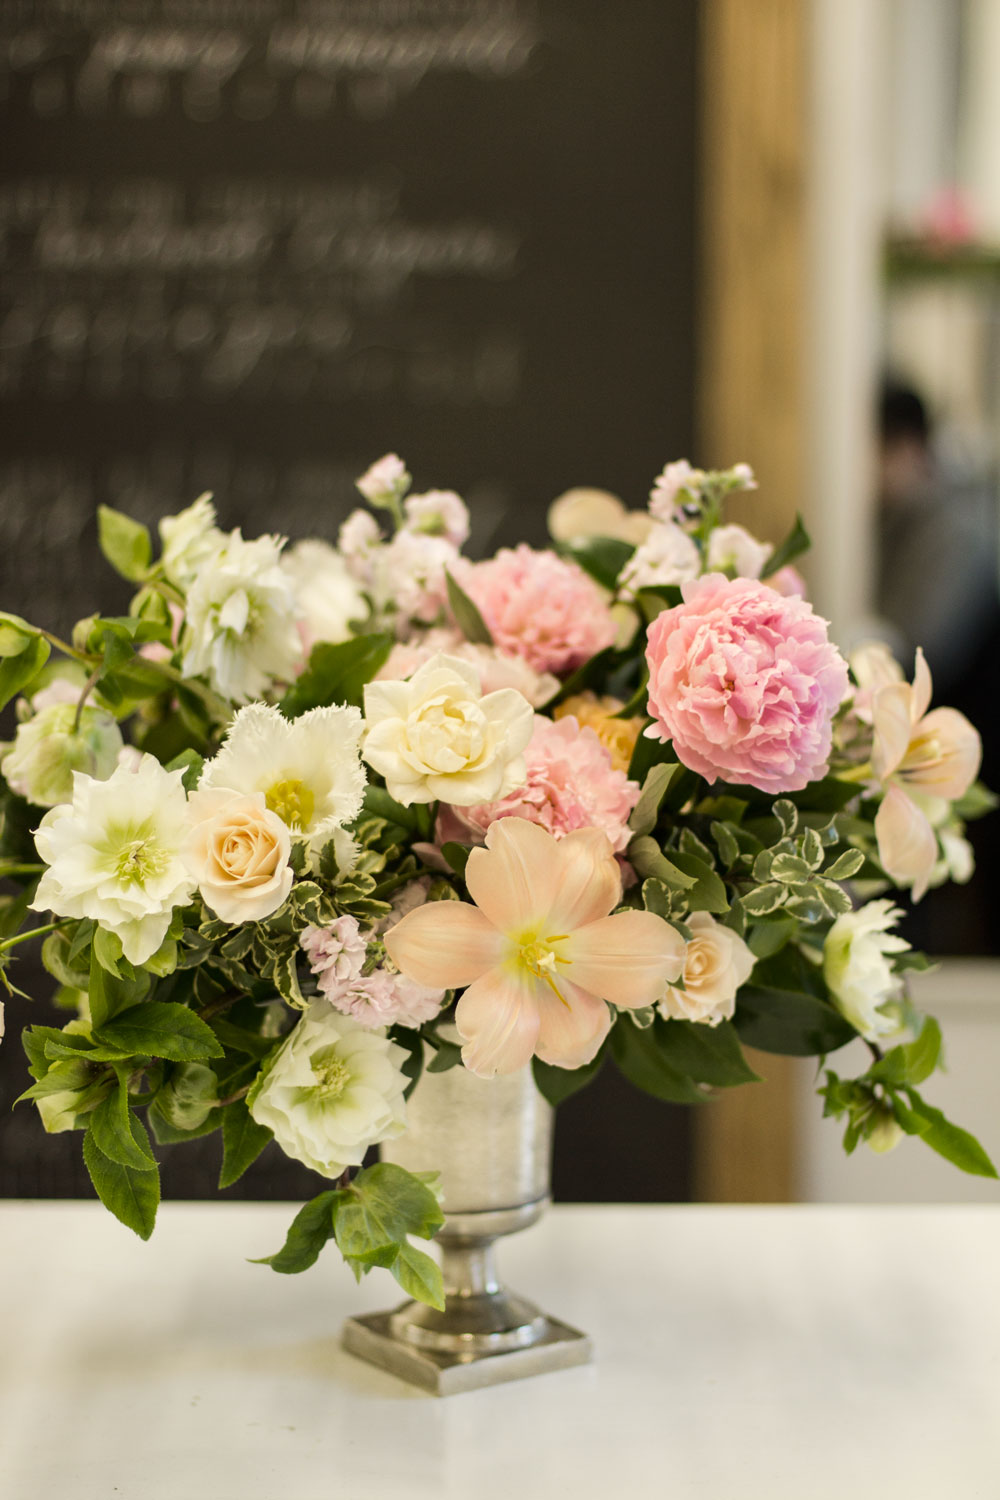
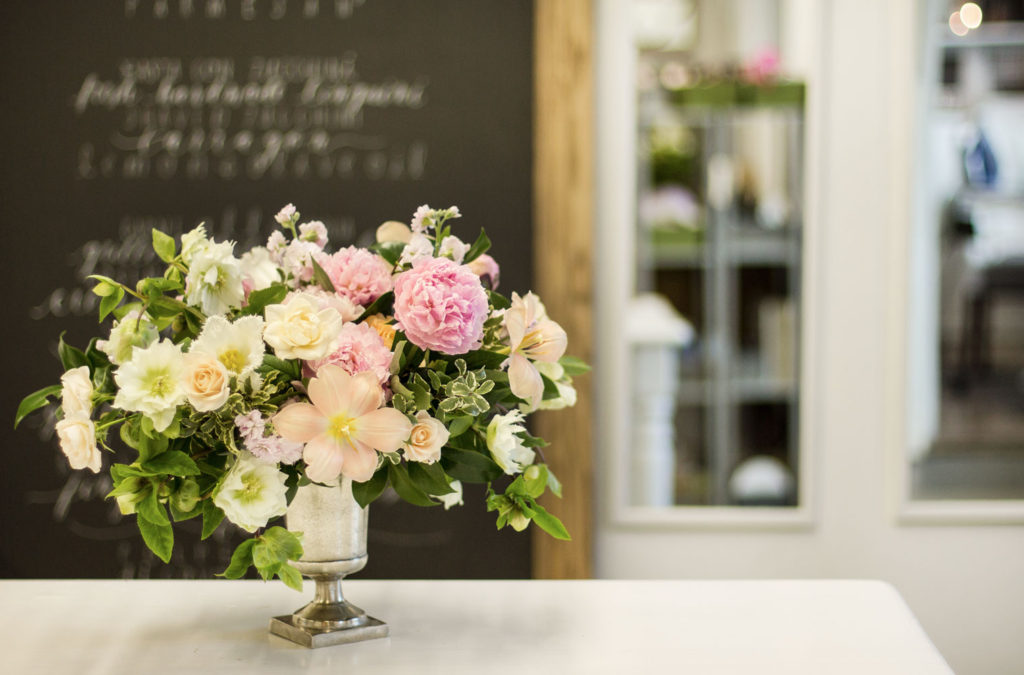
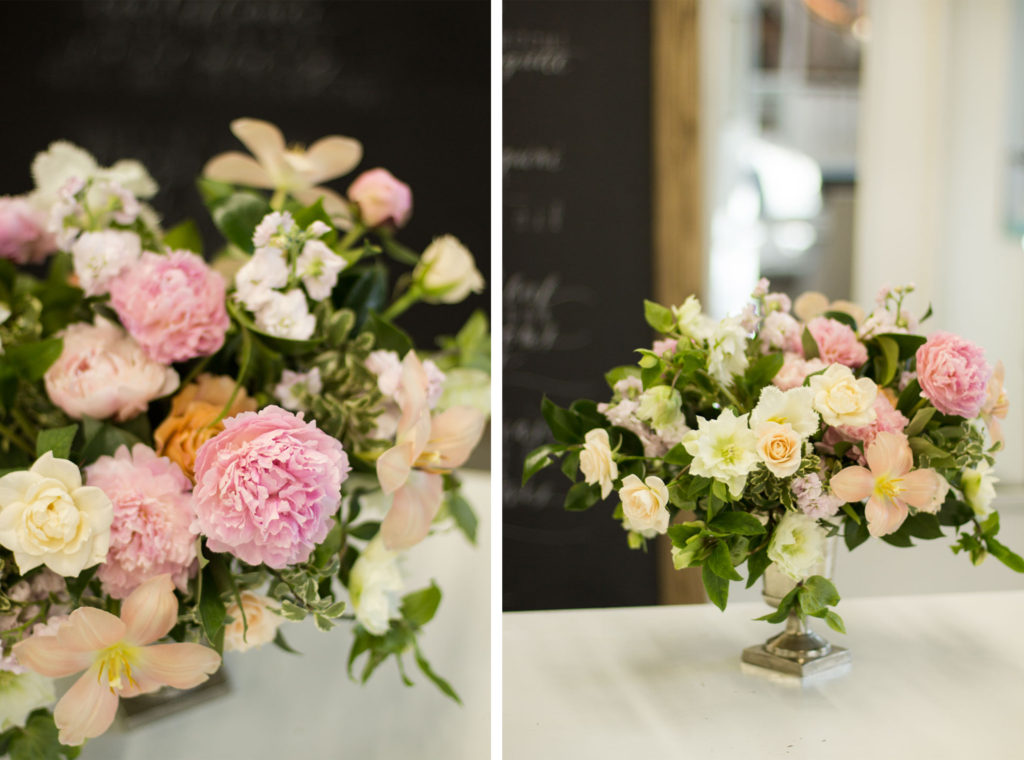
Lisa loves the look of loose, whimsical arrangements and likes to think about what a garden really looks like in nature. When creating the shape for her bouquets and centerpieces she thinks about “what is old is new” and draws shape inspiration from old Dutch paintings. Lisa creates bouquets with either a sweeping “S” shape (starting low on one side higher to the other), or an “M” shape that dips into the middle”. Our centerpeice was a mixture of the two as you can see from the photos.
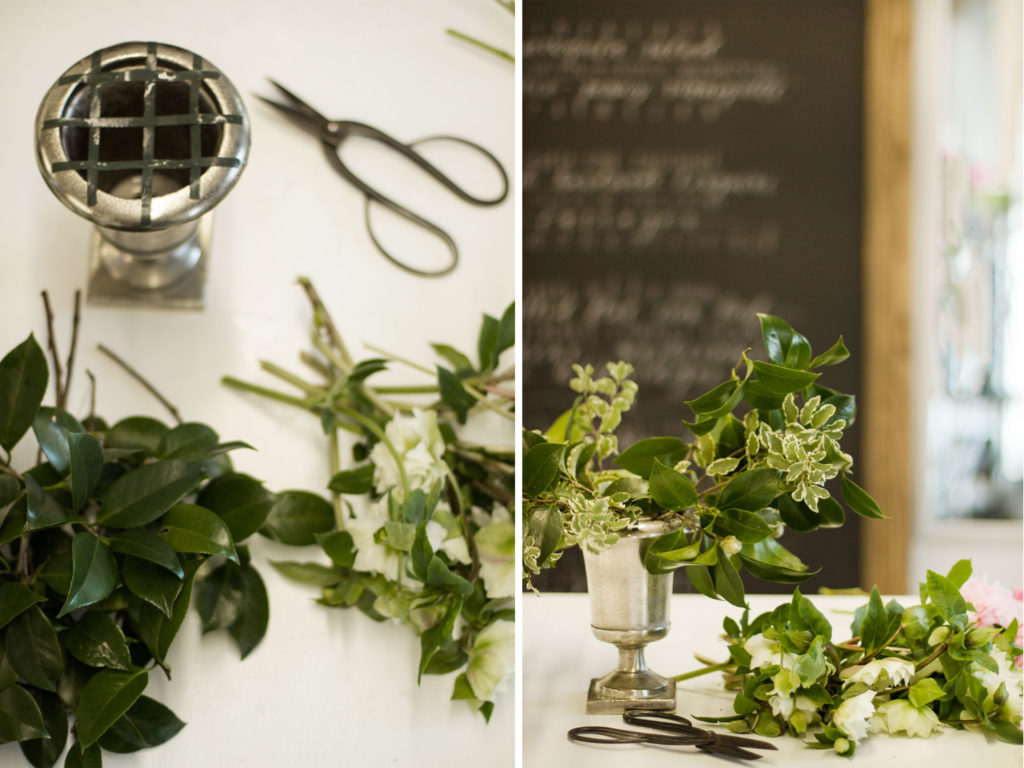
To begin start by making a grid on your vase out of waterproof floral tape, we made a 3×3 grid as you can see in the photo above. Once you are happy with your grid placement start creating your initial shape with the greenery (either the “S” or the “M”) being mindful that the greenery and flowers will begin dictating where they want to go. Lisa says “when you are starting with the greenery you will notice that it will fall where it wants and begin cascading and leaning. “It will look like it wants to be placed there.” In The Sweet Woodruff shop nothing is wired on manipulated, Lisa likes to “let the flowers fall where they may.”
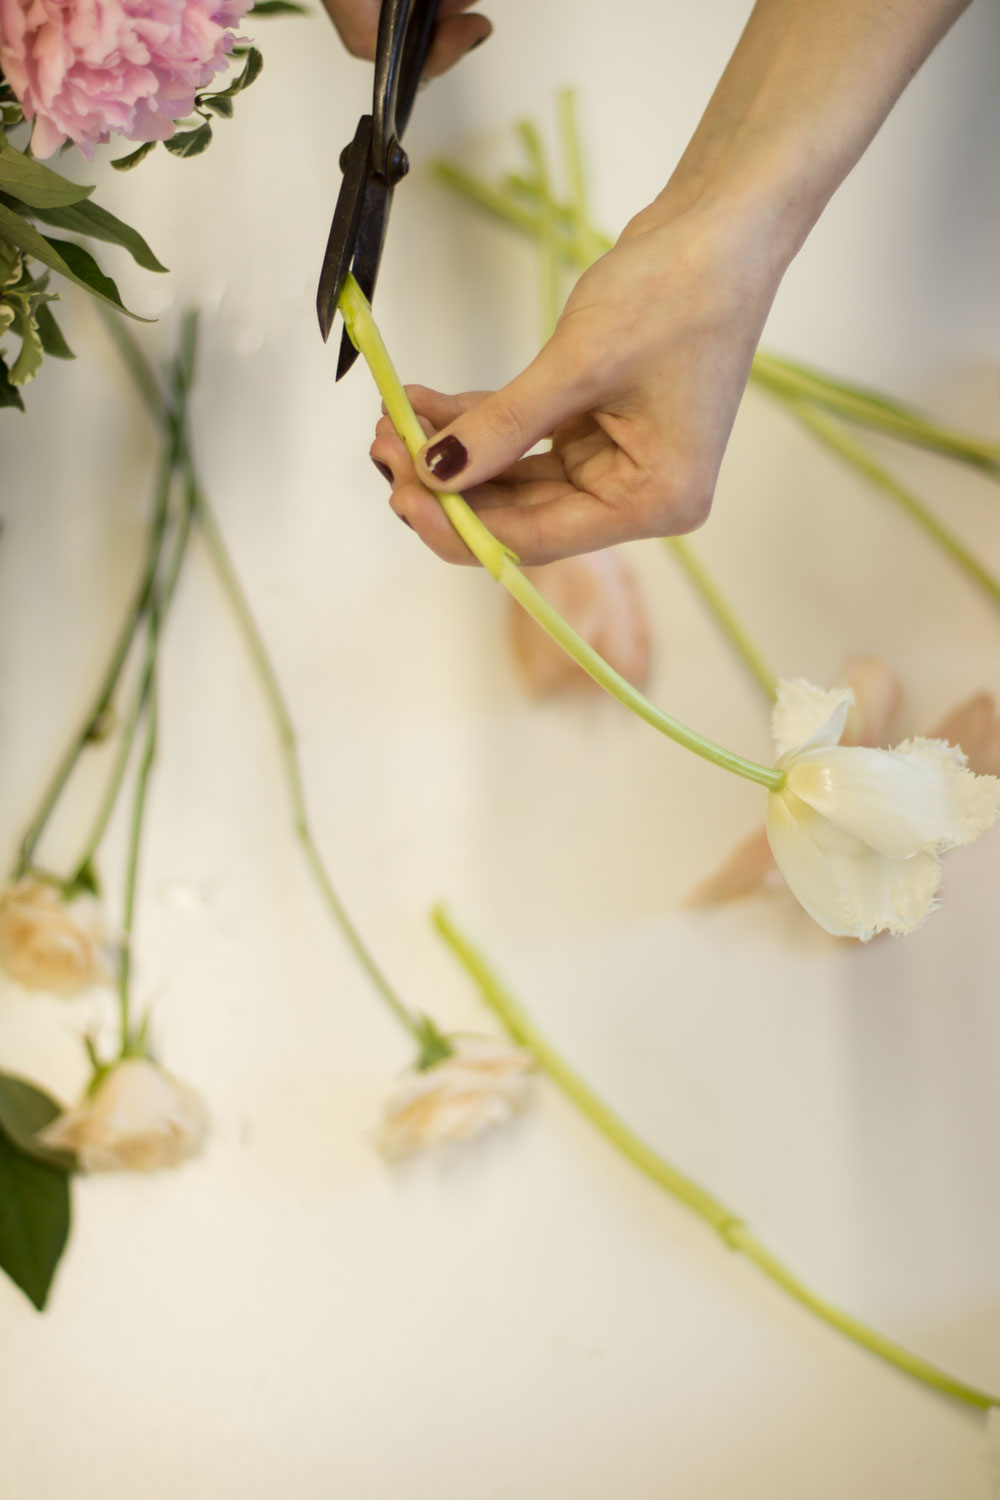
Before you start adding flowers to your centerpiece be sure to give them a fresh cut on a diagonal with shears. Cutting the flowers on a diagonal allows for more surface area on the stem which in turn allows the flowers to drink more water and stay alive longer.
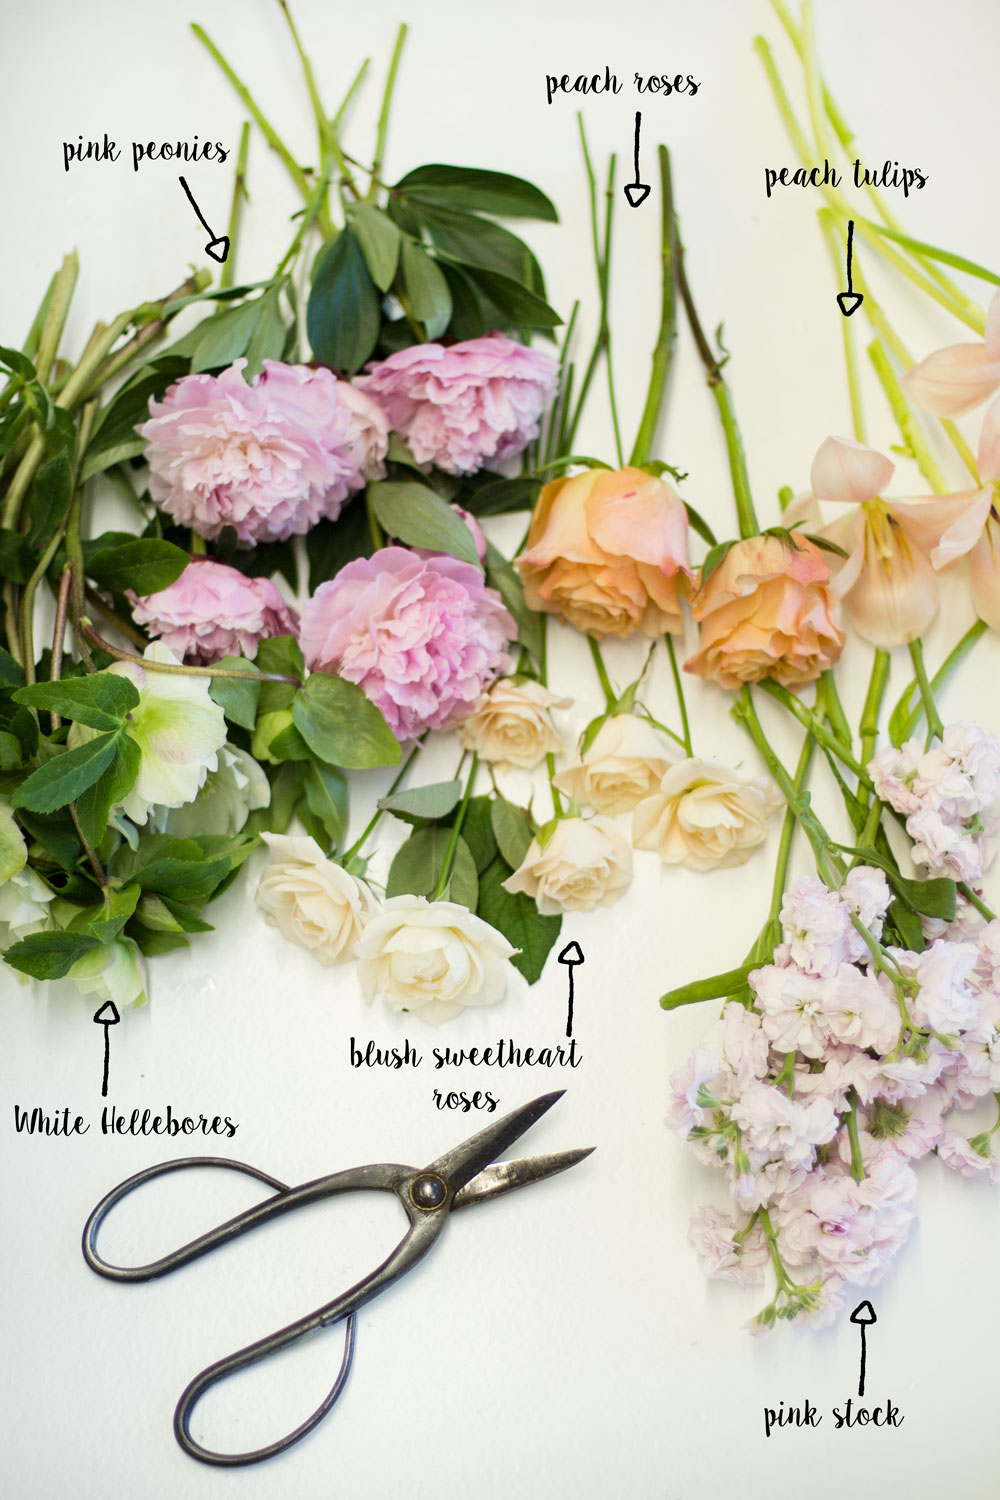
From L to R: white hellebores, pink peonies, blush sweetheart roses, peach roses, peach tulips, pink stock
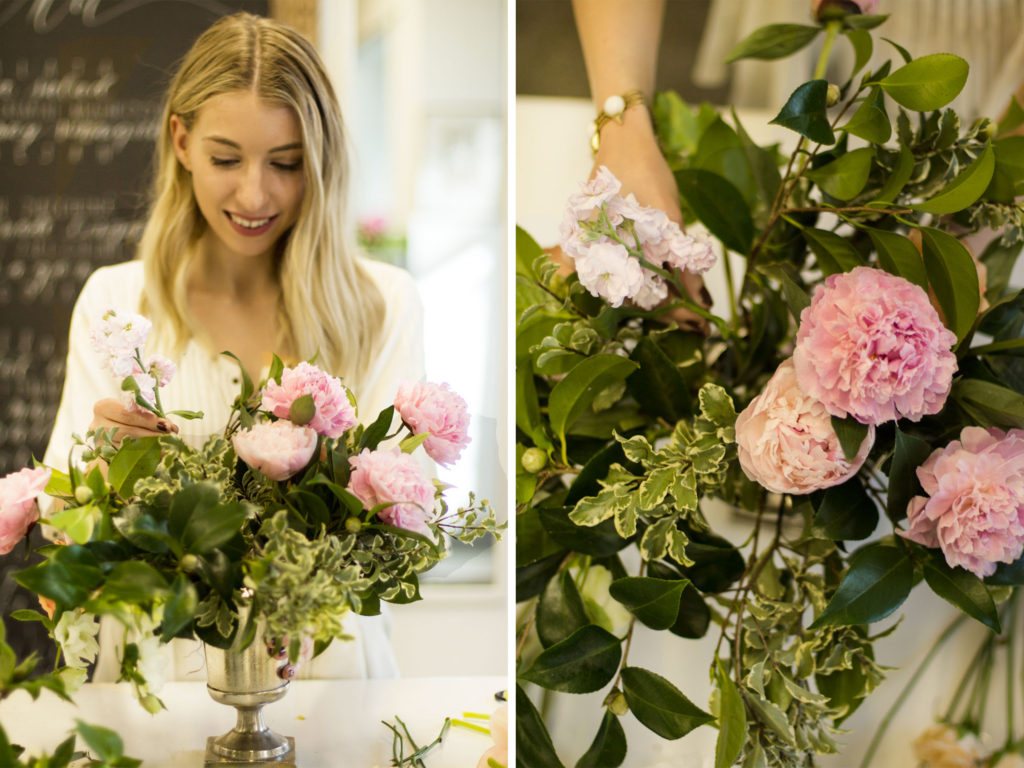
Once your greens are placed where you like them and the stems of the flowers are trimmed, start adding the focal flowers, in this case we used pink peonies and peach roses. When adding the flowers try to group the varieties together in small clusters. You can see from the photos that our peonies are grouped together instead of sporadically placed around the centrepiece. Creating clusters looks more natural and garden inspired.
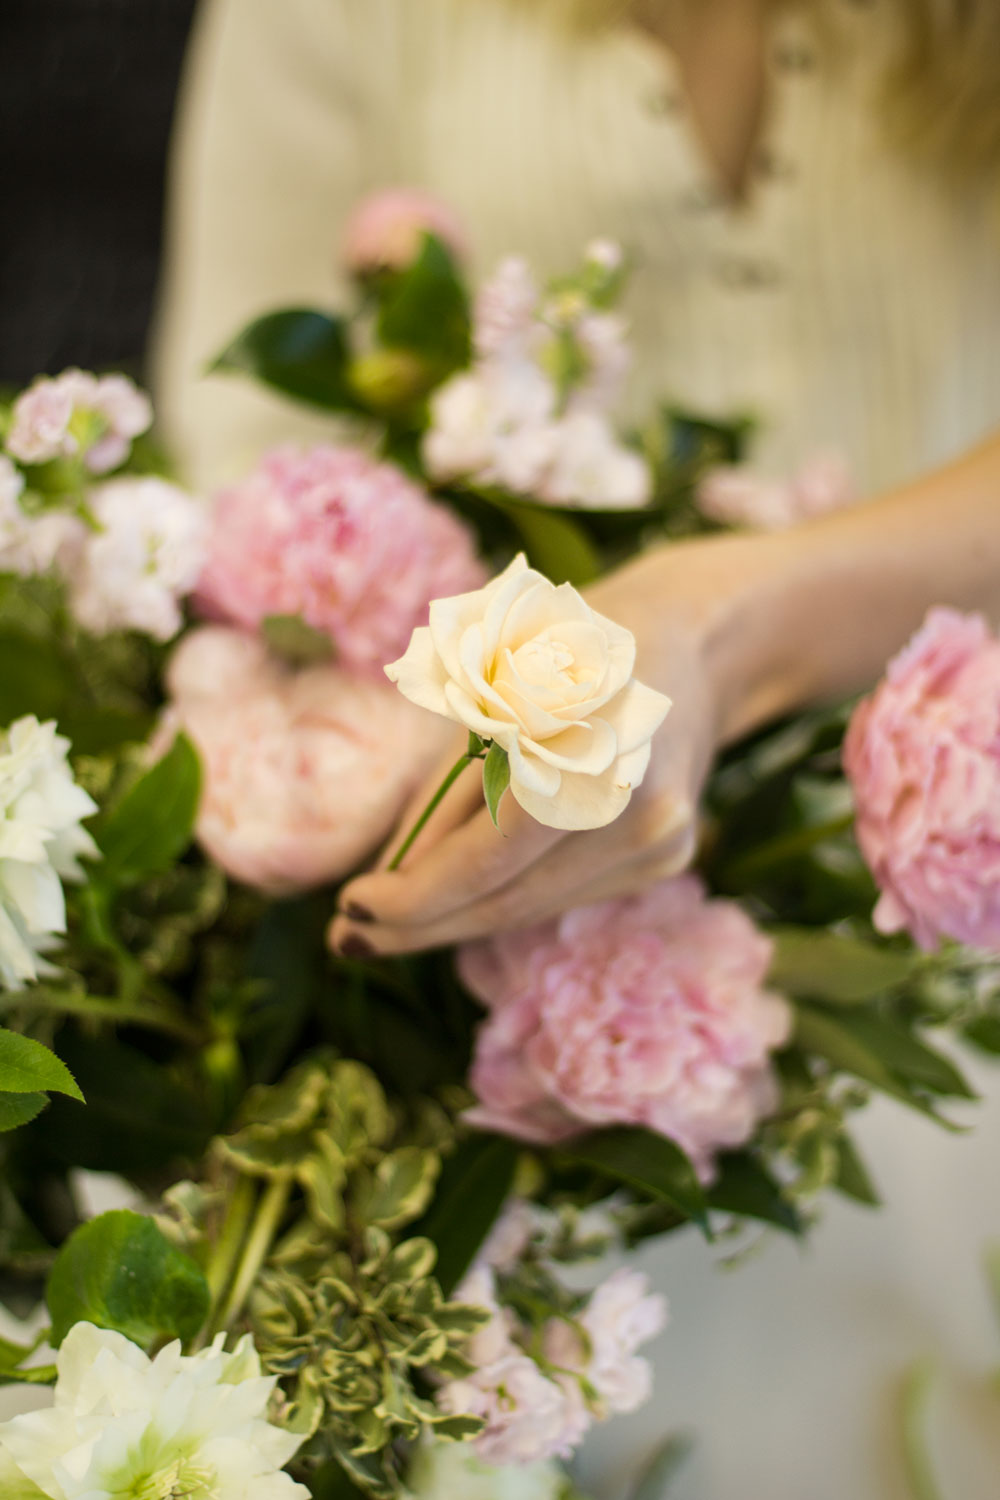
After the focal flowers are placed in the centrepiece add your other varieties (tulips, sweet heart roses, white hellebores). Be sure to think about things like grouping colours just as you grouped the flowers. Begin with your whites and lighter colours, letting the centrepiece grow into the darker colours. When adding the flowers into the centrepiece use your fingers to guide you, it’s okay if some are sticking out more than others, just make sure that all of the stems are touching the water.
Finally consider layering for texture, being aware that not everything is on the same plane. Having flowers and greens layered on different planes gives you more dimension and depth of field.
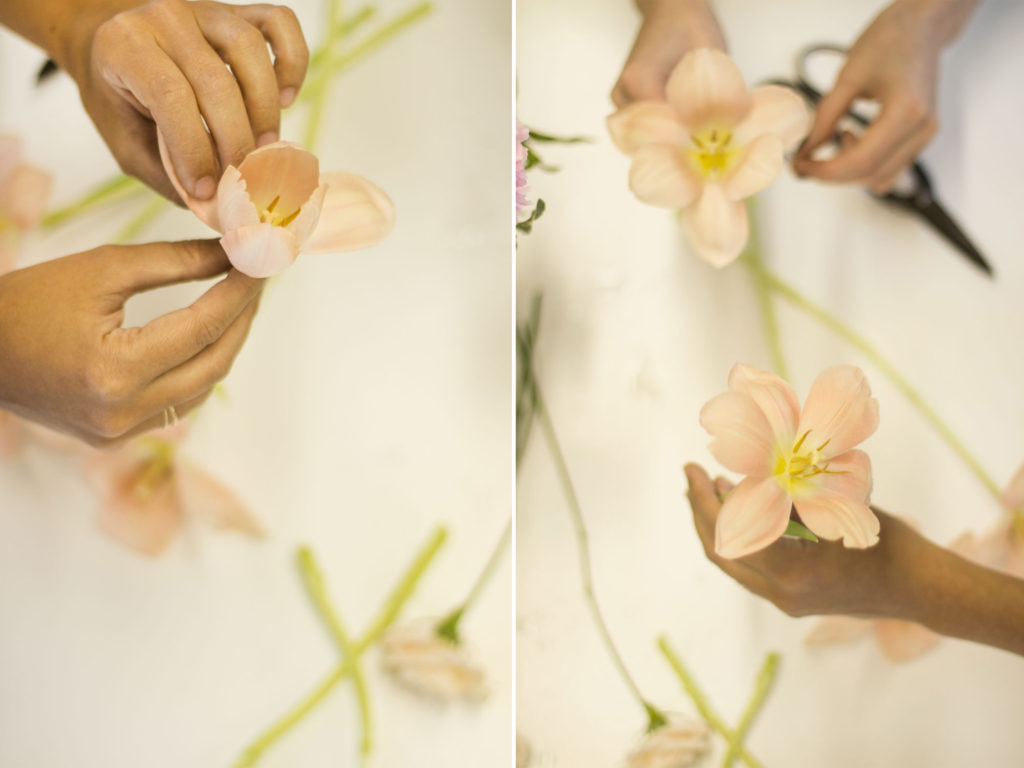
Tulip trick: To create this open faced tulip begin by stripping off all of the greens from the stems. Then using your thumb and index finger gently pop the petals outwards towards the ceiling one at a time. Once the petal is popped, gently use your thumb and finger to slide the petal towards your body. this will allow the peals to stay open and give your tulips an entirely different look. Try to touch the flower as minimally as possible as the more you touch it the less likely it is to last and stay open as the oils on your fingers can hurt the pretty blooms.