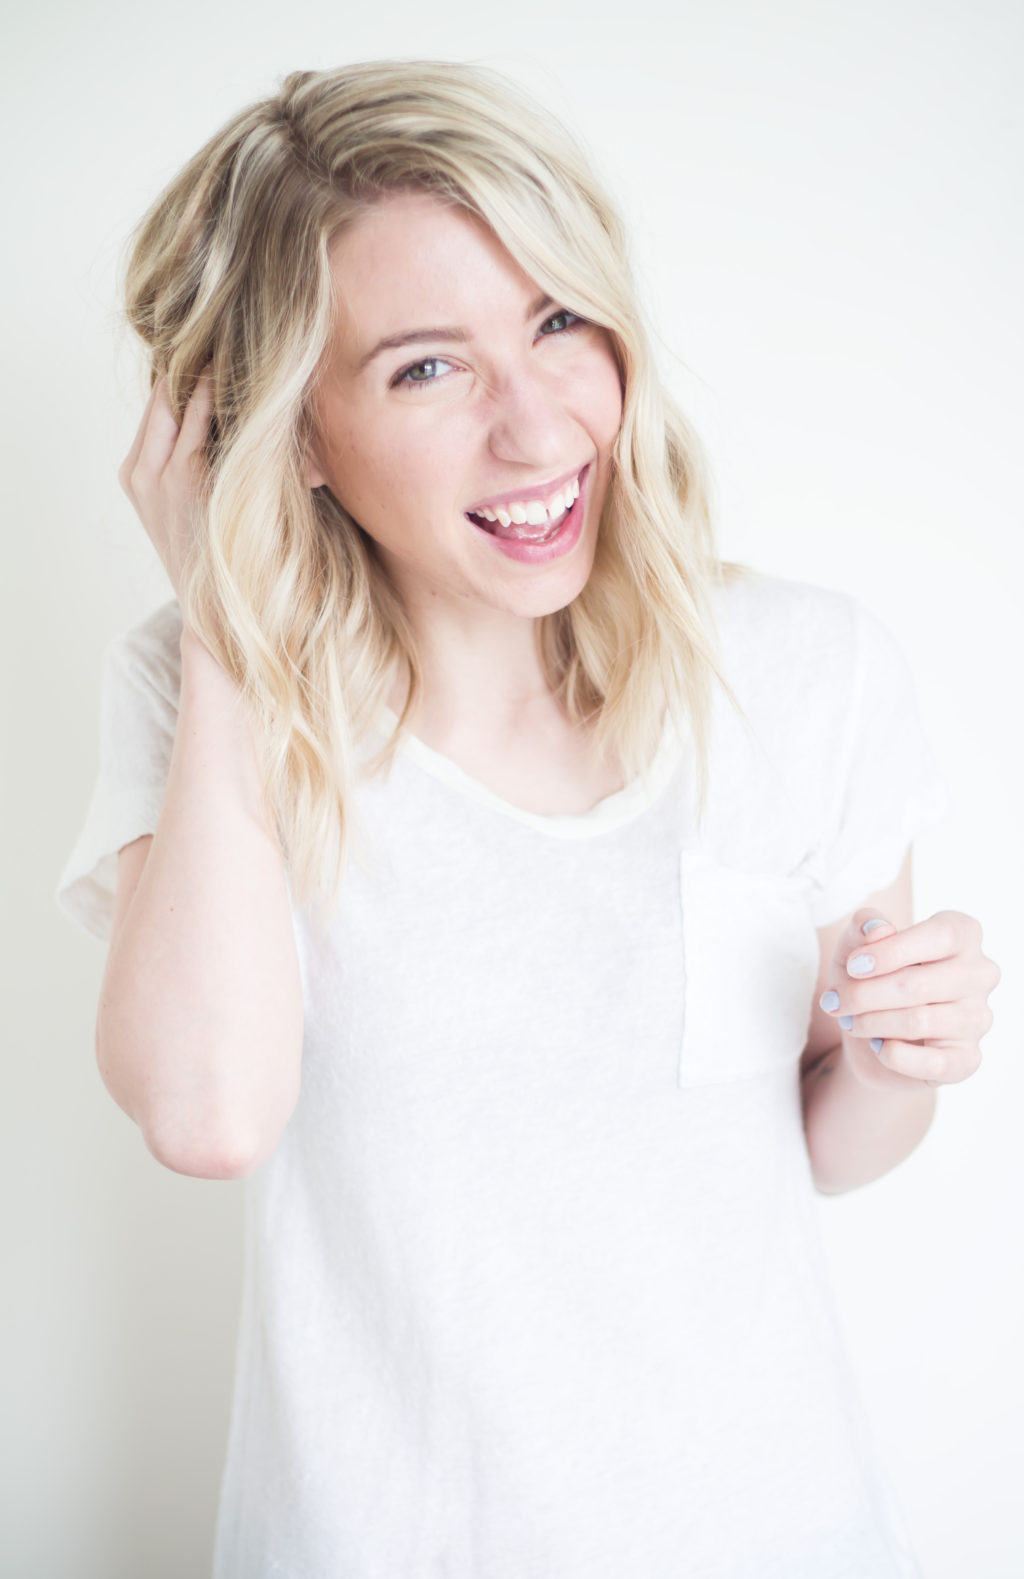
One of the most frequented questions that I get asked from friends, family and readers is “how do you do your hair like that!?” I never understand what they are talking about as I have done this beachy wave for years and they come extremely simply to me, but it seems like for some, no matter how hard they try, they just can’t seem to conquer the beach wave! I promise you achieving this hair style is not as hard as it may look and I am going to explain my absolute best as to how I achieve the perfect beachy wave. If you find that the pictures and written explanation aren’t enough, please let me know and I will make a video at some point!
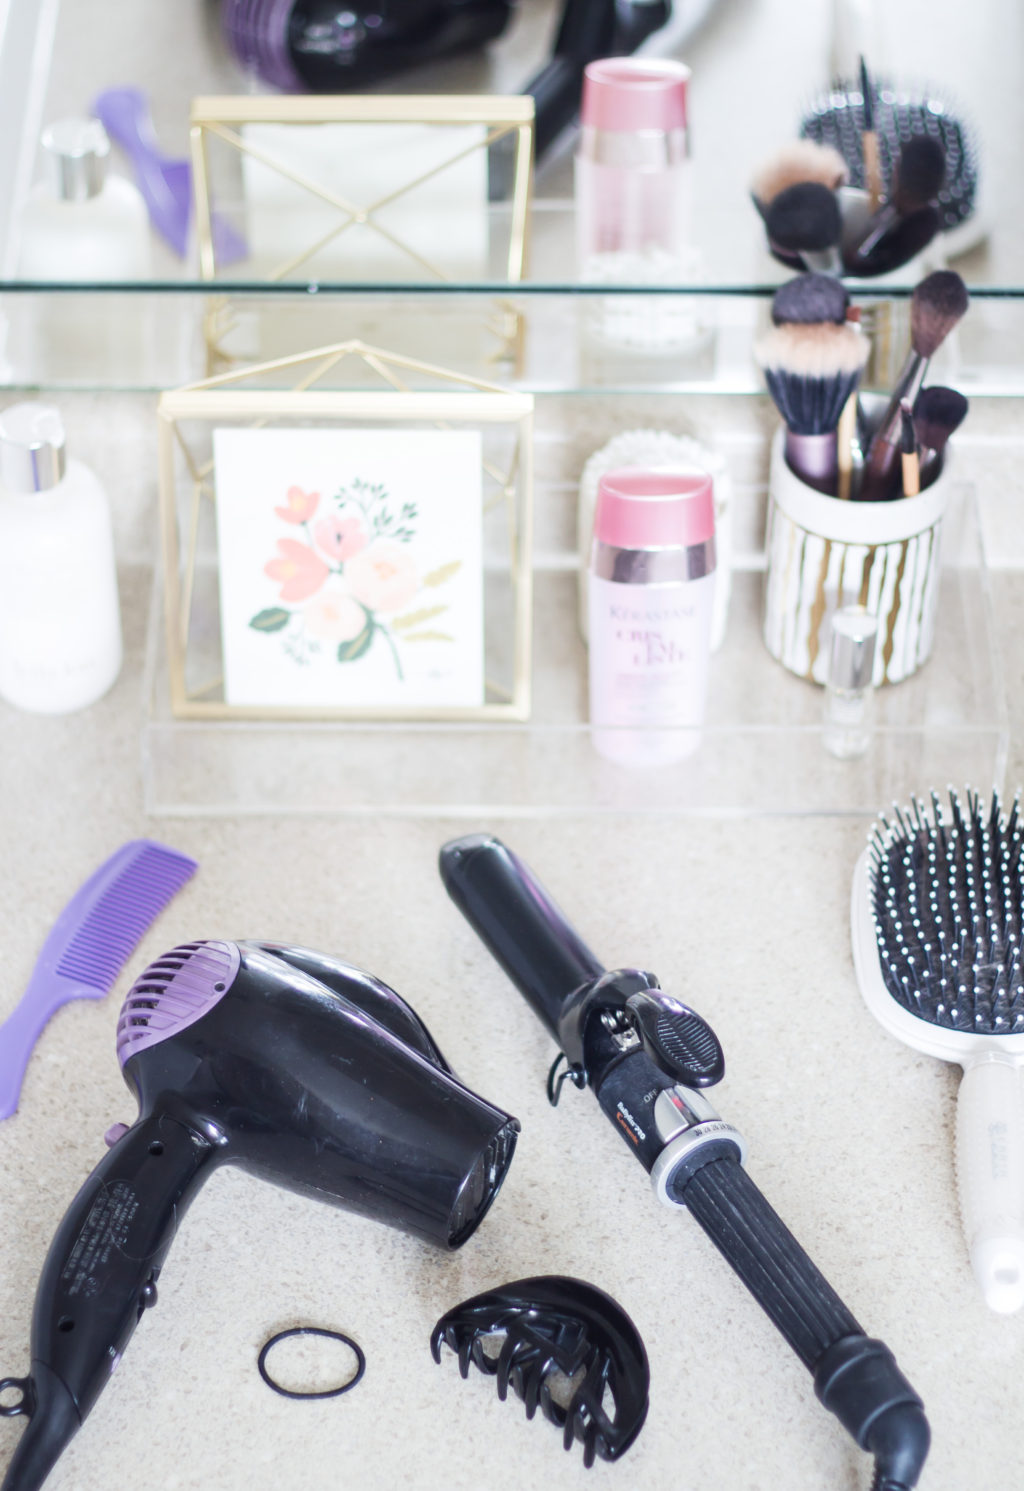
What I use:
1. Babyliss Pro 38mm curling iron (that’s the big one)
2. Hair dryer (any will do)
3. Hair brush/Comb
4. Hair elastic
5. Hair clip
6. Kérastase Cristaliste cristal sculpt
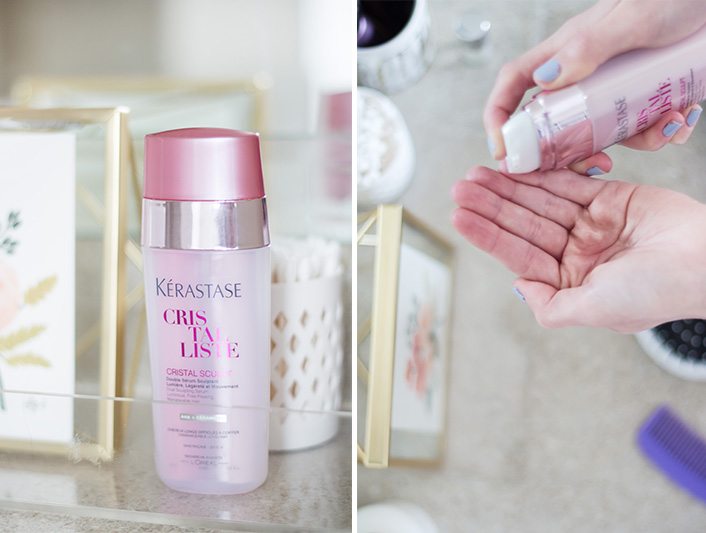
Step 1: While hair is still wet, I work in one pump of the cristal sculpt into my hair, concentrating on ends. Afterwards I fully comb through my hair, and get rid of any last bits of moisture with a hair towel.
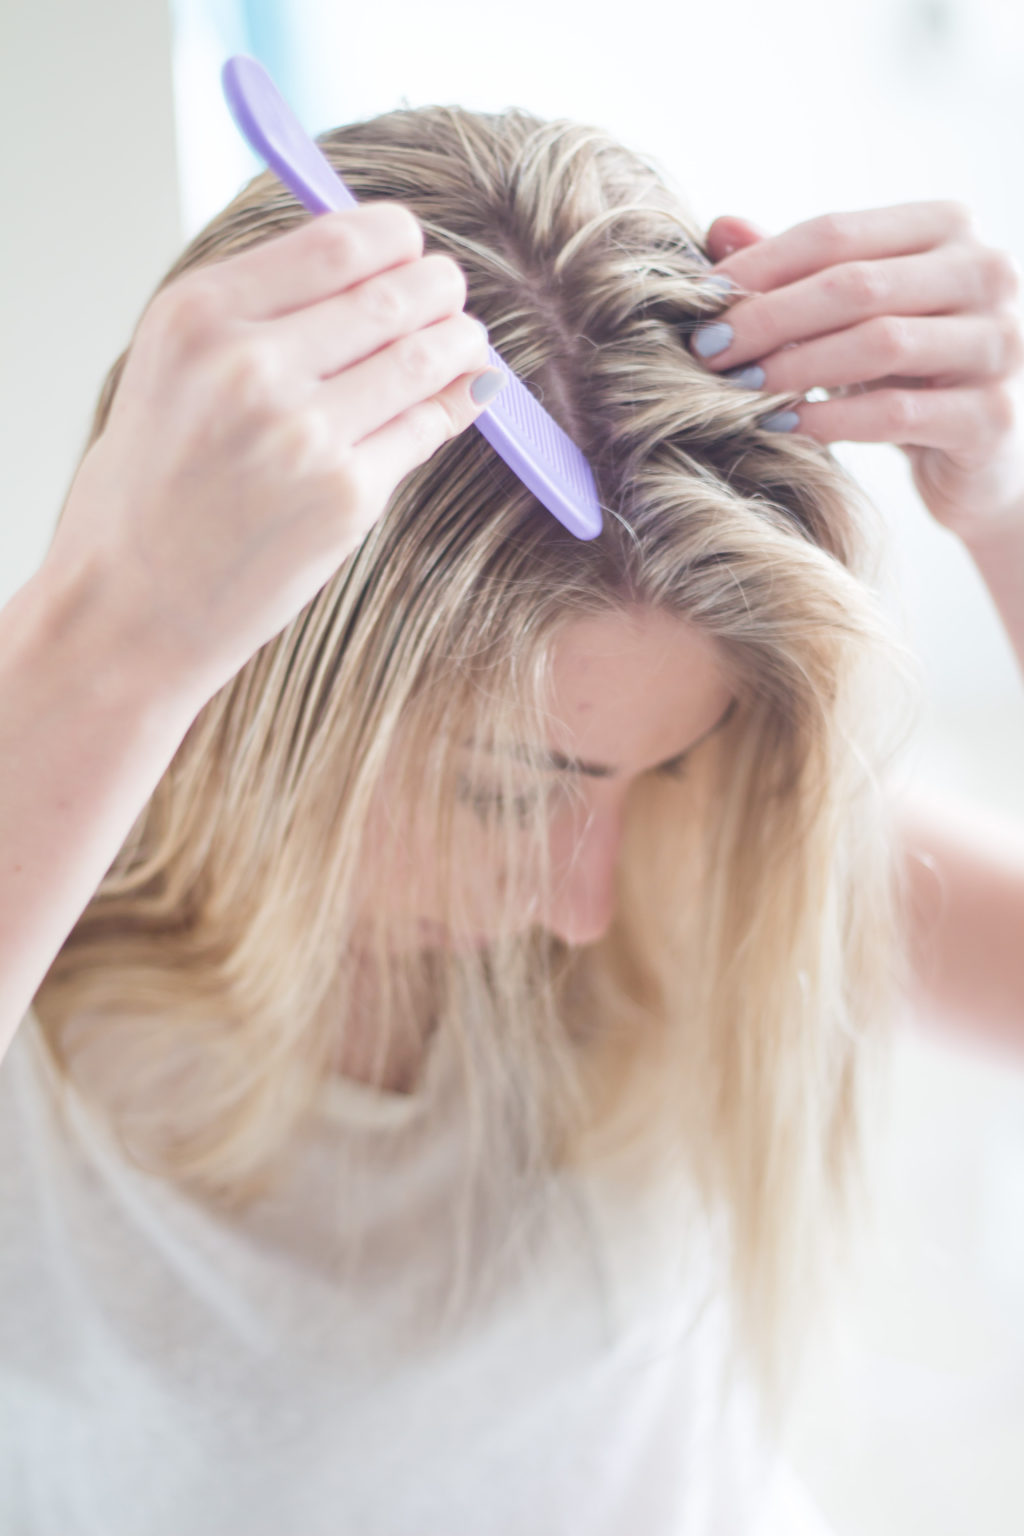
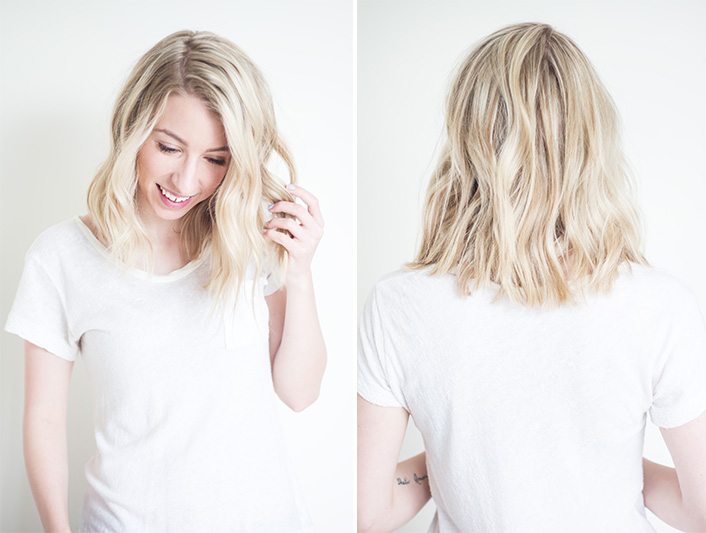
Step 2: I normally part my hair either in the middle or off to one side, it’s really whatever you prefer but for this look I parted it off to the side.

Step 3: I blow dry my hair in a downwards facing motion, making sure that is fully dry before I begin curling my hair. After it is fully dried I run my fingers loosely through my hair to remove any stubborn knots.
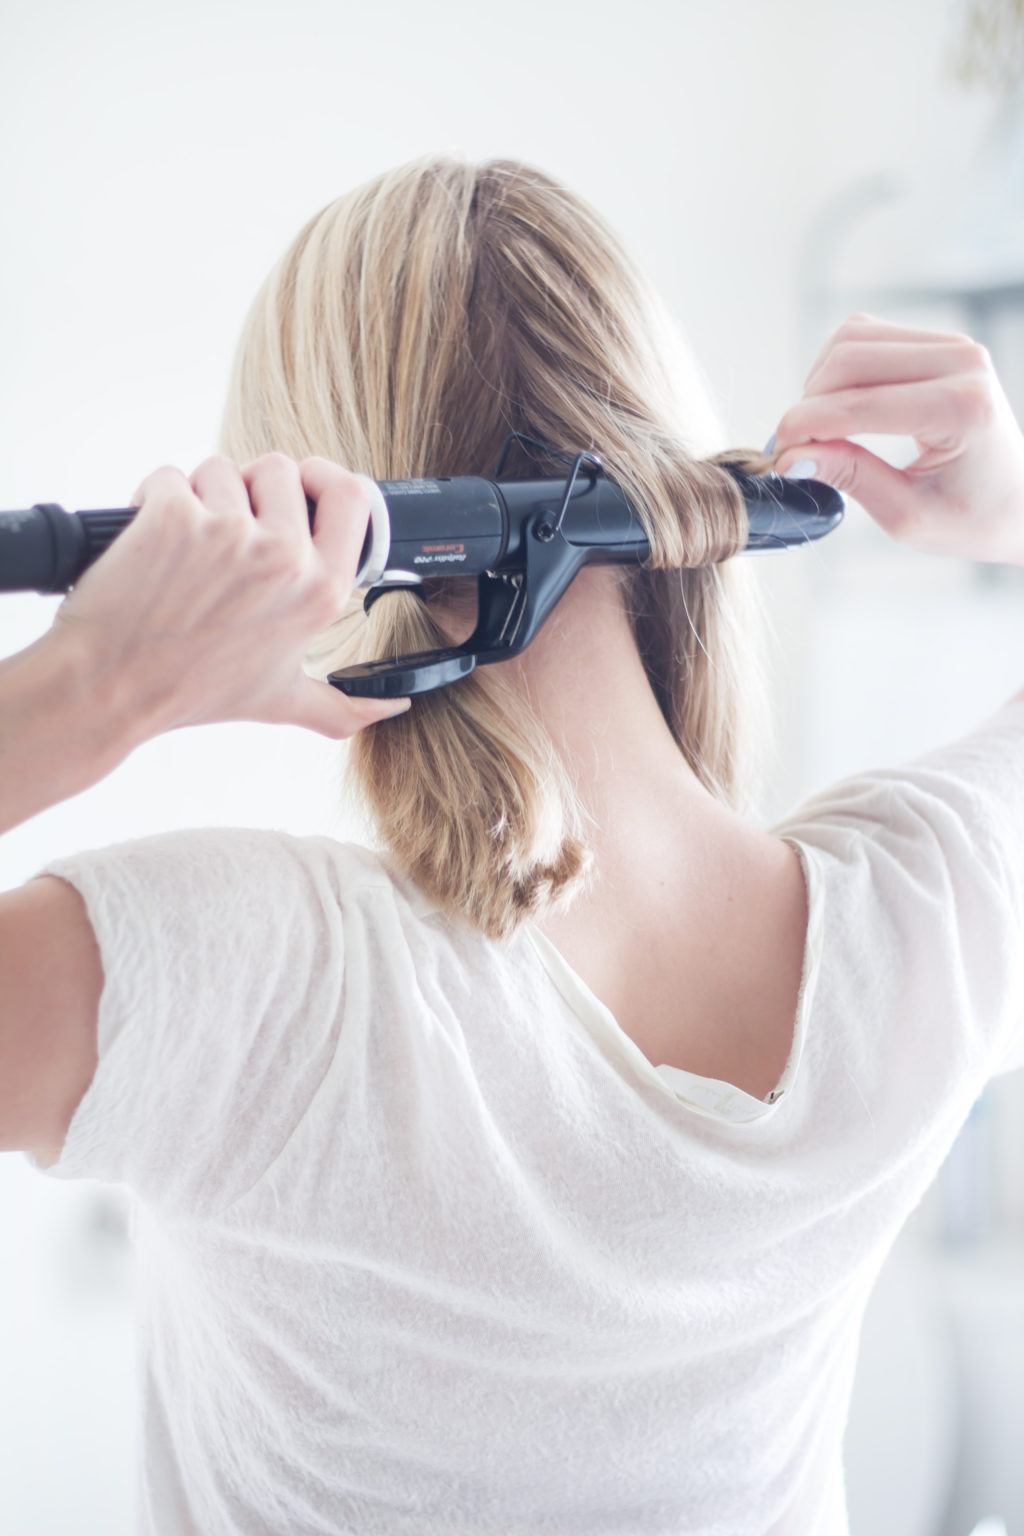
Step 4: I separate the two sides of my hair with an elastic. Sometimes I also separate my hair into a top layer and bottom layer with a hair clip, but whichever way you prefer will achieve the same results. I curl my hair starting with the back, using between 1/2″ and 1″ sections. Taking my hair I loosely wrap it around the iron (not using the clamp). For my back pieces I usually only end up wrapping my hair around once or twice as it’s short, and I like to leave the ends out of the iron to give my hair a more natural look. I hold the end of my hair (as shown in the picture) and leave my hair in the iron between 6-10 seconds, depending on how tight I want the curl to be.
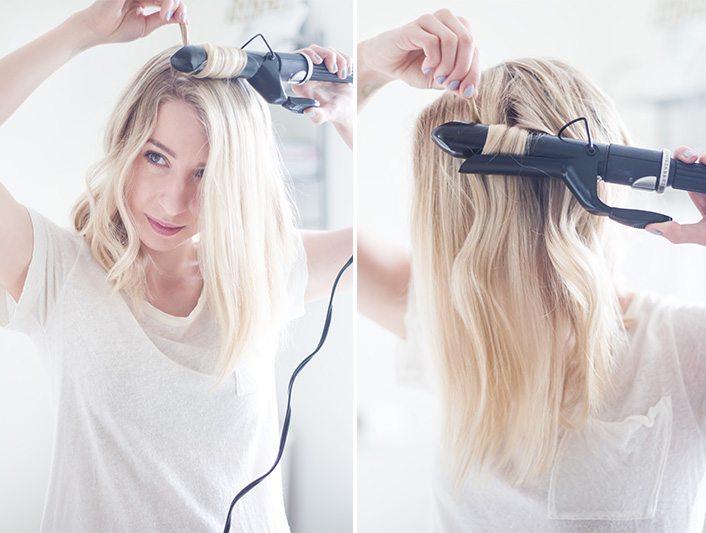
Step 5: For each side of my hair I wrap the curl in opposite directions to achieve a more free flowing and natural looking curl. Sometimes I open the clamp and tuck my hair underneath it (shown in picture), and sometimes I wrap my hair around the barrel without the clamp. I find this creates multiple different types of curls which I think give a really beachy look. I also leave about 1″-1 1/2″ of my hair out of the curling iron as mentioned in step 5 for a more natural curl. For the front of my hair I usually curl smaller sections anywhere between 1/4″-1/2″ as I find it creates nice shape and movement around my face.
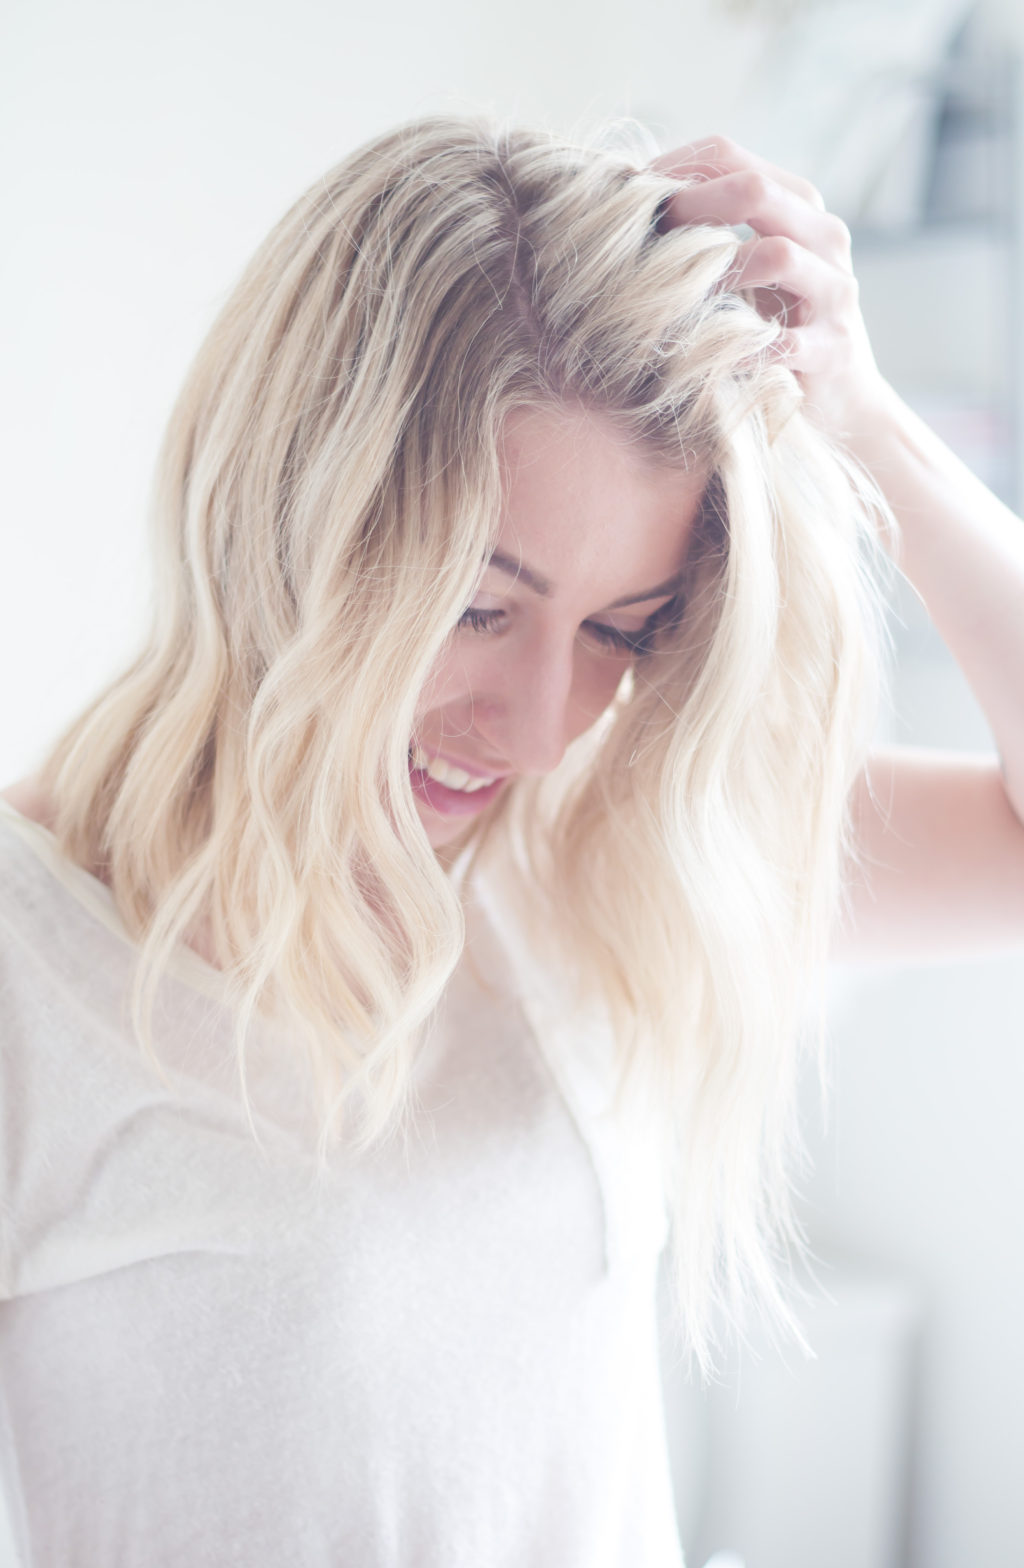
Step 6: For the final step I just run my fingers loosely through my hair and shake out the curls to loosen them up, which creates a beautiful beach wave. Sometimes I spray a bit of seal salt spray into my hair to give it a grittier texture, but I didn’t have any at this time (whoops!).