When I decided to take the plunge and go for bangs last fall, I knew that if/when I decided to grow them out that it was going to be a huge pain in the rear. But what I didn’t know was how quickly I actually would decide to grow them out. While I loved rocking bangs and actually think that they suited my face shape extremely well, I did, in fact, end up keeping them for only a few months. My short-term bangs were mostly because after Jamie proposed, I quickly decided that I didn’t want to have bangs on my wedding day and so I began growing them out. It feels like it is taking FOREVER for my bangs to catch up with my other strands but I have become a master at styling and blending my nose length pieces in with the rest of my hair. The only annoyance has been when I style and sleep on my hair, the next day one side will just not cooperate…no matter what I do! I hate washing my hair every day and so I found myself playing around with hairstyles recently and came up with this quick braided hairstyle solution for my second-day hair issues. This is such a simple braid style but I have loved wearing it in between washes. This is a style anyone, no matter their bang situation can quickly and easily do and it looks so pretty, unexpected and pulled together. This might just be the smartest 2 minutes in hair styling history!
 Step 1: This braid style works best on wavy, second-day hair. For my waves, I just wrap my hair around a large barreled curling iron, comb it out with my fingers and finish off with a dry texturizing spray for a beachy, tousled look.
 Step 2: Starting at the crown on one side of your hair part a thin amount of hair about halfway down the middle where your hairline meets the top of your ear. Begin Dutch braiding your hair in a downwards angle. If you’re unsure how to dutch braid, I found a great written + video tutorial here (so much better than my trying to explain, haha!).
 Step 3: Continue your Dutch braid all the way down to your ear, guiding the braid in behind your ear.
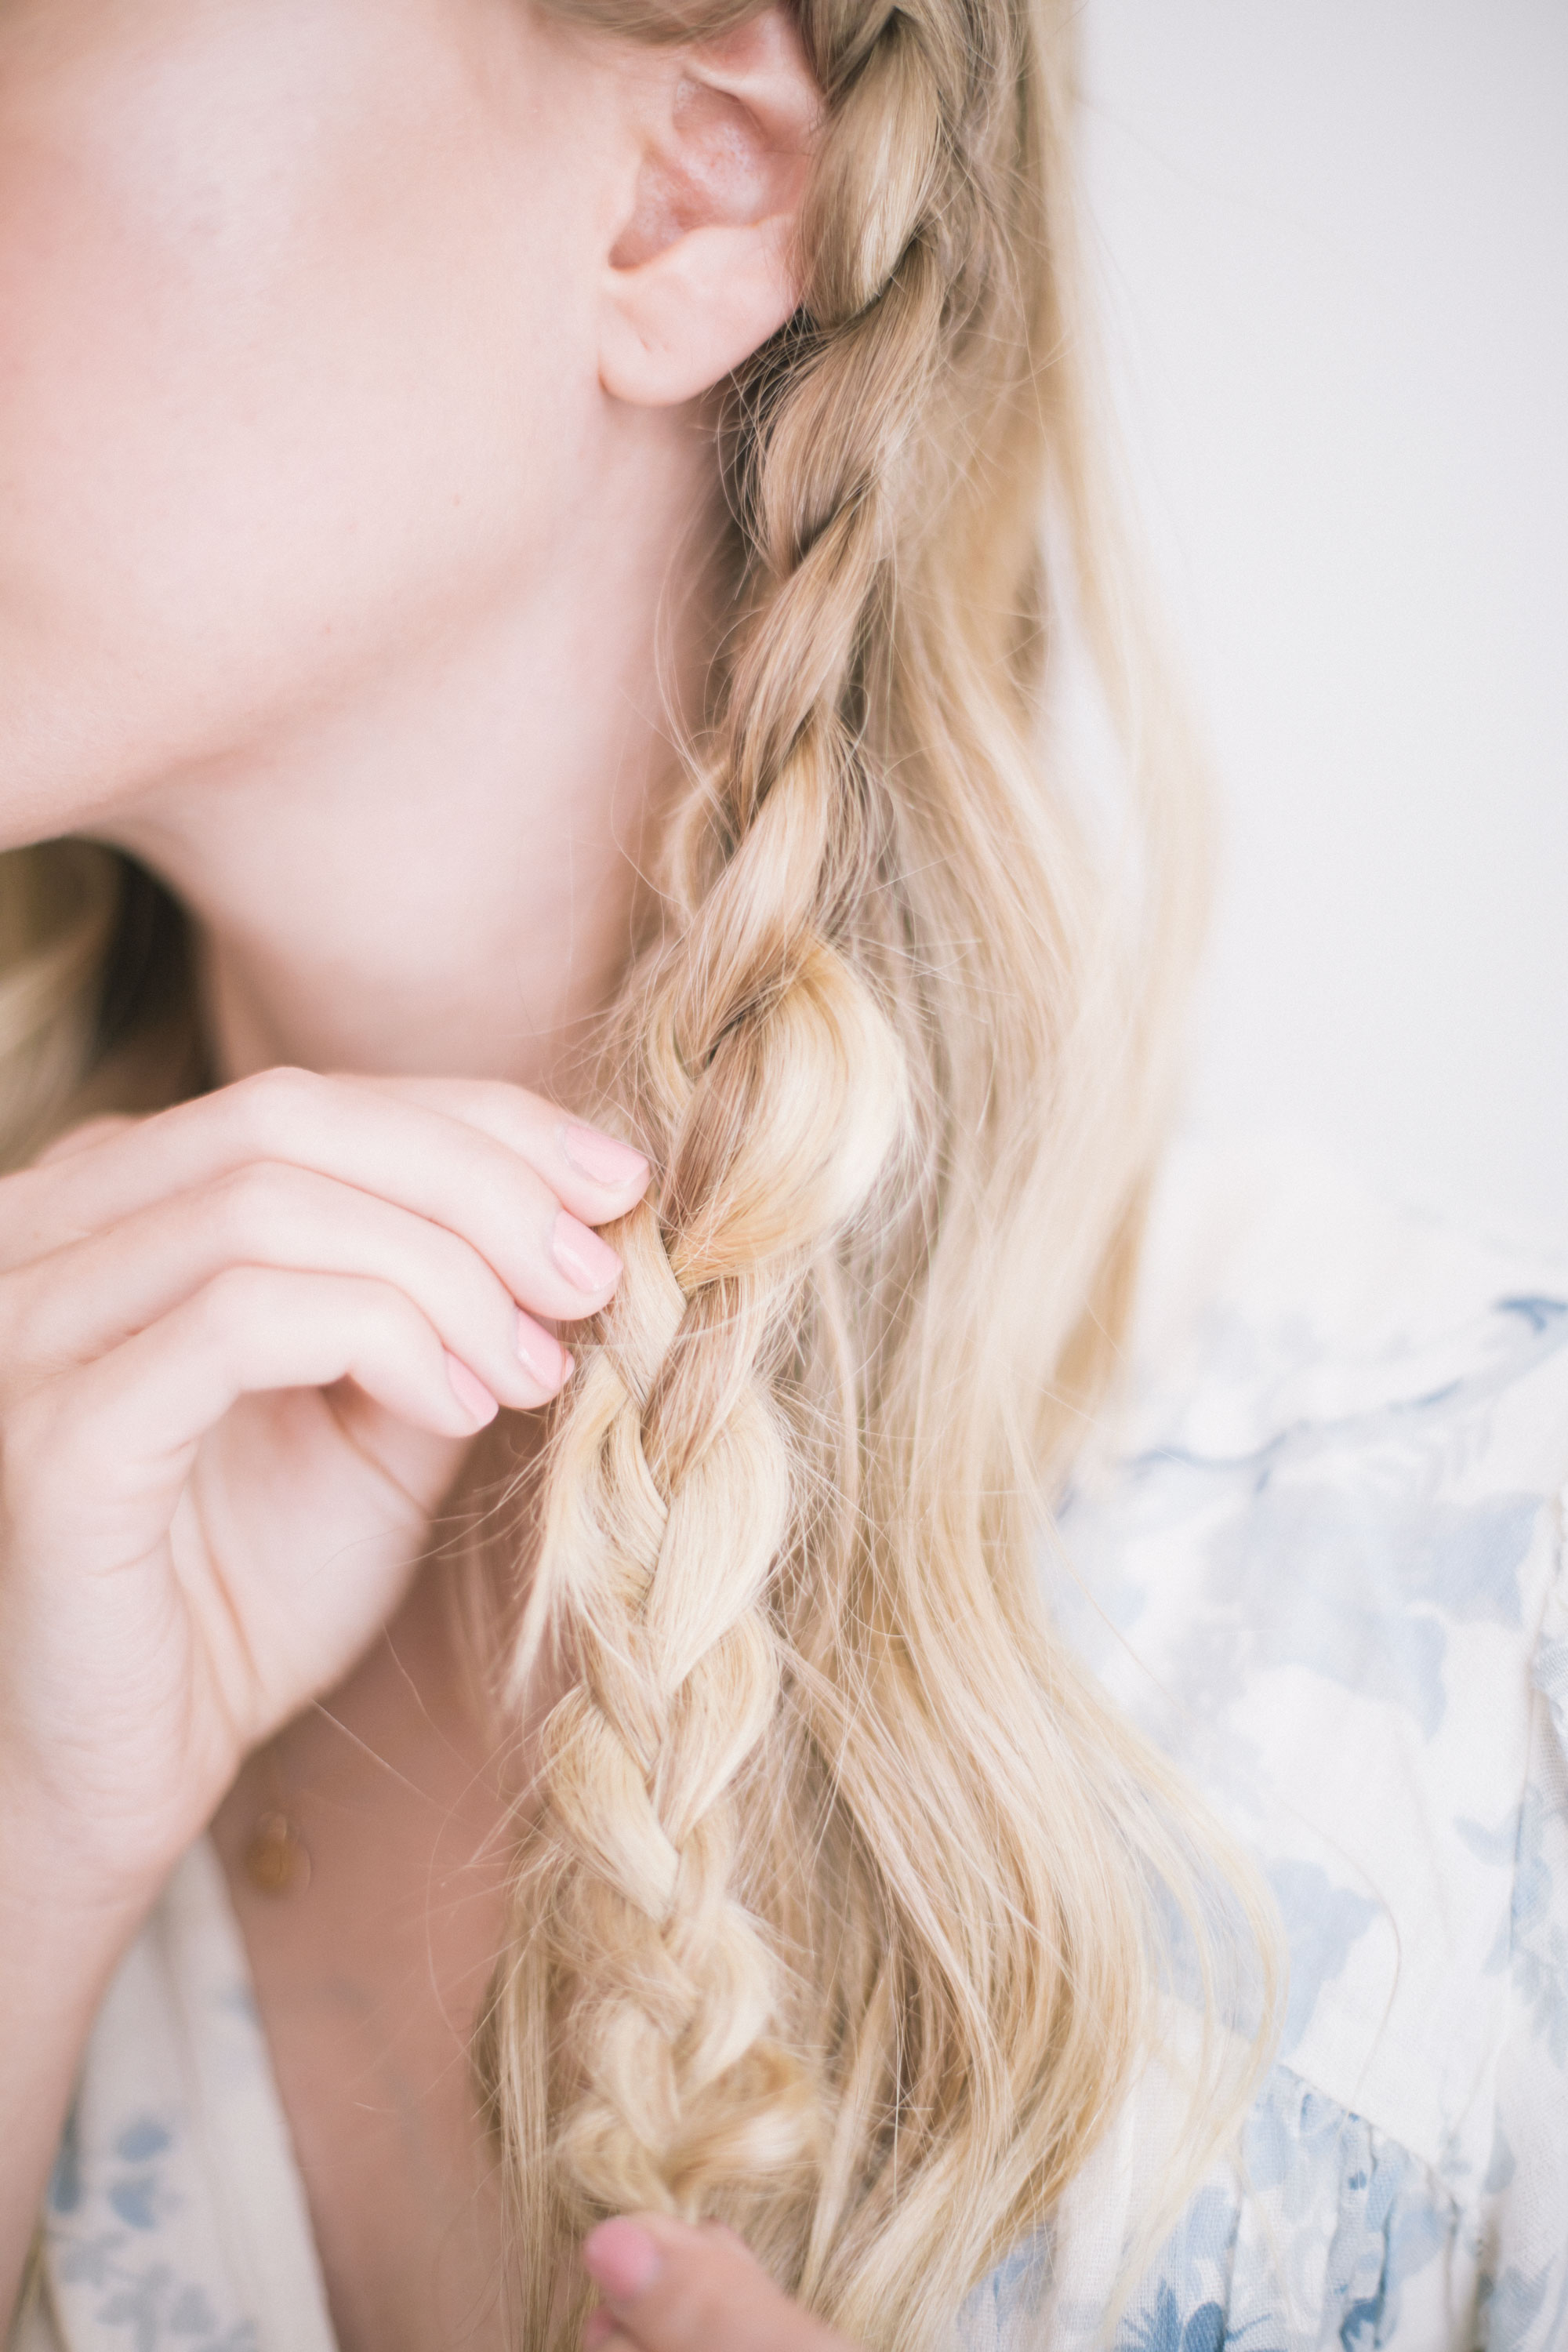
 Step 4: Once you’ve reached 1/2 way down your ear, stop Dutch braiding and continue with the classic braiding method (don’t grab new pieces of hair to attach the braid). Once you’ve braided to about 2 inches before the end of your hair, simply secure the braid with a clear elastic hair tie.
 Step 5: When your braid is secure, hold the bottom of your braid where the hair elastic is and begin pulling upwards at each loop. This will help the braid lay flat on your hair so it blends into the rest of your hairstyle. Doing this also allows the braid to look much fuller so make sure to do this all the way to the top, it will look like you have a ton of hair! Also, don’t worry if a few pieces start falling out, it just makes the braid look more natural and “lived in”.