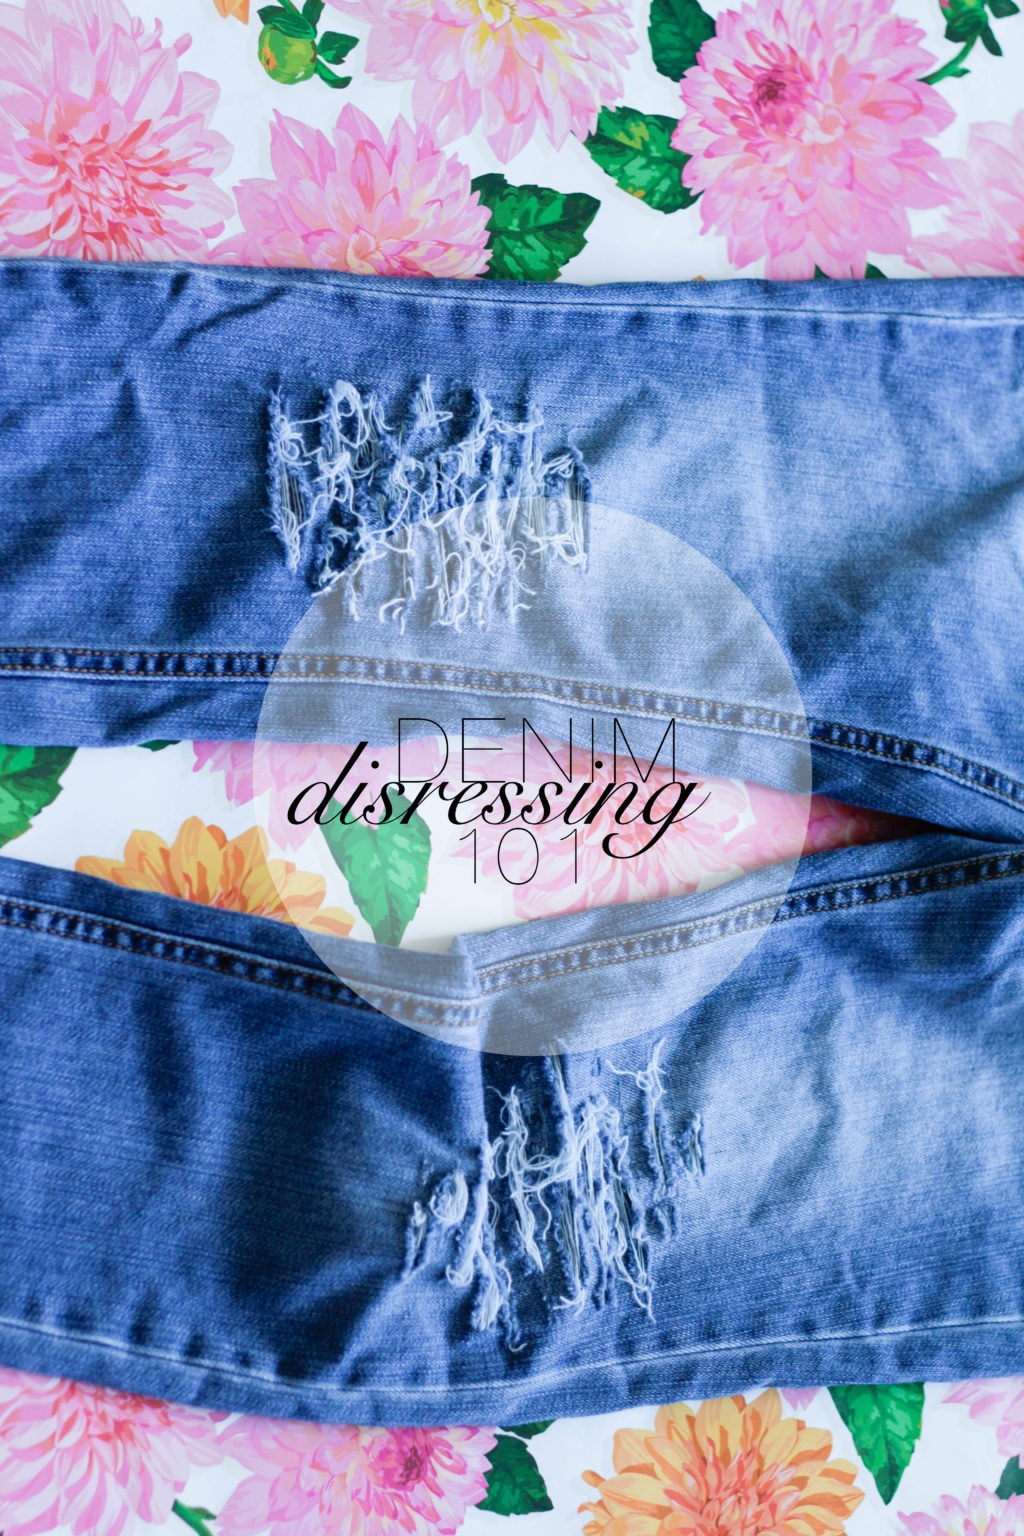
 I love the look of distressed jeans (see distressed denim awards here), but sometimes finding the perfect pair can be difficult. Often times the distressing is done just right but the fit just isn’t working, or vise versa. I purchased these jeans last year at Joe Fresh and loved how they fit (outfit post here). I have since worn them multiple times and noticed they were beginning to get worn in. I figured it was the perfect opportunity to distress them to what I thought was the perfect destroyed boyfriend jeans. Follow along below to learn how to distress your own pair of jeans! It’s takes no time at all and the process is fun and so rewarding!
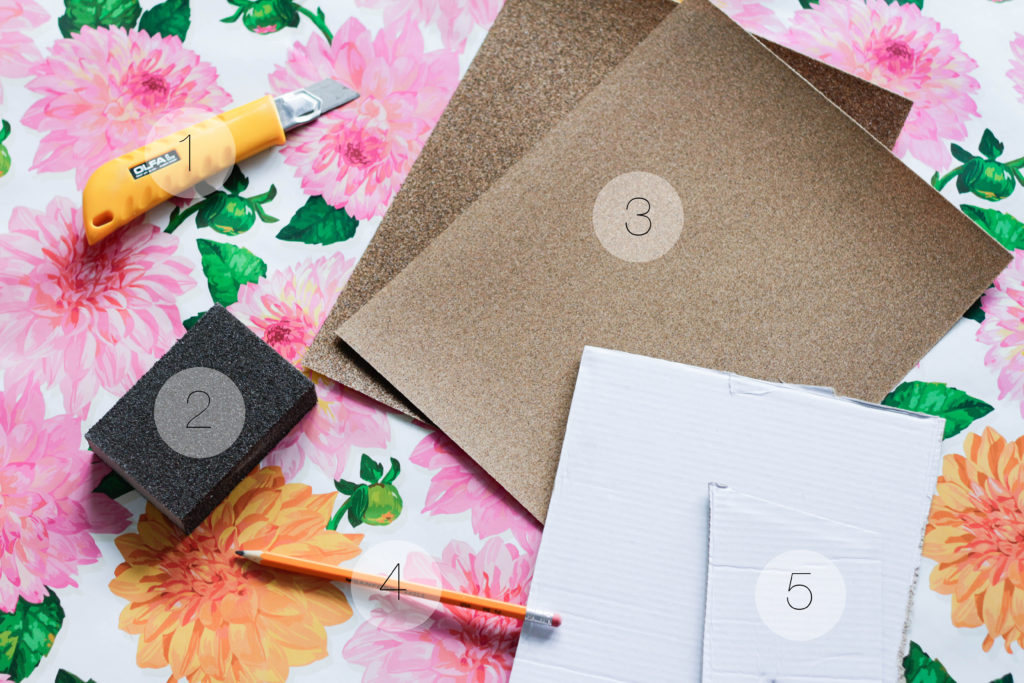 1. X-acto knife
2. Sandpaper block
3. Different grains of sandpaper
4. Pencil/Pen
5. Cardboard
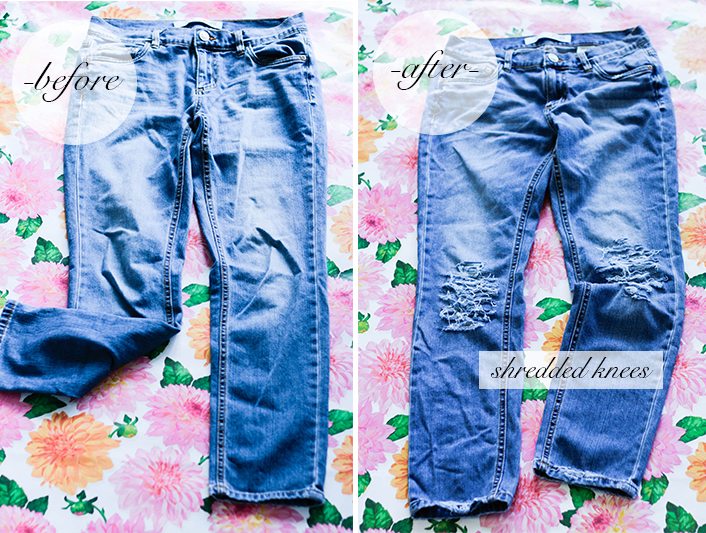
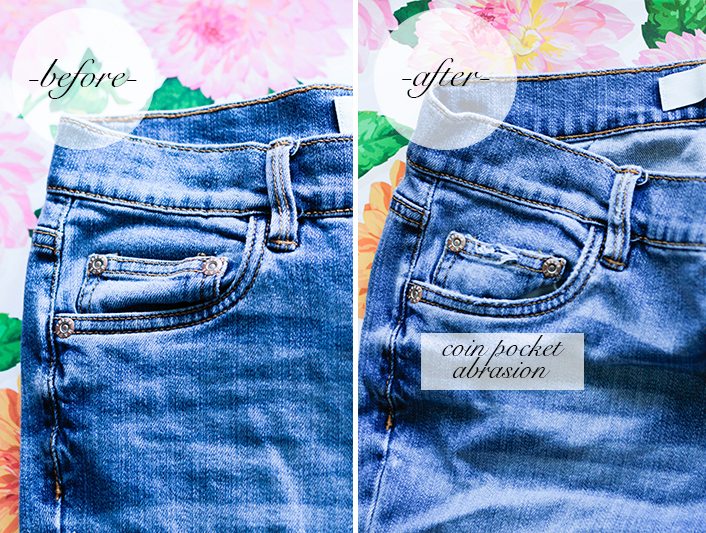
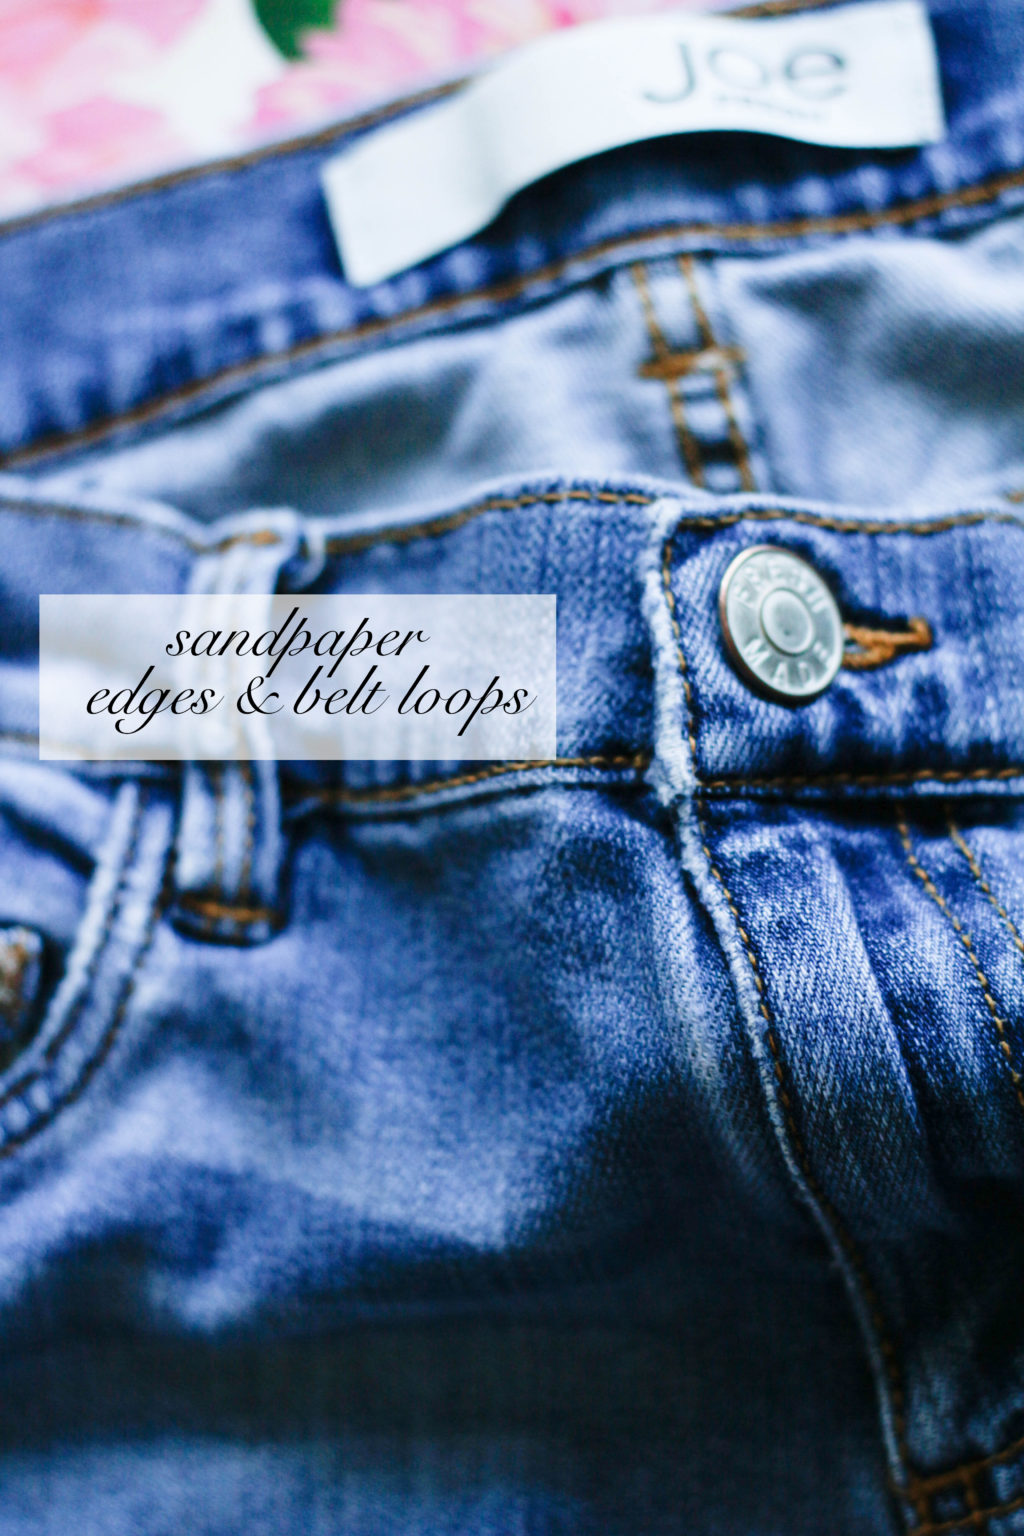
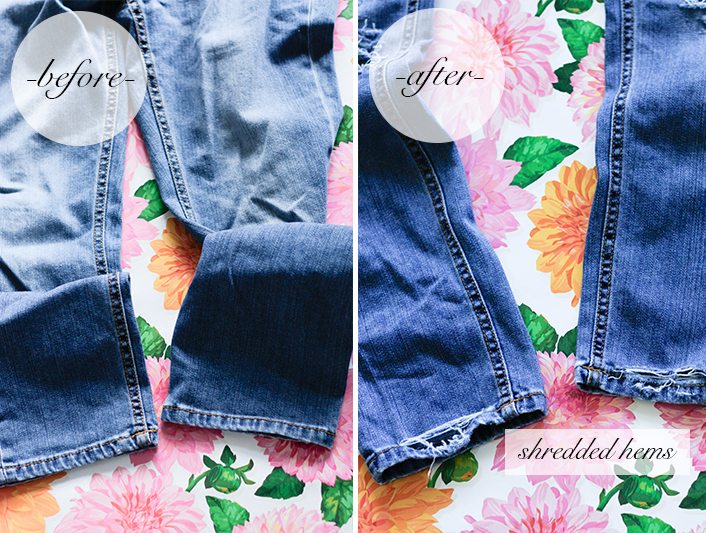
Step 1: Begin by deciding where you would like to distress or shred your denim. I chose the knee caps, coin pocket, belt loops, front/back pocket edges, back pockets and bottom hems.
Step 2: Begin by taking the bottom hem or leg of your jeans and fold them up to the crotch. This is where your kneecaps would land if you put on your jeans. Make pencil marks in between where your knees will start and where you would like the shredding to end. If you want more shredding, just make a mark higher on the thigh.
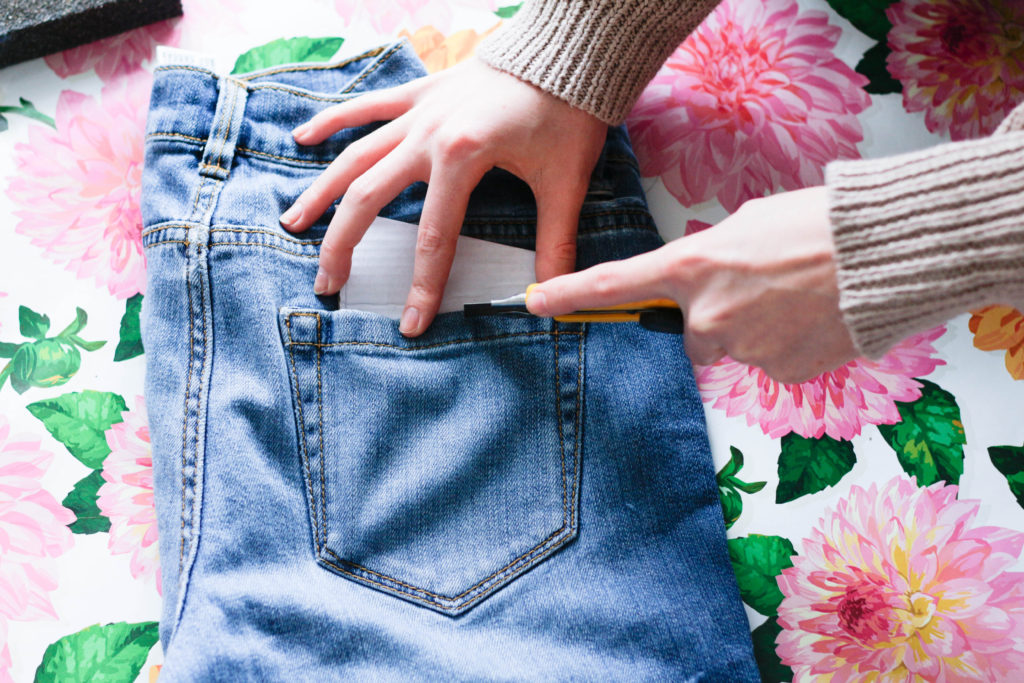
Step 3: MAKE SURE that before you shred anything that the cardboard is in-between your jeans. This will create a barrier so that the other side of your denim does not accidentally get cut.
Step 4 (KNEES): With your X-acto knife very carefully slit straight (ish) holes in a horizontal line from the top of where you made your pencil mark the bottom leaving about 1/4″ of space between each slit. Your jeans will look just as though there are a bunch of slits in it, with minimal fraying (this is how they are supposed to look). I also took my sandpaper over the knees to give them a bit more abrasion.
Step 5 (BOTTOM HEMS): Again take your X-acto knife and make 1 slit just above the hem line. With your sand paper block roughly sand the hems and where you made the slit. This will give your hems that very worn in feeling.
Step 6: (ALL POCKETS AND BELT LOOPS): For the pockets you will want to sand them down with the sand block or paper, making sure to focus on the edges. If you want a bit more distressing take your X-acto knife and make small slits in the hems or any other places you would like to see some abrasion.
Step 7: Once your jeans are distressed to your liking, throw them in the washing machine and dryer. You may need to do this a couple of times to get the fraying just right.