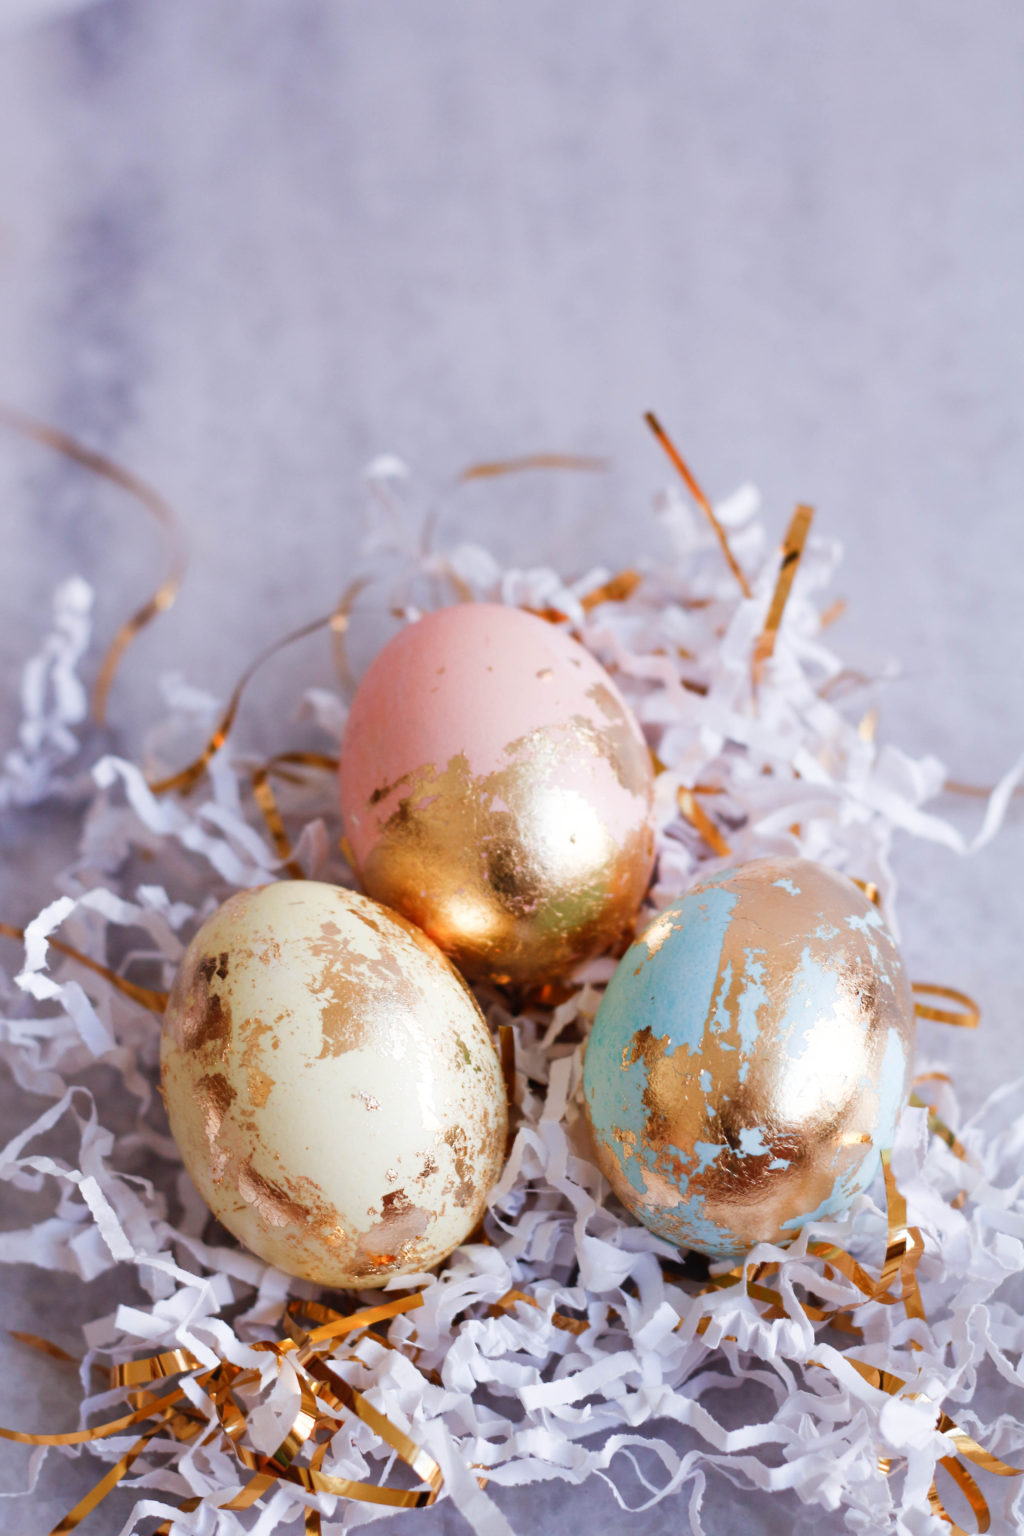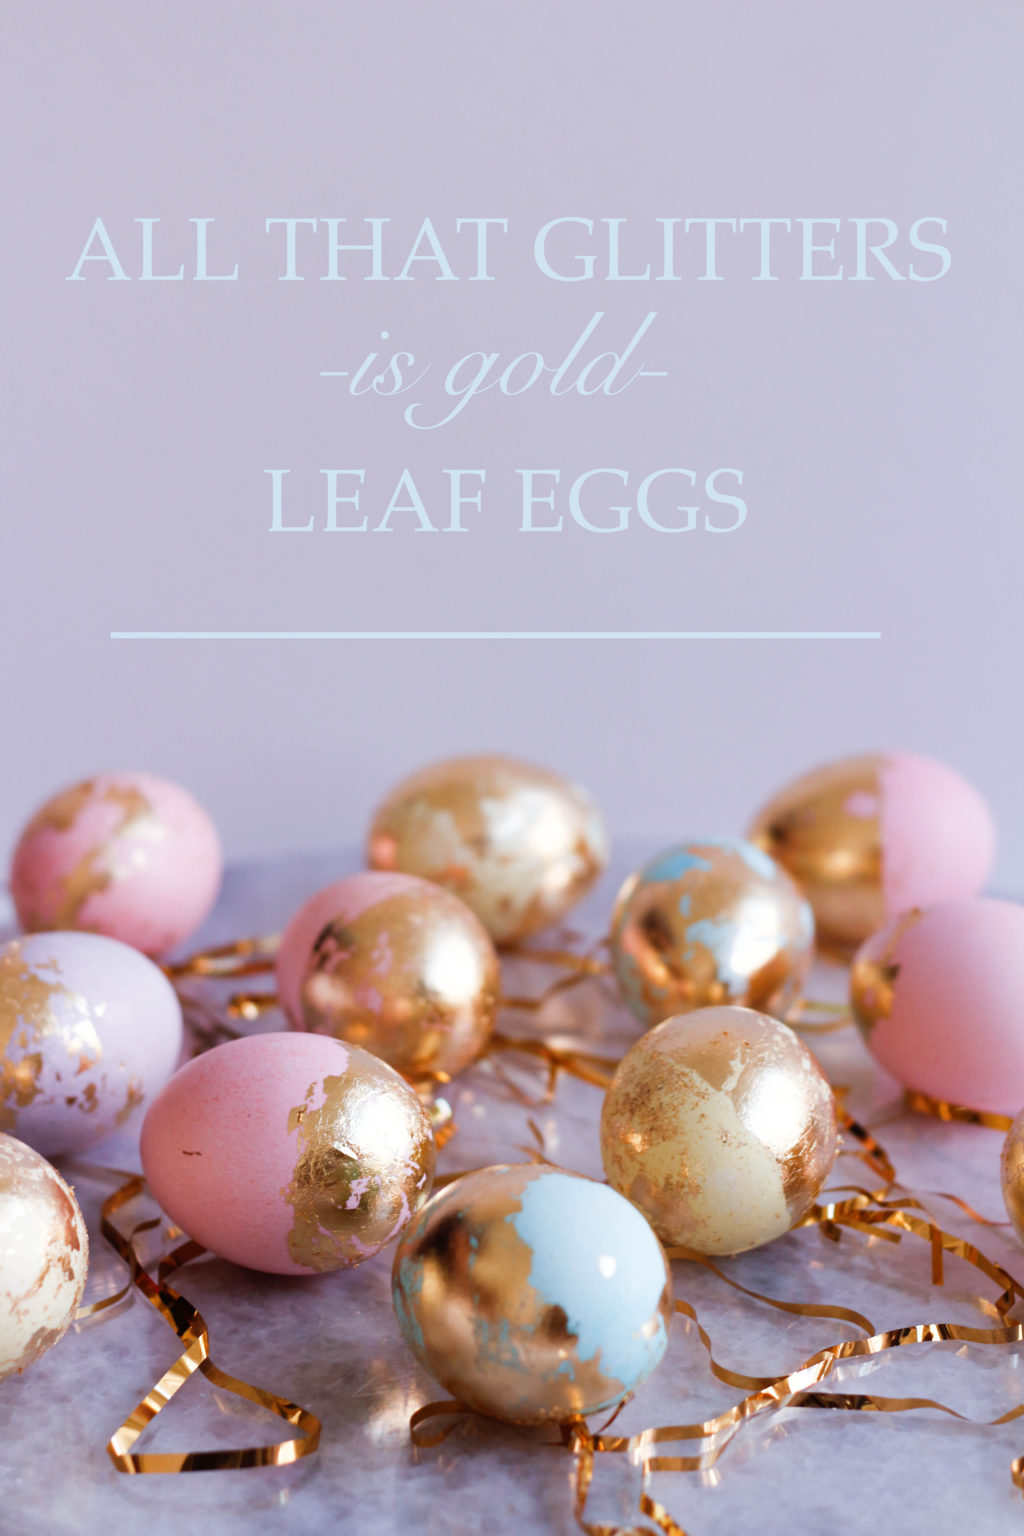
Every Easter When I was a child, my mom would spend hours blowing out eggs for my sisters and I to decorate. Whether it was dye, stickers, paint or glitter… you name it, we used it to create our “masterpieces”. Since those days my taste for decorating has become more refined, but I will never forget the memories of decorating easter eggs each year. I haven’t actually decorated easter eggs in quite some time but this year I really wanted to try out these gold leaf eggs I saw on Martha Stewart’s website. I ended up boiling my eggs but after these beauties were complete I regretted not blowing them out. They are the most glamorous and elegant easter eggs I have ever seen, and although they do take some time to complete the result is absolutely stunning.
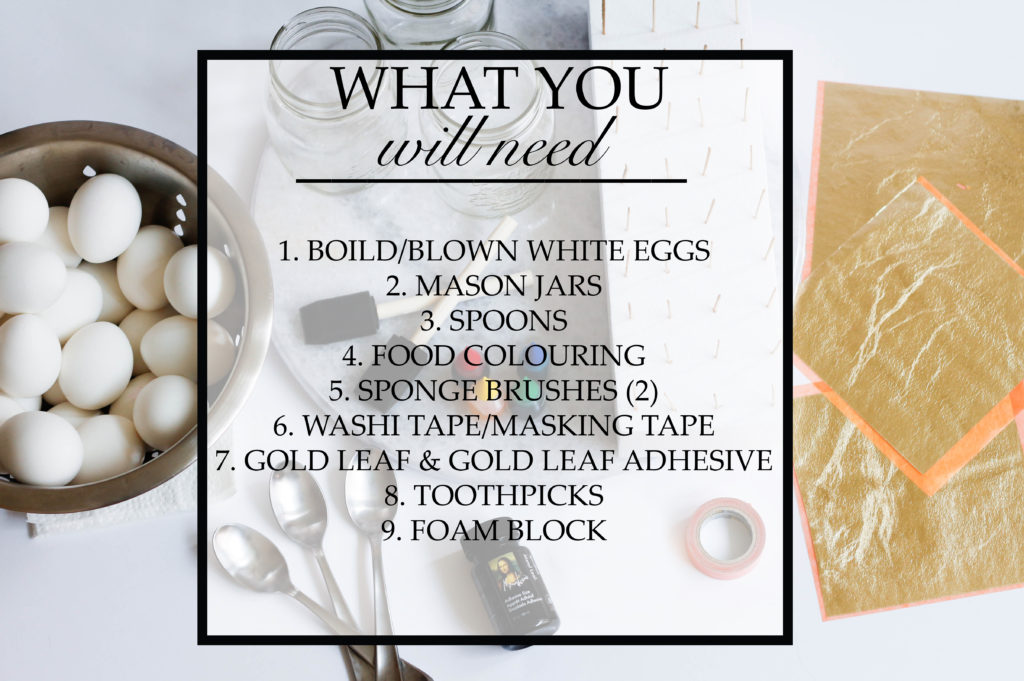
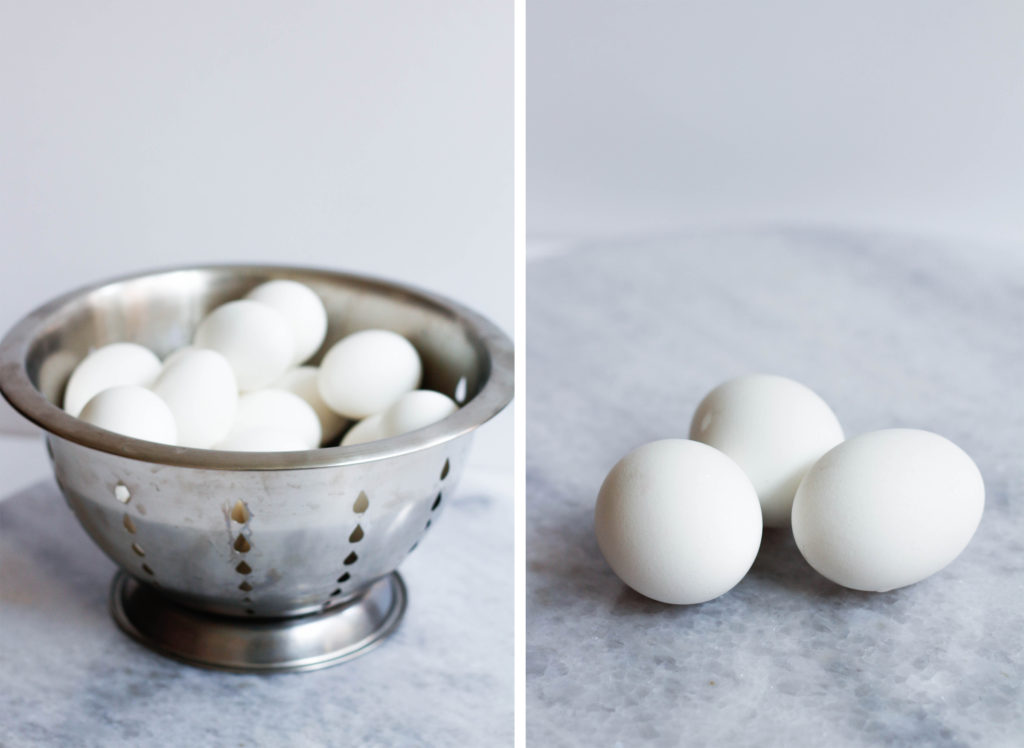 Step 1: Boil eggs for 20 minutes and then submerge them in cold water until the eggs are cold. If you want to keep your eggs then you will want to blow them out.
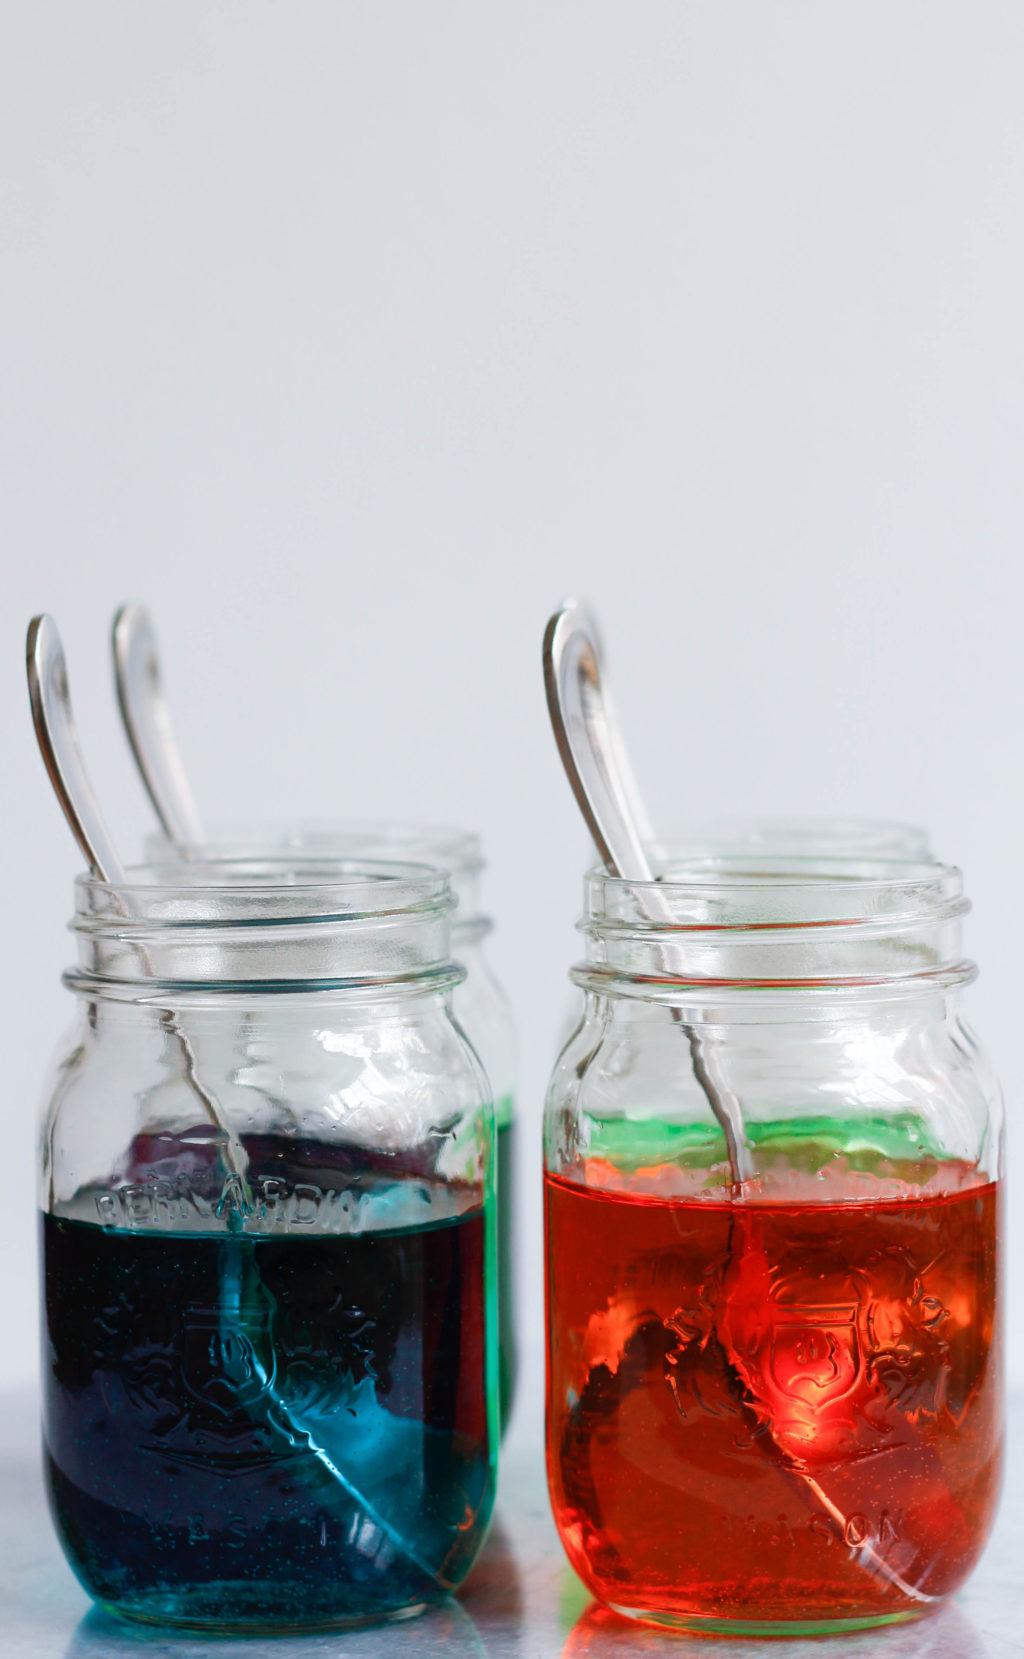 Step 2: While you are waiting for your eggs to cool, add water and food colouring to mason jars to create the dye for the eggs. Here is a chart to give you an idea of dye to water ratios and dye colours
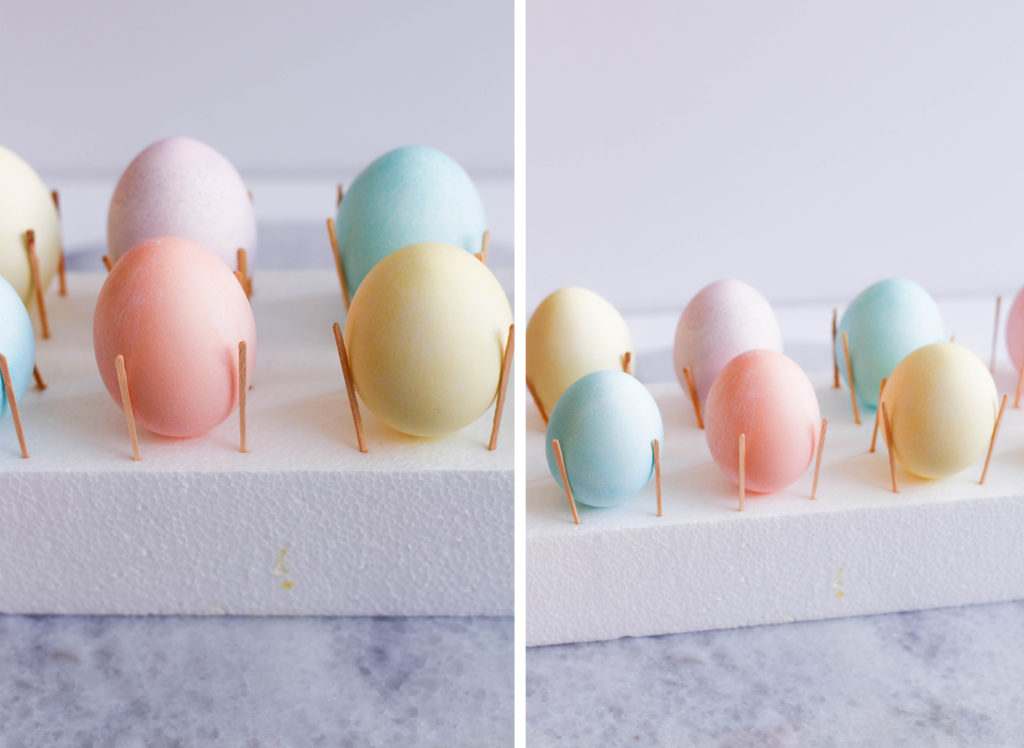 Step 3: Once your easter eggs are dyed the colours you would like (I did pastel shades) lay the wet eggs on top of toothpicks in a styrofoam block.
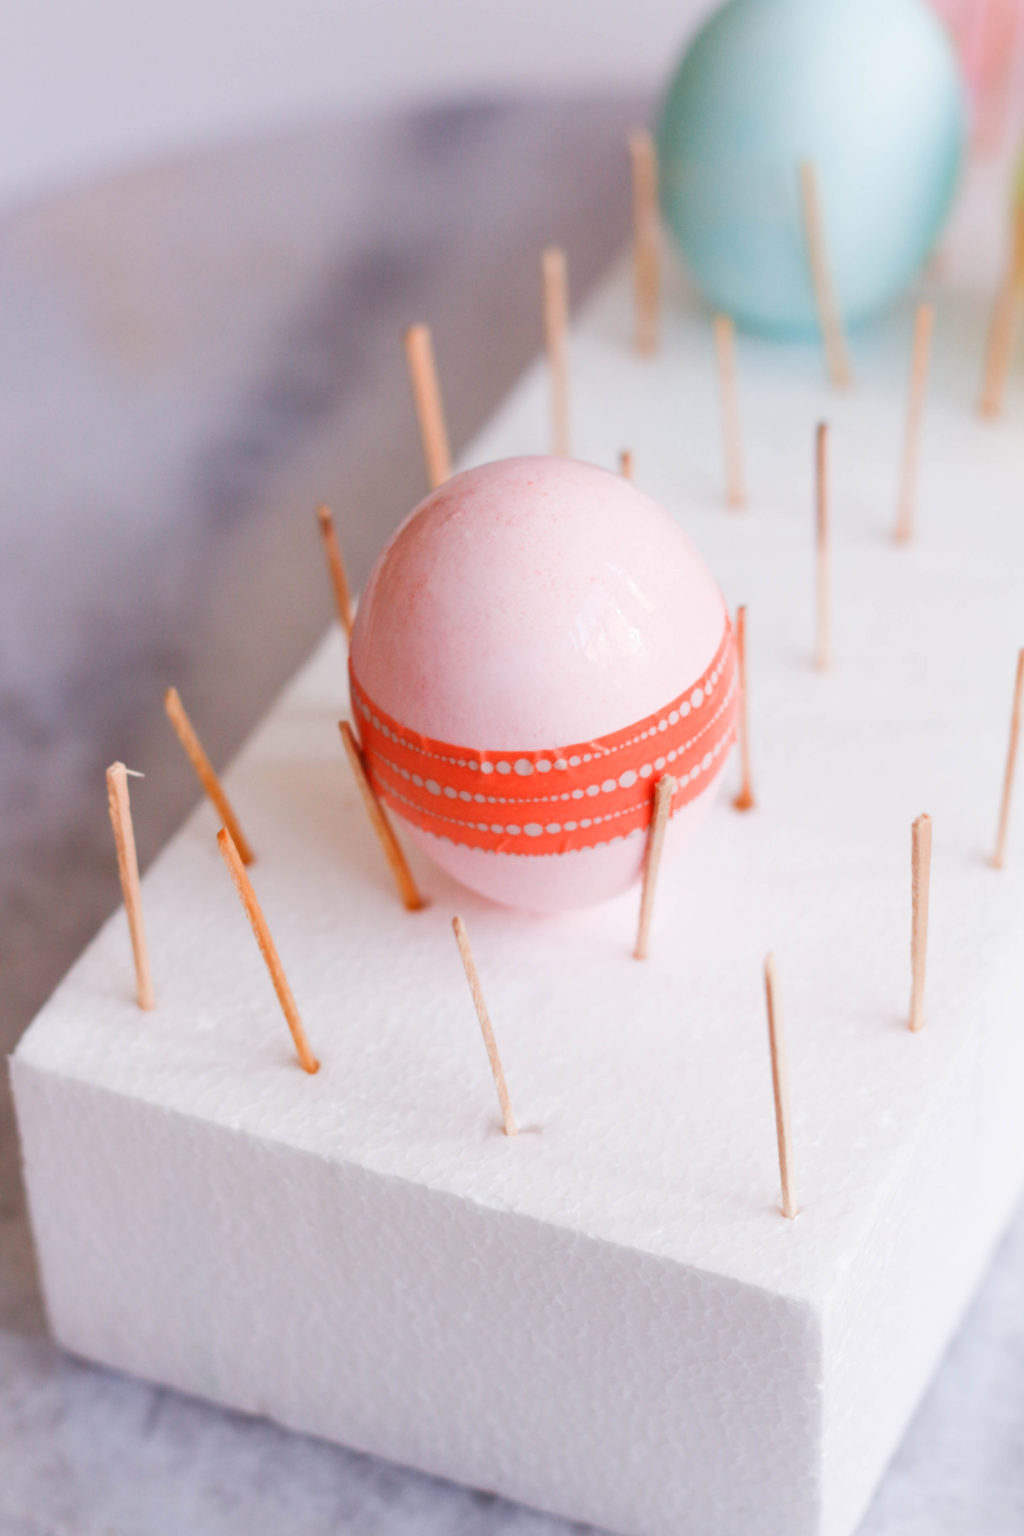 Step 4: If you decide to only gold leaf half of your eggs you will need to securely wrap washi tape or masking tape around the eggs. Apply a thin lucite layer of gold leaf adhesive onto your egg and allow to dry until tacky.
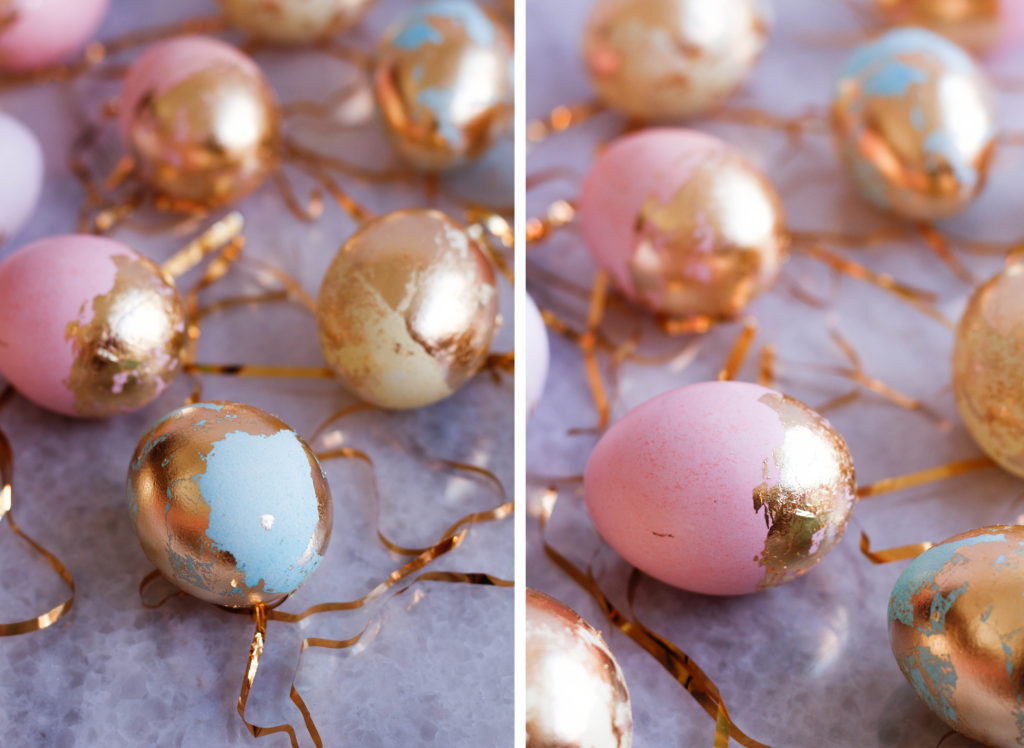
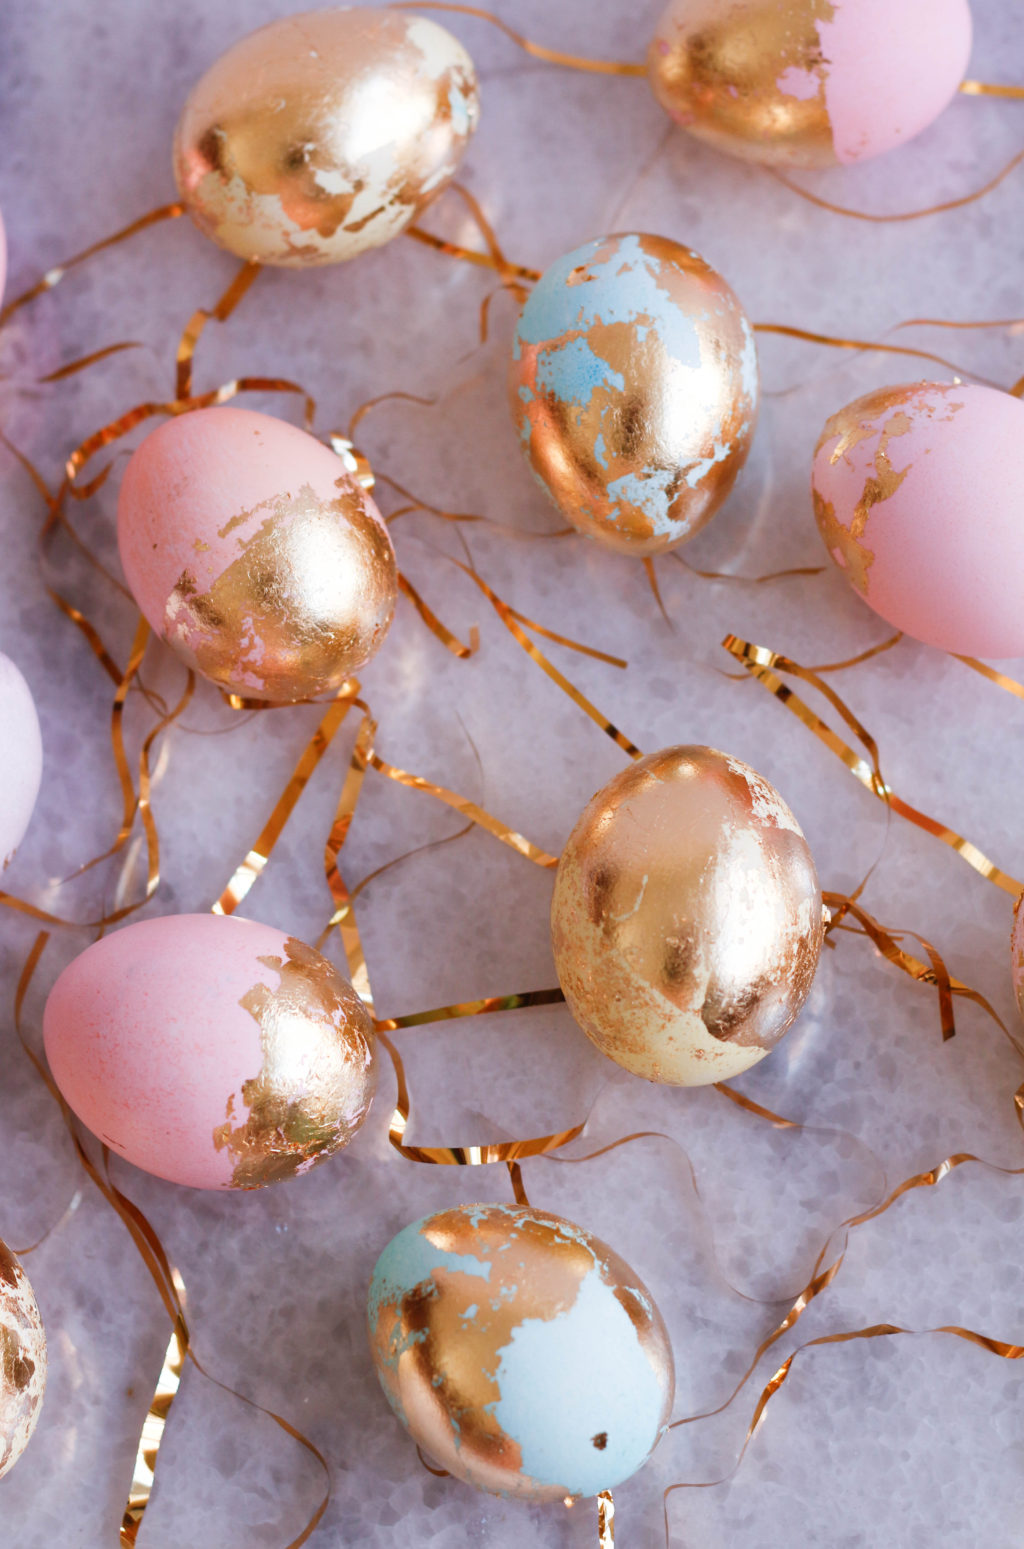
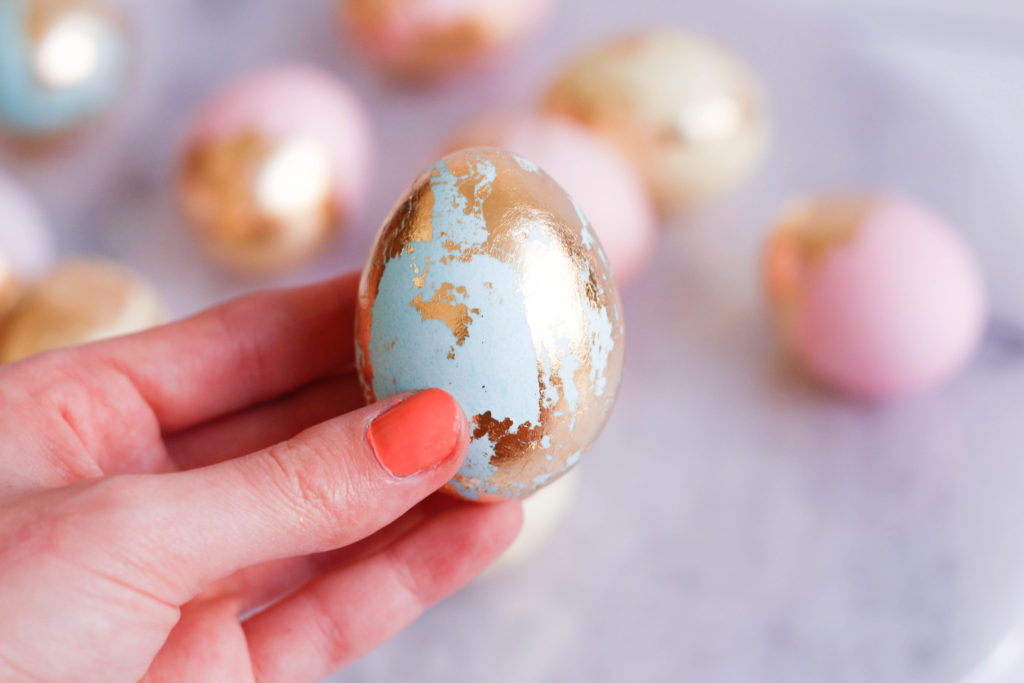
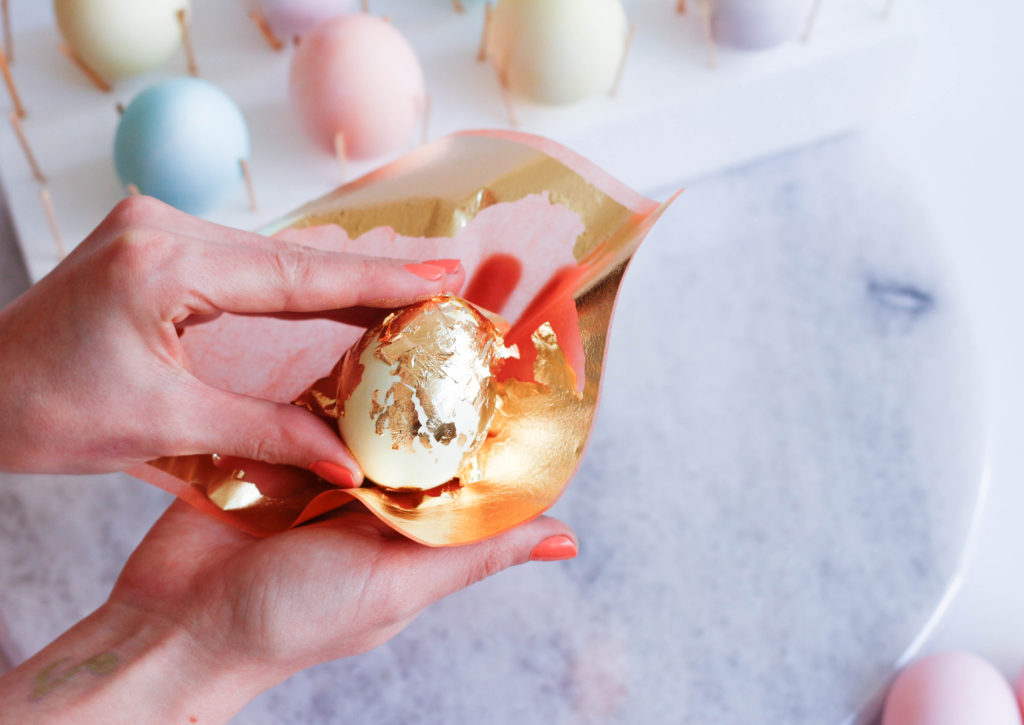 Step 5: Roll your eggs around the gold leaf leaving some gaps so the colour will show through
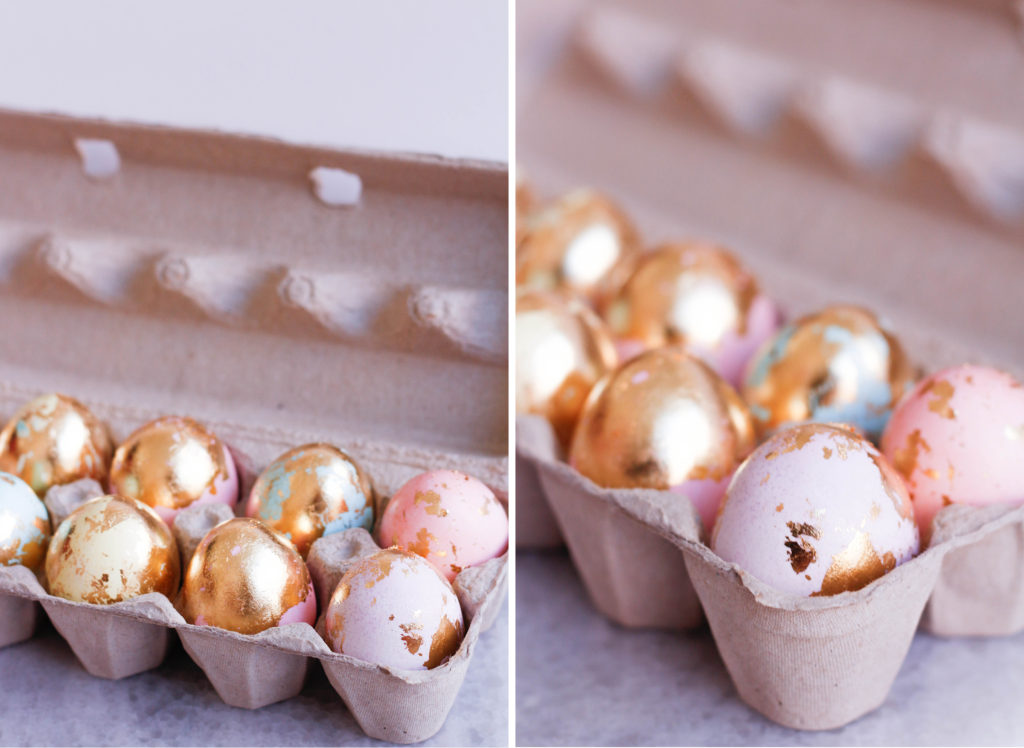 Step 6: Allow eggs to dry fully. TIP* if you decided to blow your easter eggs and want to keep them make sure to apply a sealant to the gold leaf so that it doesn’t oxidize