
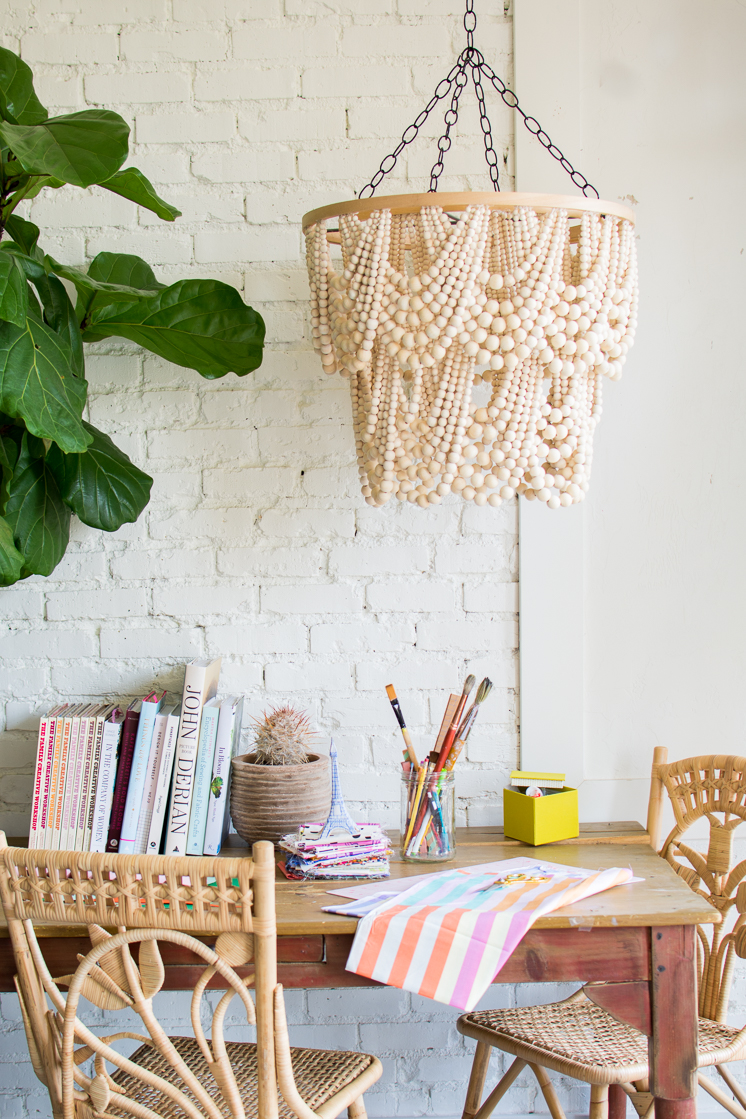
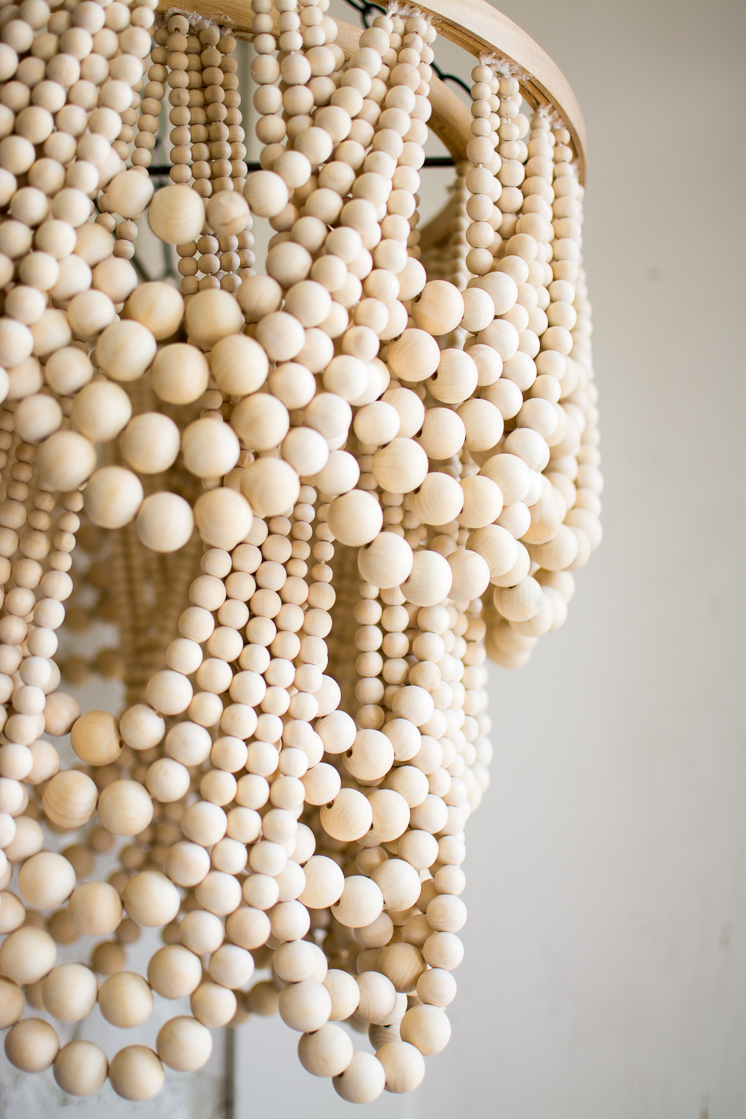
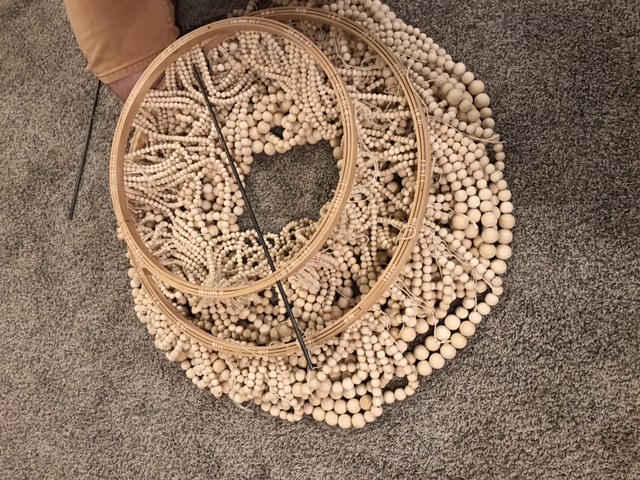
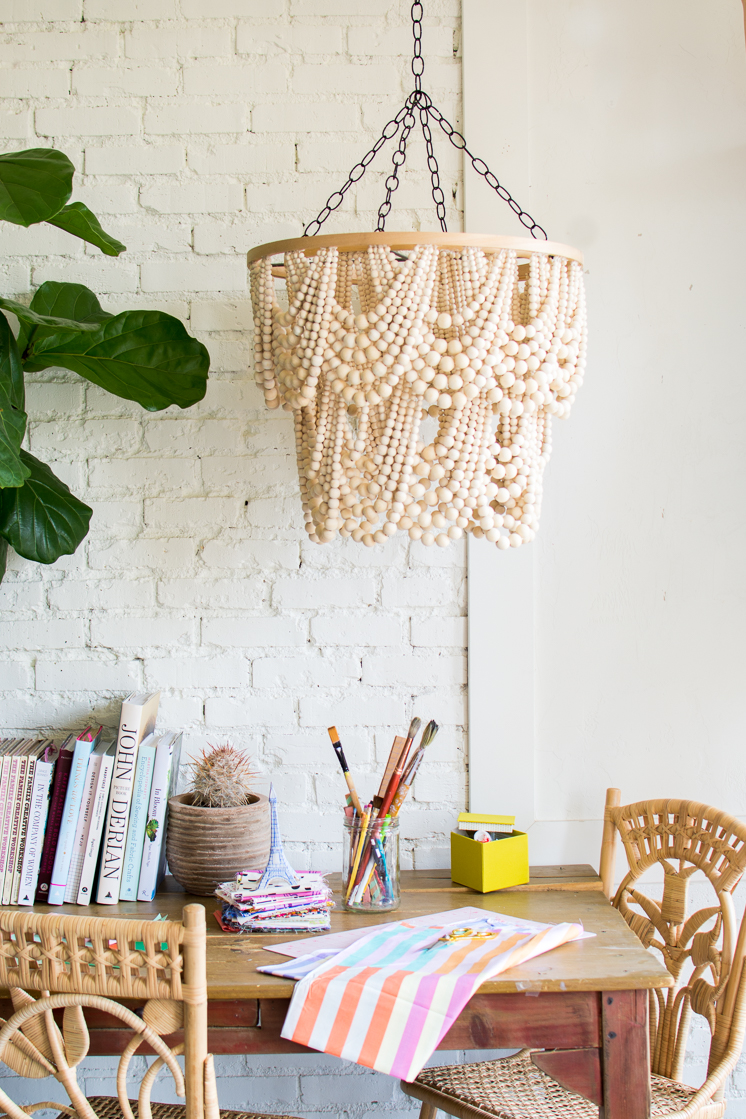
We’ve got a Pottery Barn hack for you guys to try! You’ve probably seen this amazing bead chandelier making its way around the social media network. The layers of cascading beads have such a graceful look, but the natural wood keeps it fresh and easy to incorporate into any setting. We love it but with the $800 price tag, it’s a big dent in the monthly budget! Save where you can so you can splurge where you can, right? Of course, we automatically started to think of how we could replicate this beauty. A box of wooden beads, a handful of embroidery hoops, and a season of Friends later (yes, this one’s a bit time-consuming folks), we got just what we wanted! This chandelier could easily pass for an original. If you’ve got pennies to pinch and time to spare, this is the project for you! Total cost of supplies, $170! Score!
Check out the full DIY!
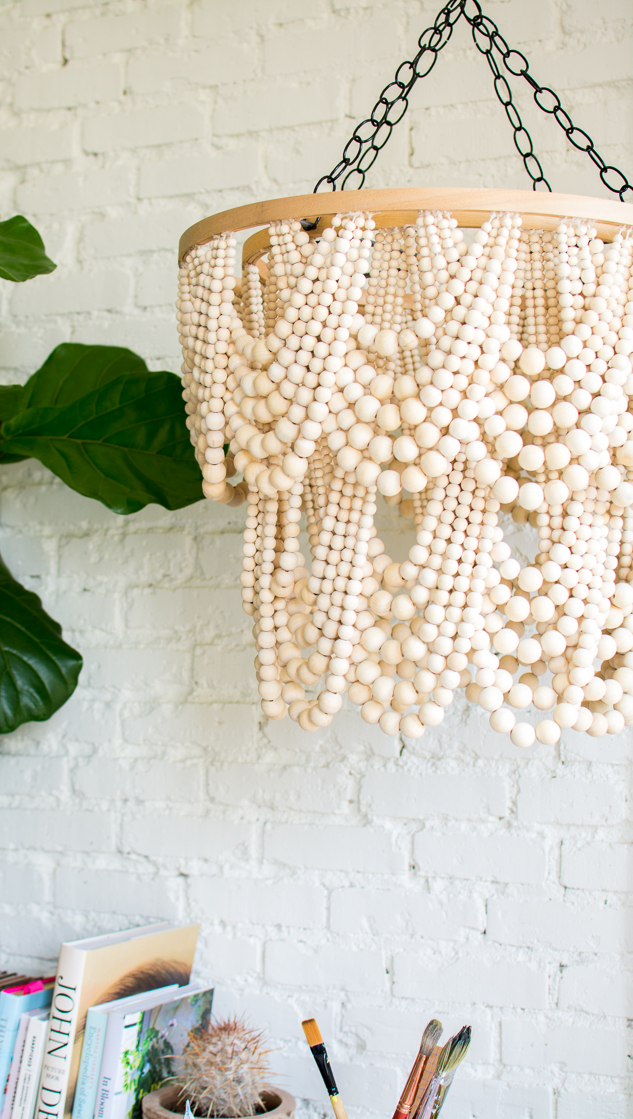
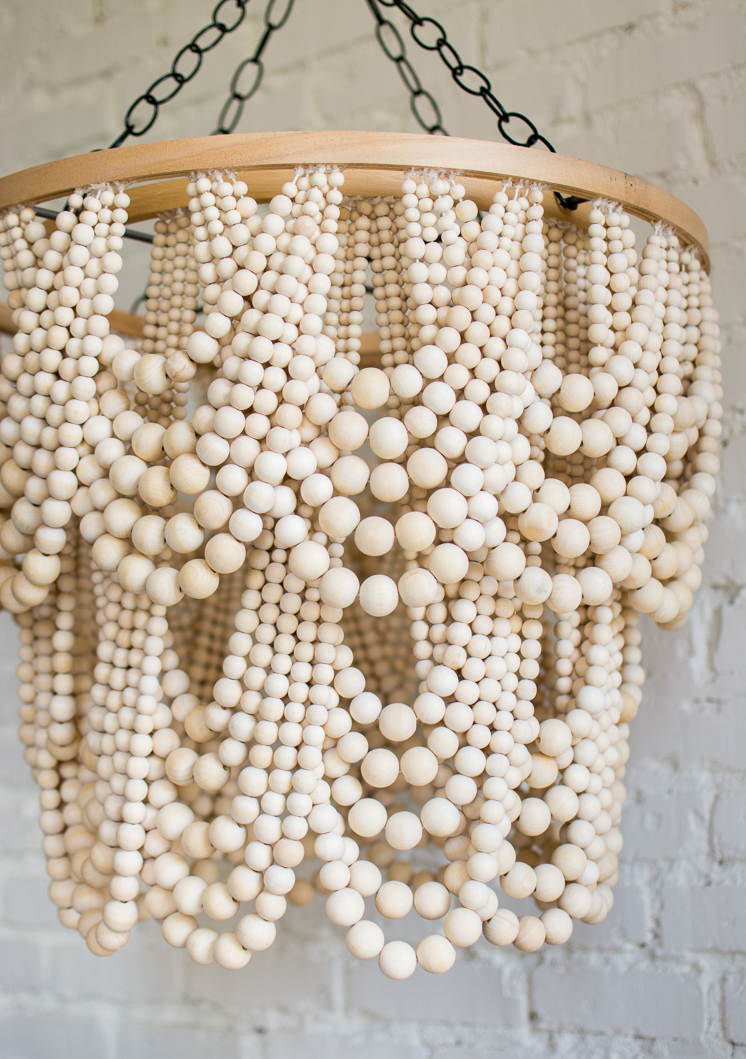
DIY Bead Chandelier
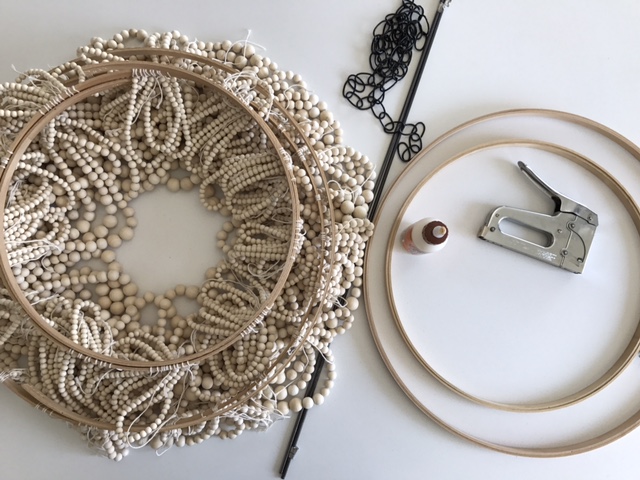
Materials:
- 10 mm wooden beads, 12 packages of 300
- 20 mm wooden beads, 10 packages 50
- 25 mm wooden beads, 11 packages of 30
- 14 mm wooden beads, 11 packages of 100
- 16 mm wooden beads, 8 packages of 100
- 2 inner, closed pieces of 18” and 23” quilting hoops + 1 outer, open/adjustable pieces of an 18″ and 23″ quilting hoop (total 3 hoops for each size)
- Scissors
- Natural twine
-
Wood glue
-
2 Metal rods (1/4 inch size)
-
Black chain (6 feet)
-
Clamps
-
Lighting kit and lightbulbs (optional)
-
Drill and ¼ inch bit
-
Rotary tool and a cut-off wheel
-
Pliers
- hand saw
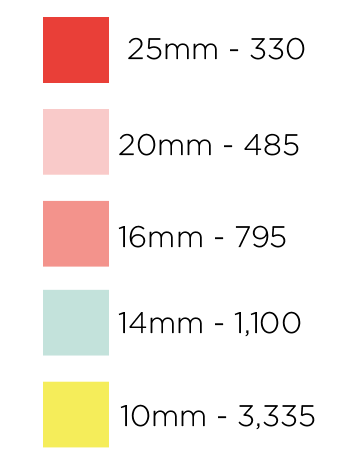
Exact Bead Quantities Used (Rounded to the nearest number divisible by 5):
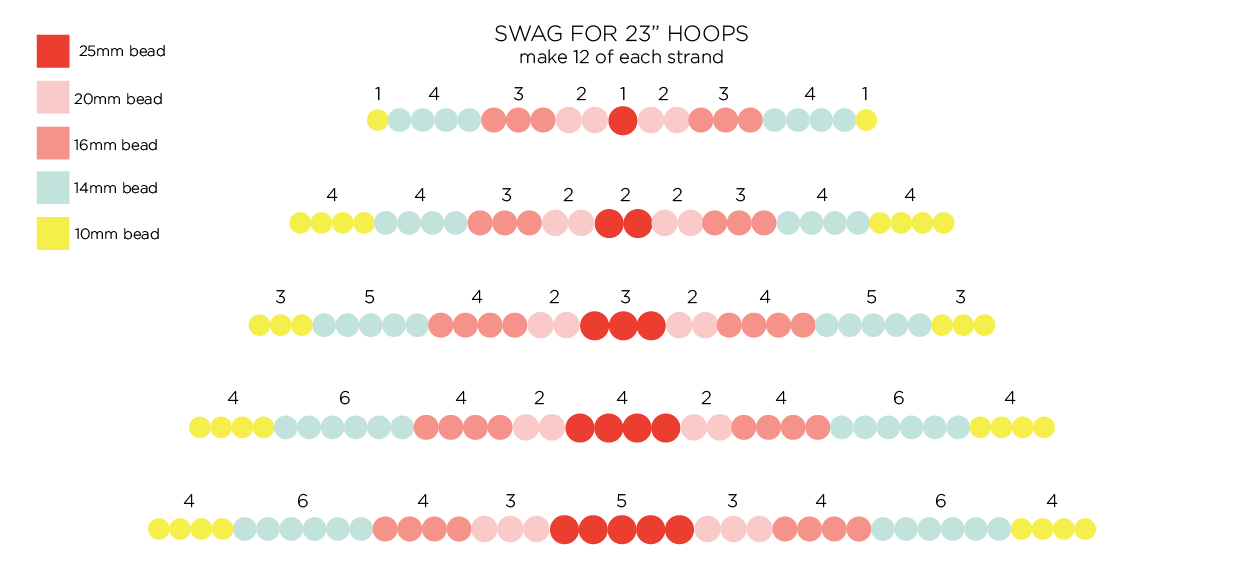
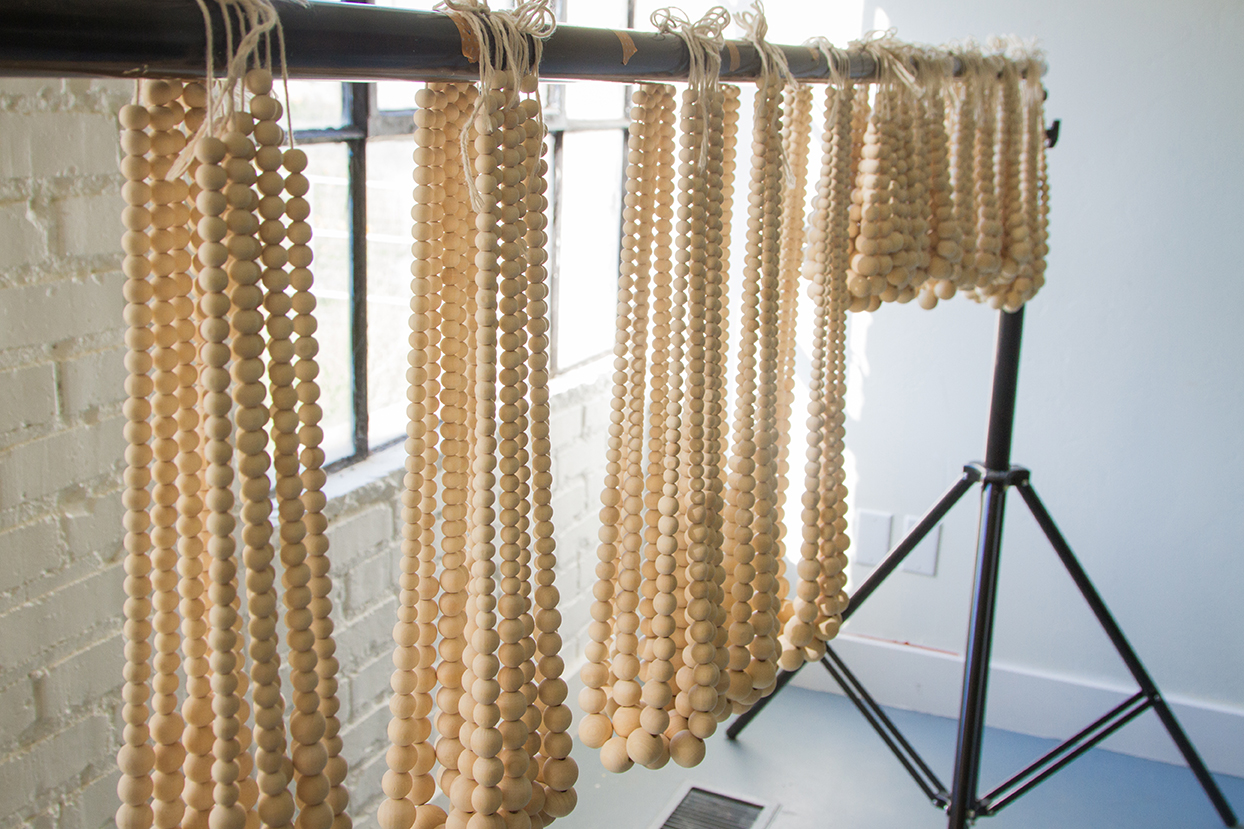
Instructions for stringing the beads:
- String beads according to the color coded diagram.
- Leave about 10″ of excess twine on each side of each string of beads. As you finish each string you can tie these ends together loosely to keep your beads in place while you are working on all of the other strings.
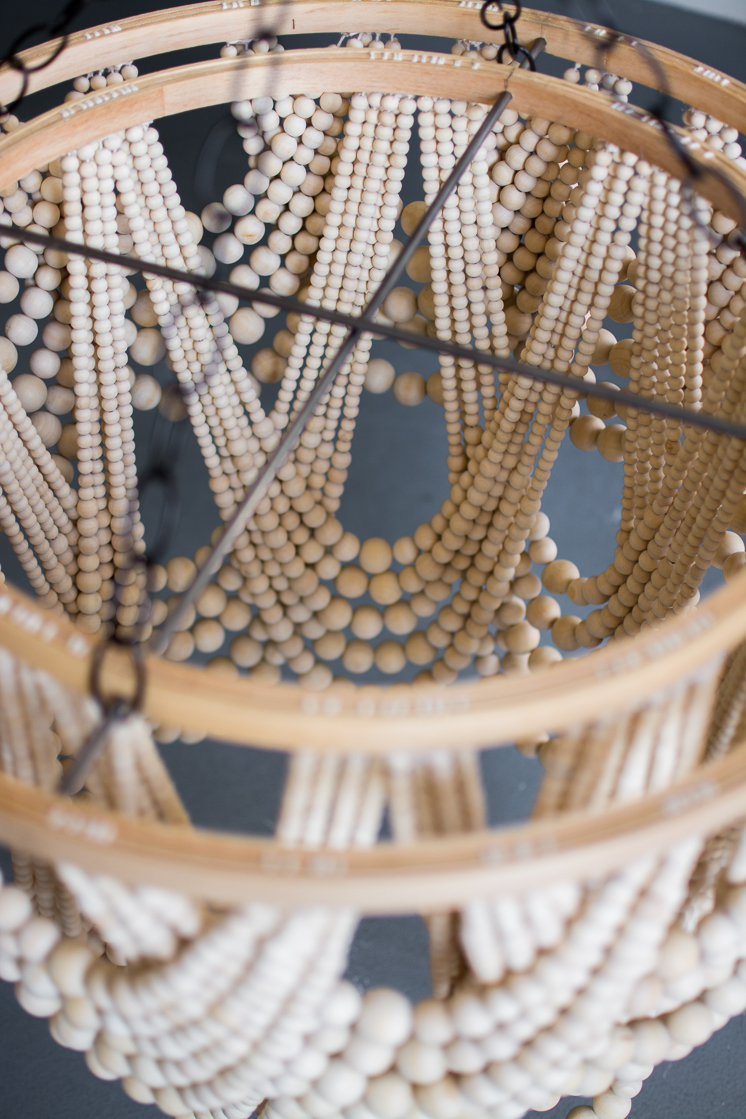
- Each U-shaped section of 5 strings is called a “swag”.
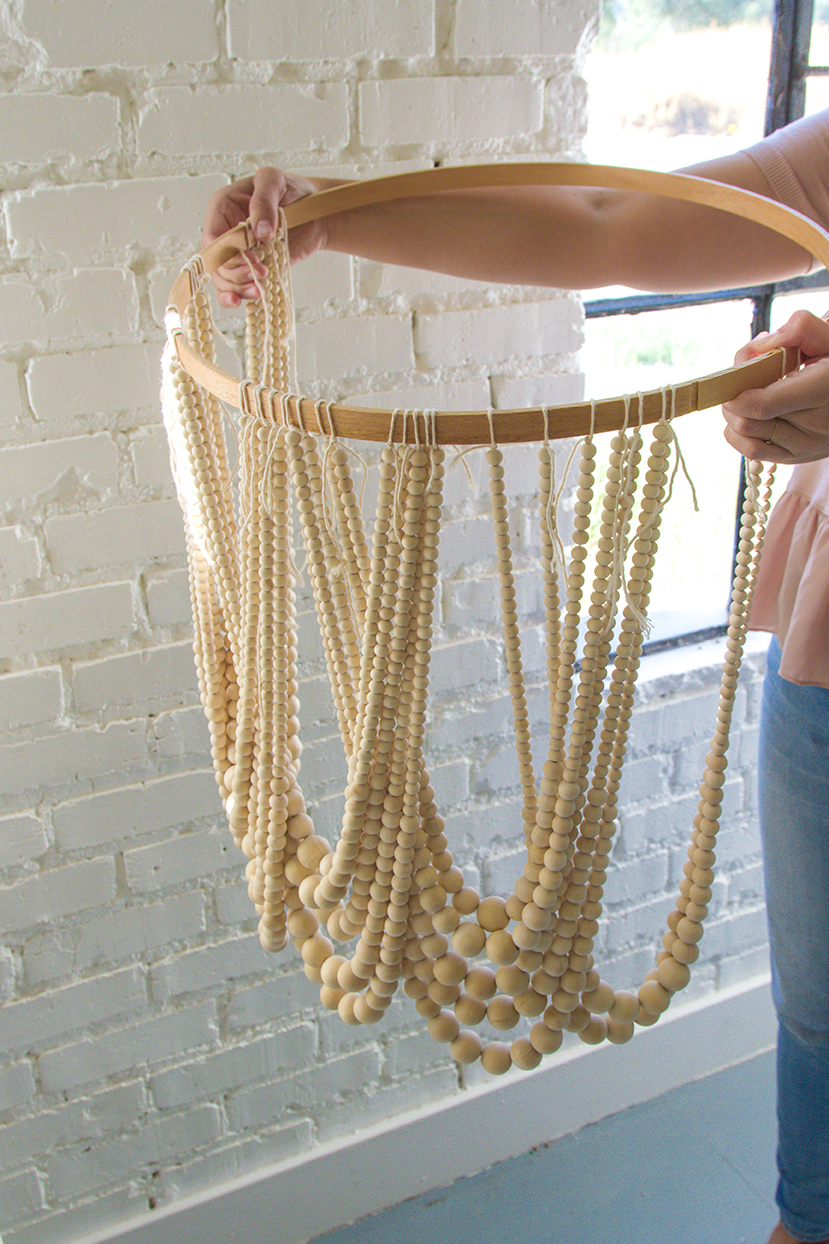
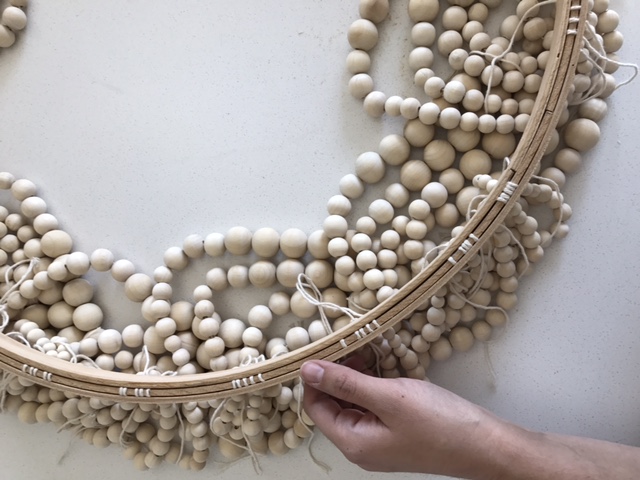
23″ hoop
- Tie the strings of beads to one of the closed 23″ hoops with double knots. Then, tie the knots so that they are sitting on the top edge of their hoop. Tie all of strings for one “swag”. Start tying the strings for the next “swag” in the middle of the U-shape of your previous swag to form a crossover pattern until all of your swags are tied onto one of closed 23″ hoops. You will have 12 swags total on this hoop (each swag is made of 5 strings of beads).
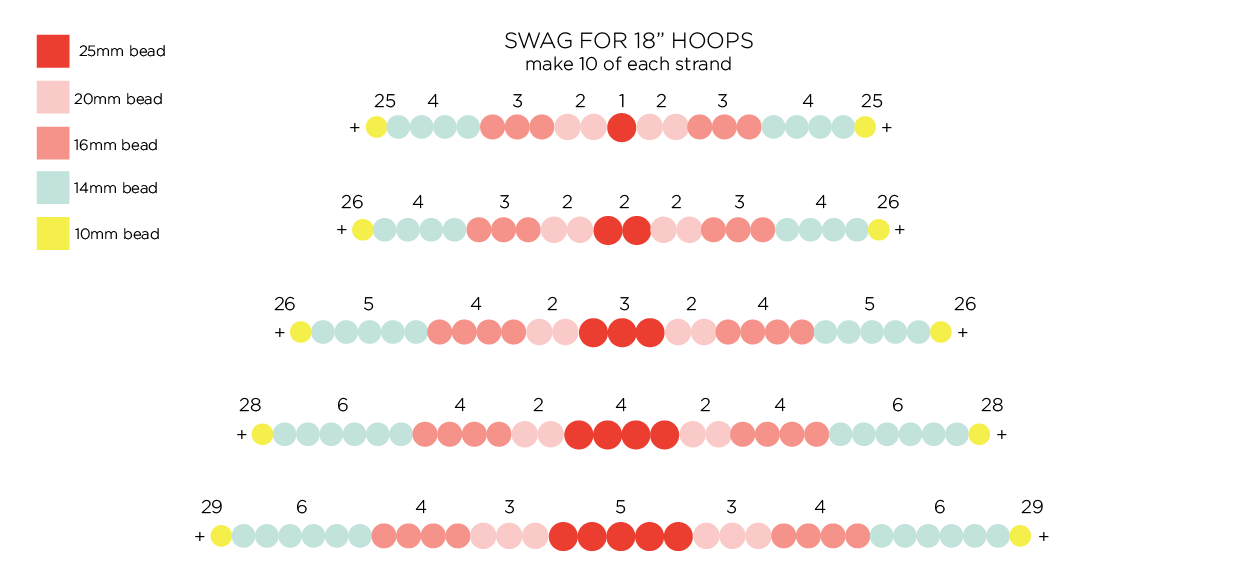
18″ hoop
- Repeat this process with one of the closed 18″ hoops and the longer strings of beads. This hoop will have 10 swags total (each swag is made of 5 strings of beads).
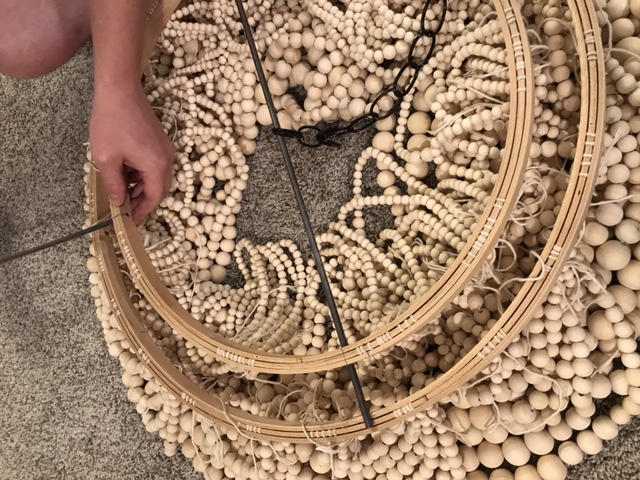
To construct the chandelier:
- Tie the strings of beads in a crossover pattern onto one of each 18” and 23” closed hoop.
- Remove the embroidery tightening device on one 18” hoop and one 23” hoop. You will not need to remove these on the extra set of hoops.
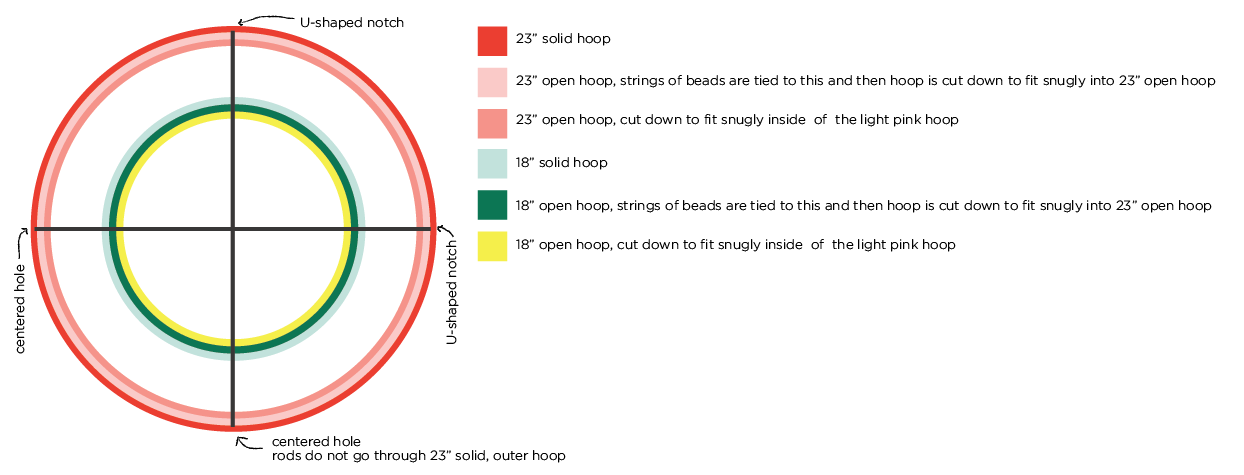
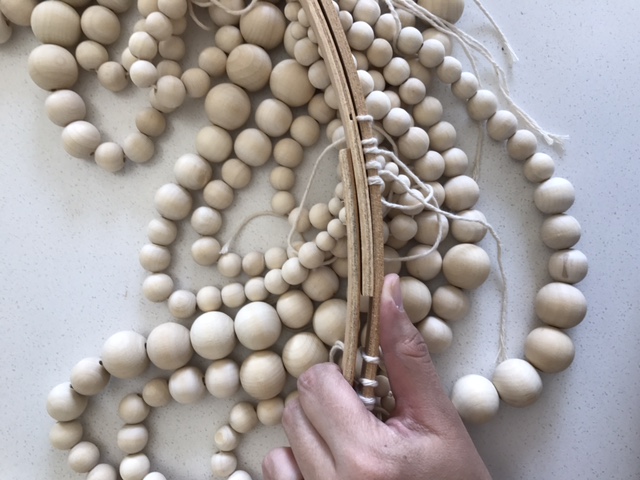
Instructions for fitting hoops together:
- Take the hoop you strung beads on and cut off a small portion. You need to be able to fit it inside another closed hoop of its corresponding size. Once you get a tight fit, use wood glue to adhere the two loops together. Clamp and let dry.
- Next, take one of the open hoops of the corresponding size. This will be the inside layer. Trim the hoop to be able to fit tightly inside the two hoops you just glued together. Clamp and let dry.
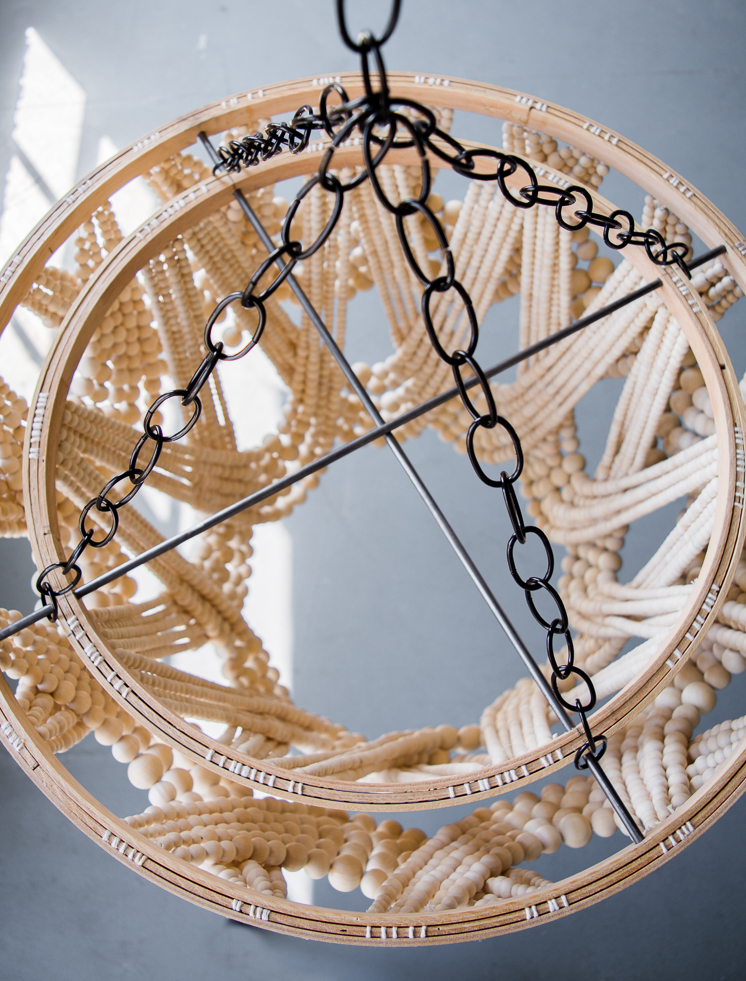
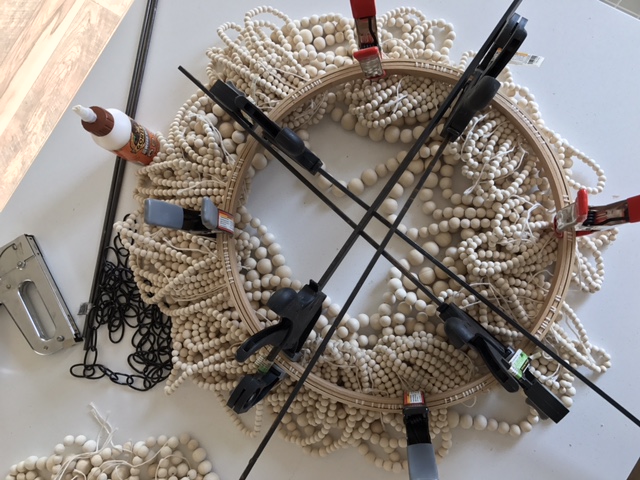 Instructions for installing metal rods:
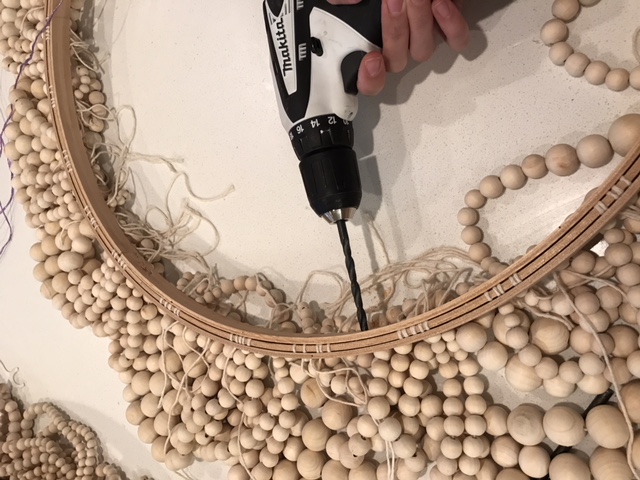
- Measure the diameter of the hoops to determine the exact cross-section for placing the metal rods. One rod will be about 1/4“ higher than the other so that they can overlap in the middle. Once placement is determined, drill 4 holes that go all the way through the inner hoop, but do not drill all the way through the outer hoop. Two of these outer loop holes will need to have an upside-down “U” shape carved out so that the rods can be tightly fit inside the hoops.
- The length of the rods need to be cut the length of the total diameter of the largest hoop, minus about 1/4 inch. The rods will go through the inner 2 layers of the outer hoop.
- Once holes are all drilled, thread the rods through the smaller hoop and fit it tightly into the larger hoop. The rods will overlap each other.
- Use pliers to make some pieces of chain that will hang from 4 sides of the chandelier. Cut off the extra strings and hot glue the frayed ends underneath the hoops. Install an optional lighting kit.
Photography by Clara Sumsion | Crafting by Betsy Croft