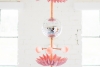

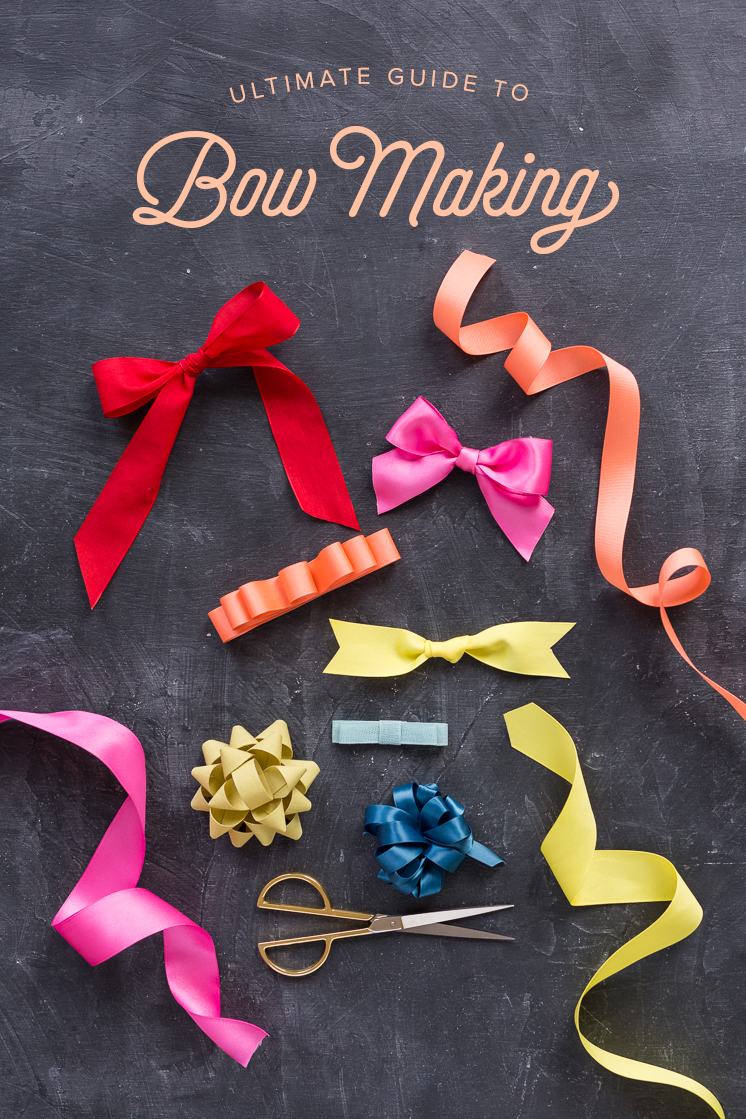
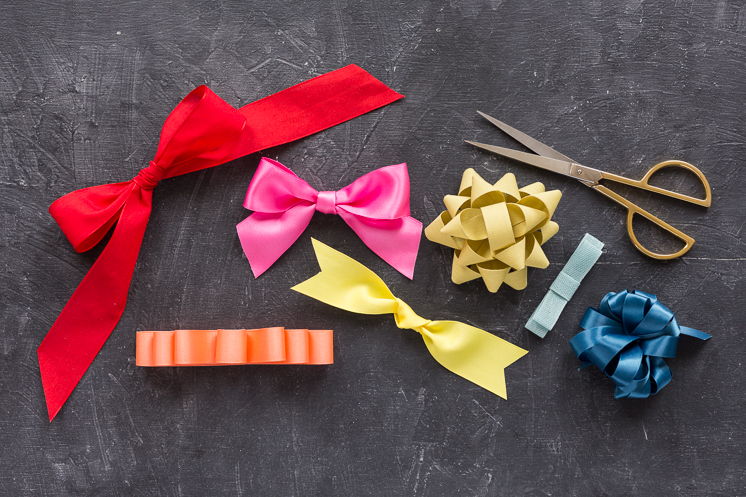
You wouldn’t think that something so trivial as a bow could be so difficult to execute, but you’d be sorely mistaken. Of course, we all know how to tie a shoe, yet that is hardly comparable to gift bows! Have you ever seen a Tiffany’s jewelry box? Their signature blue box with the perfect white bow on top is an art! I’m sure it’s part of their employee training. The world of silk and grosgrain ribbon is in a league of its own and at times requires a few pointers and tips. That’s where we come in! We have decided to create the ultimate bow guide, complete with step-by-step instructions on how to complete seven types of bows. There are bows ranging from super simple to more involved, and one for every occasion. So what are you waiting for? Put a bow on it!
The Ultimate Bow Guide Tutorials:
We’ve provided simple tutorials for you to follow to help you conquer the ultimate bow guide with ease! Each bow can be done with various types of ribbons, but some are better suited for certain designs than others. Feel free to experiment and you’ll be a Bow-Pro in no time!
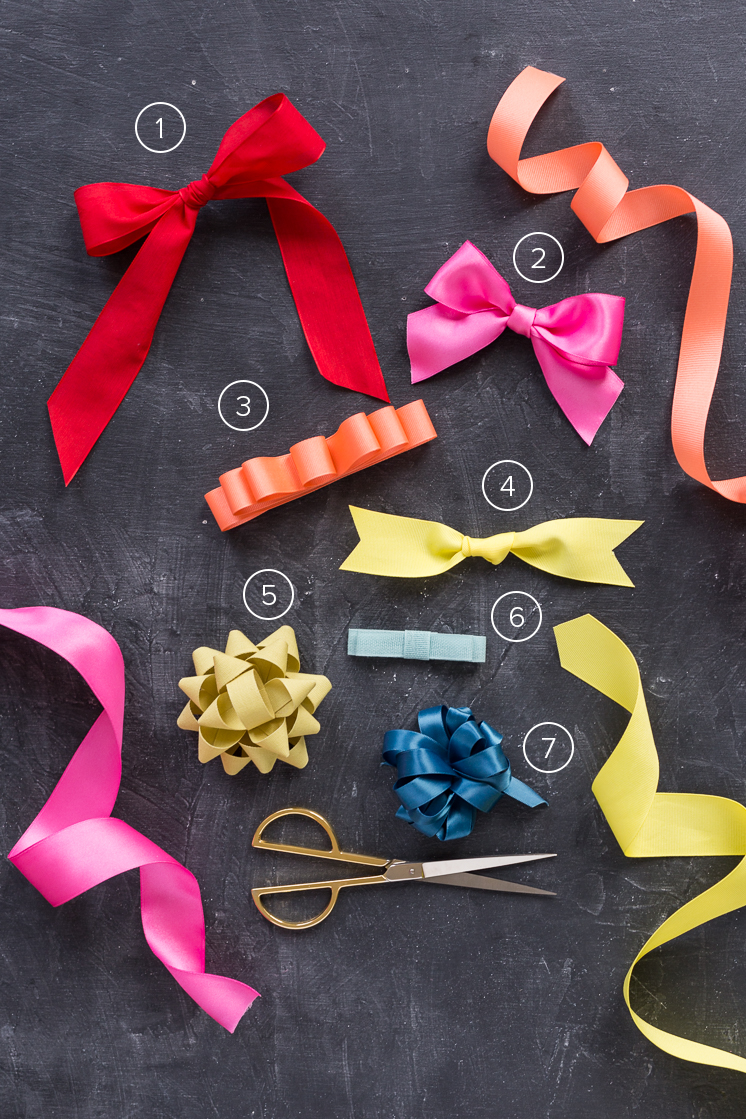
1. The Classic Bow
- Create two loops with a bit of slack in between them.
- Cross the left loop over the right.
- Continue to wrap the left loop over and around the right, tucking into the hole and pulling tight.
2. The Perfect Hair Bow
- Start with a long piece of ribbon and criss-cross the two ends, creating a condensed looking awareness ribbon shape.
- Pinch the middle of the ribbons and secure with a piece of wire.
- Take a 1″ piece of ribbon and fold is around the center of the bow. Secure with hot glue.

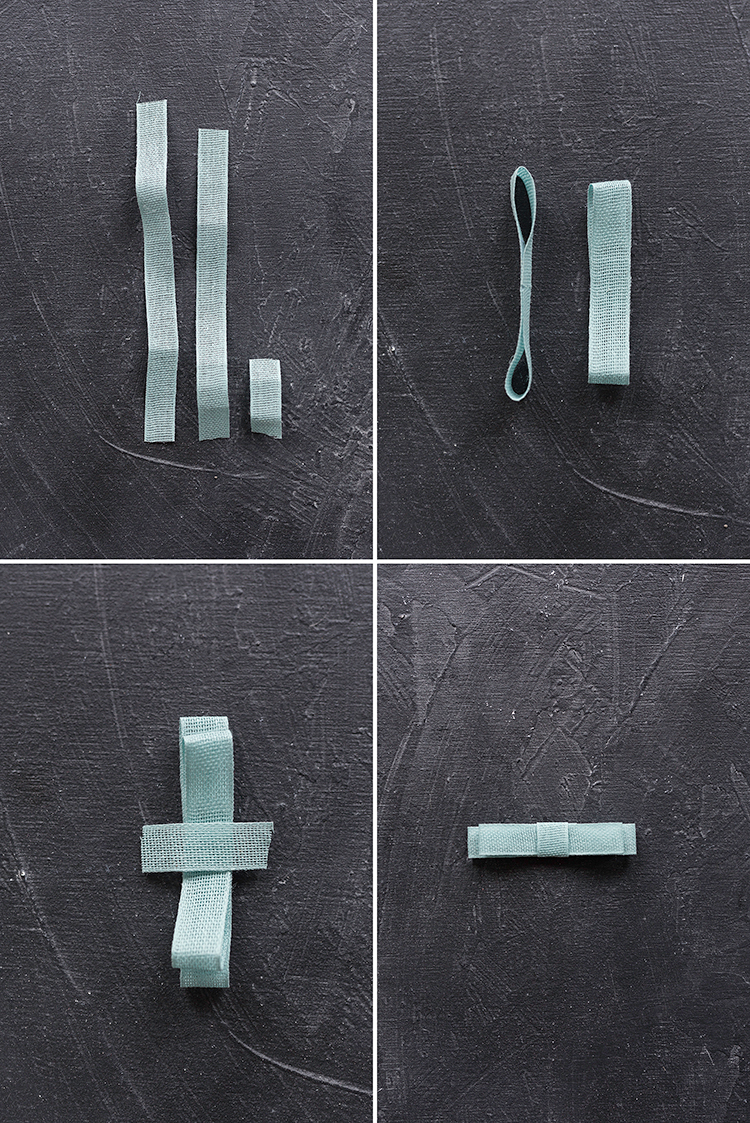
3. The Stacked Bow
- Cut four lengths of ribbon. We did 12″, 10″, 8″ and 1.5″
- Fold the two ends of the ribbon to the center and secure with double sided tape.
- Layer the three longest pieces of ribbon on top of each other and secure with tape or glue.
- Top with the small loop of ribbon.
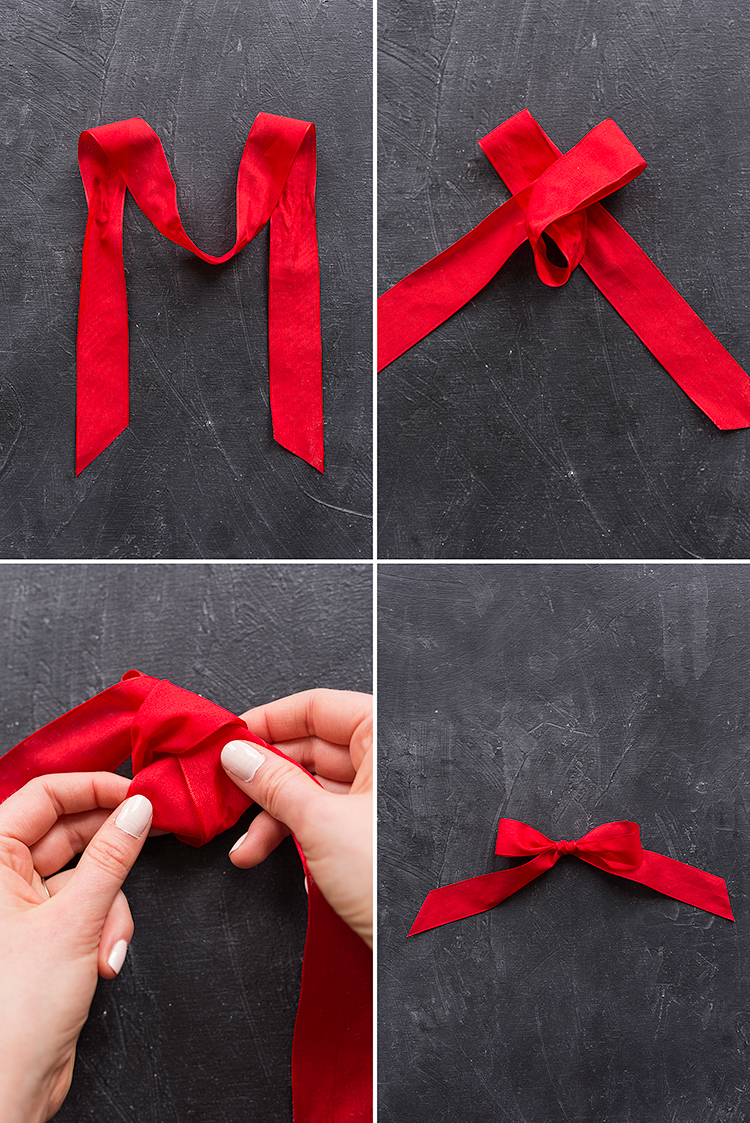
4. The Knot
- Cut the edges of your ribbon to have two points
- Cross the left end over the right
- Wrap the left end around and under the right and pull tight.

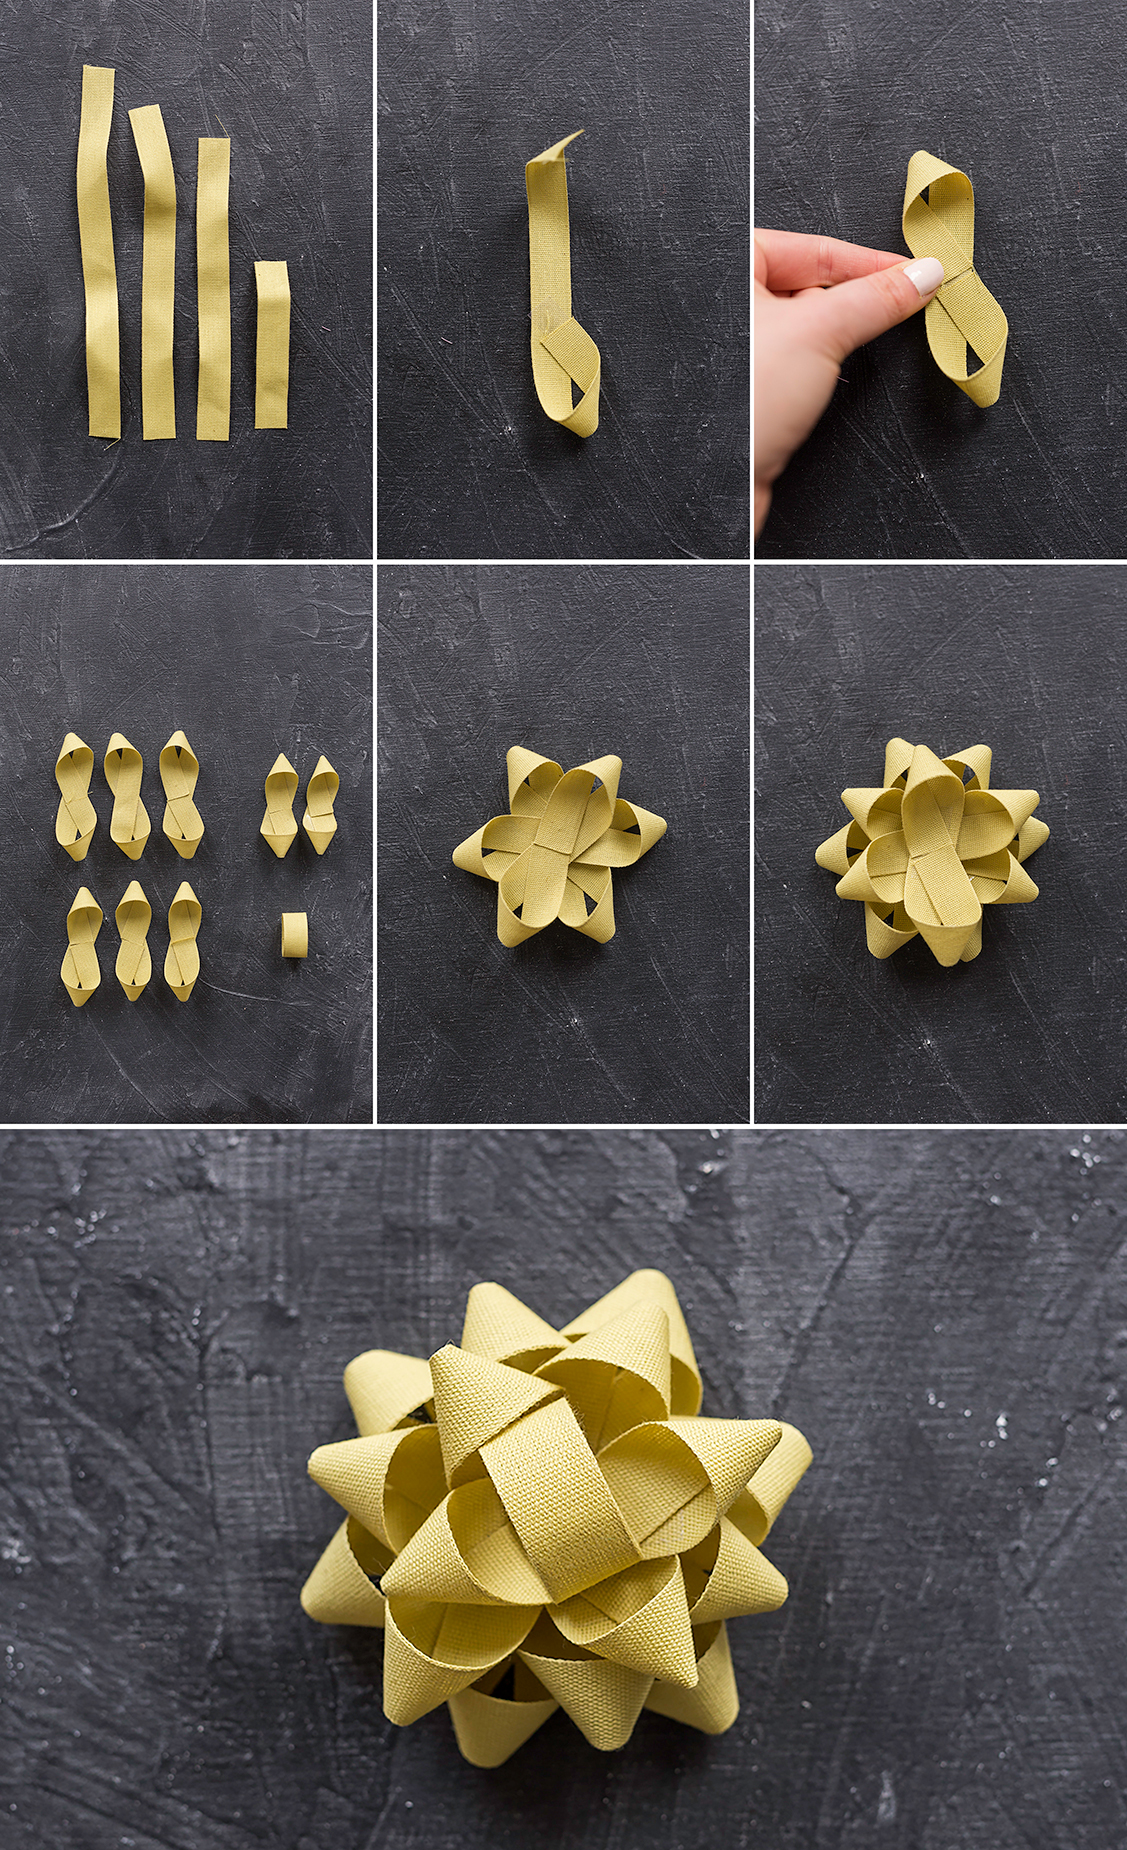
5. The Gift Box Bow
- Cut four lengths of ribbon at 21 cm, 19 cm, 17 cm, 9.5 cm
- For each piece create two loops on both ends of the ribbon and secure with double sided tape.
- Once each piece is looped, begin stacking the 3 largest loops first, at alternating angles.
- Add the next three, then the next two, ending with the single loop on top
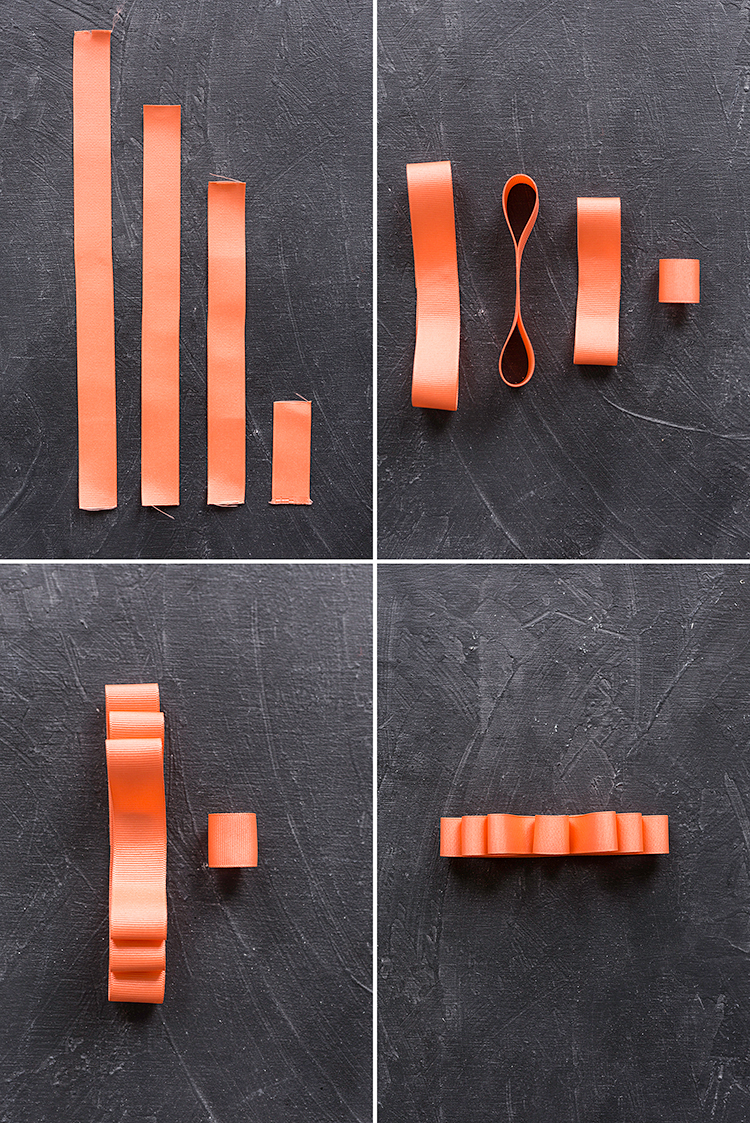
6. The Flat Bow
- Cut three lengths of ribbon at 8″, 7″ and 1.5″
- For the two longer ribbons, fold the edges toward the center and secure with double-sided tape
- Layer the two loops on top of each other and wrap the short ribbon around the top.
- Secure with tape on the underside.
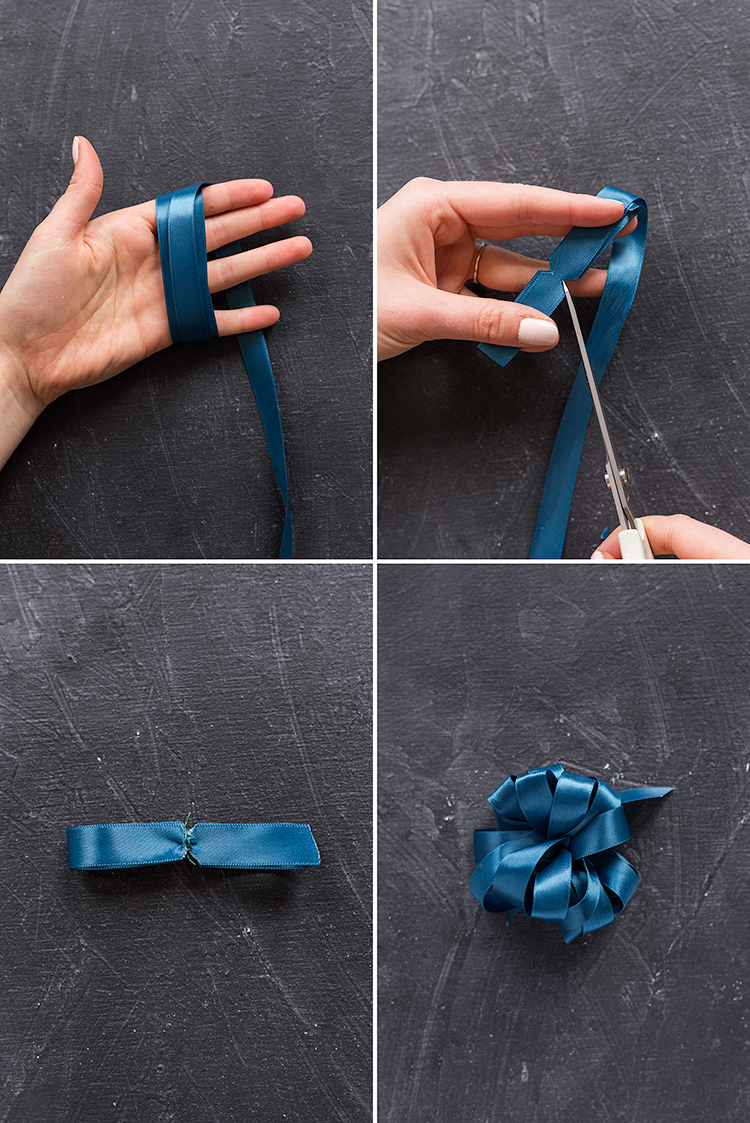
7. Loopy Gift Bow
- Wrap a piece of ribbon around your palm 8-10 times, or more if you want a really full bow.
- Cut small triangles in the center of the looped ribbons.
- With a small piece of wire, tightly secure ribbons in the grooves of the cut triangles.
- Fluff the bow by pulling apart the loops.
Now you will be the queen of gift wrapping! Just wait until Christmas… You’ll knock the socks of people with your bow making skills!
Photography by Anna Killian | Crafting by Rebecca Young