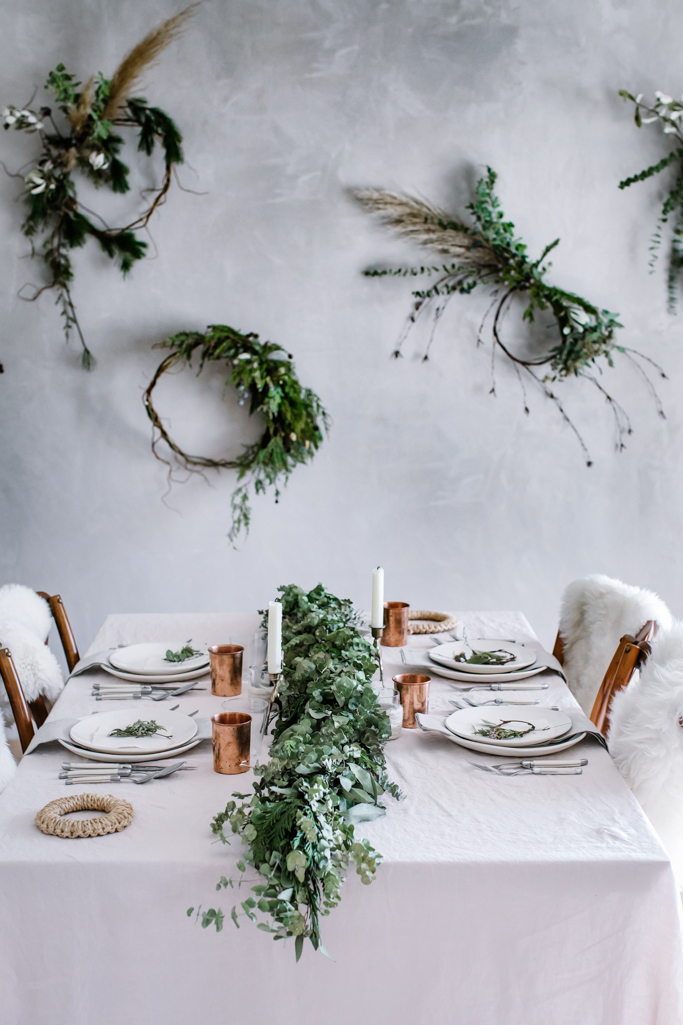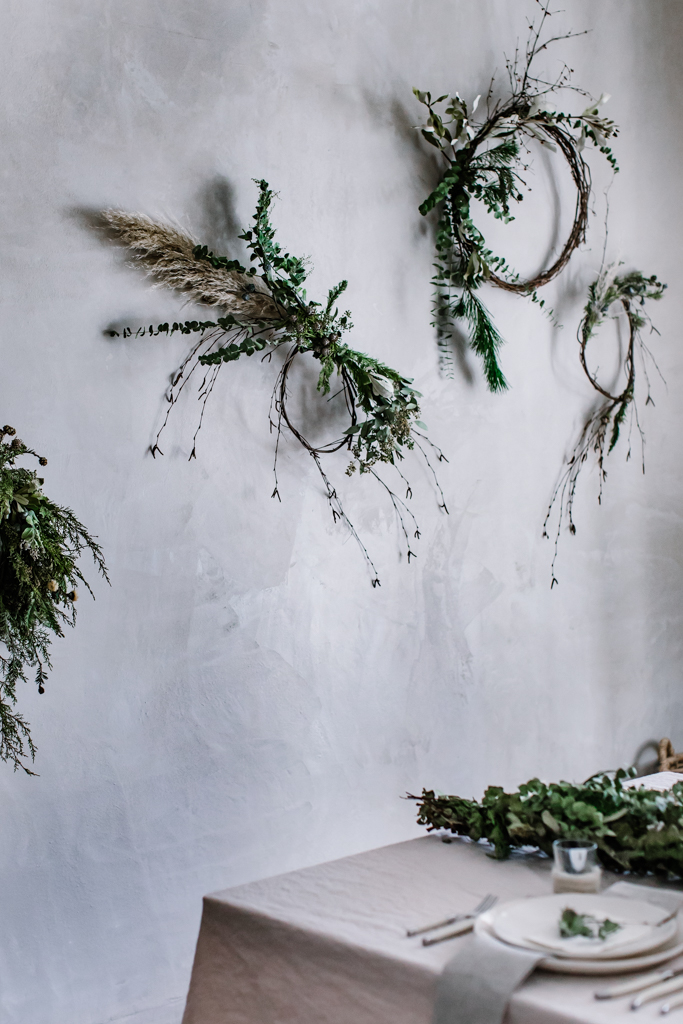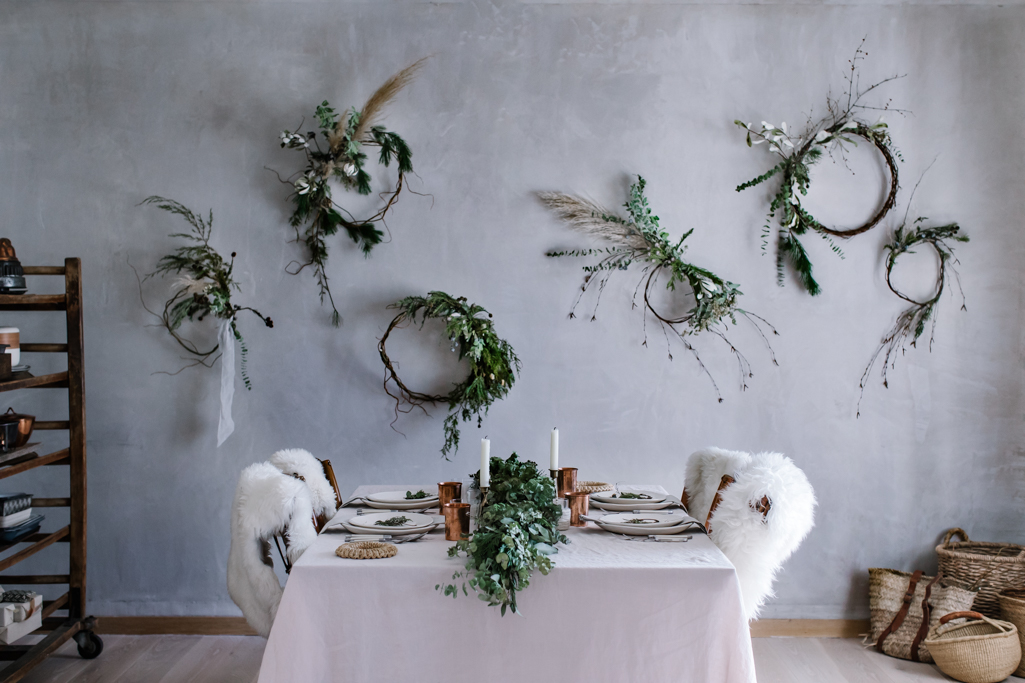
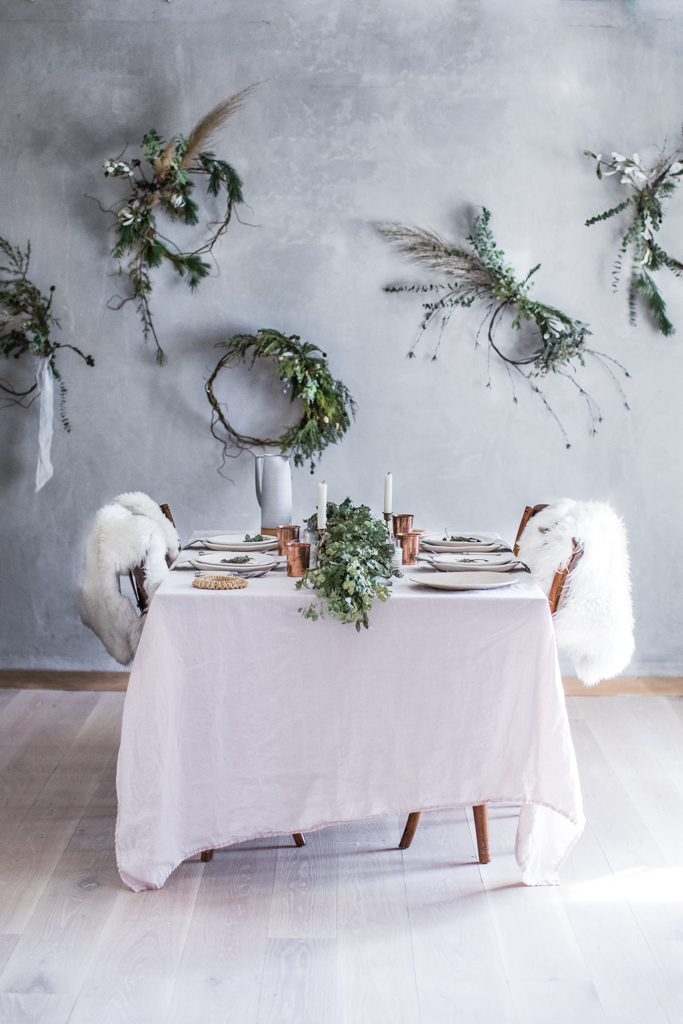
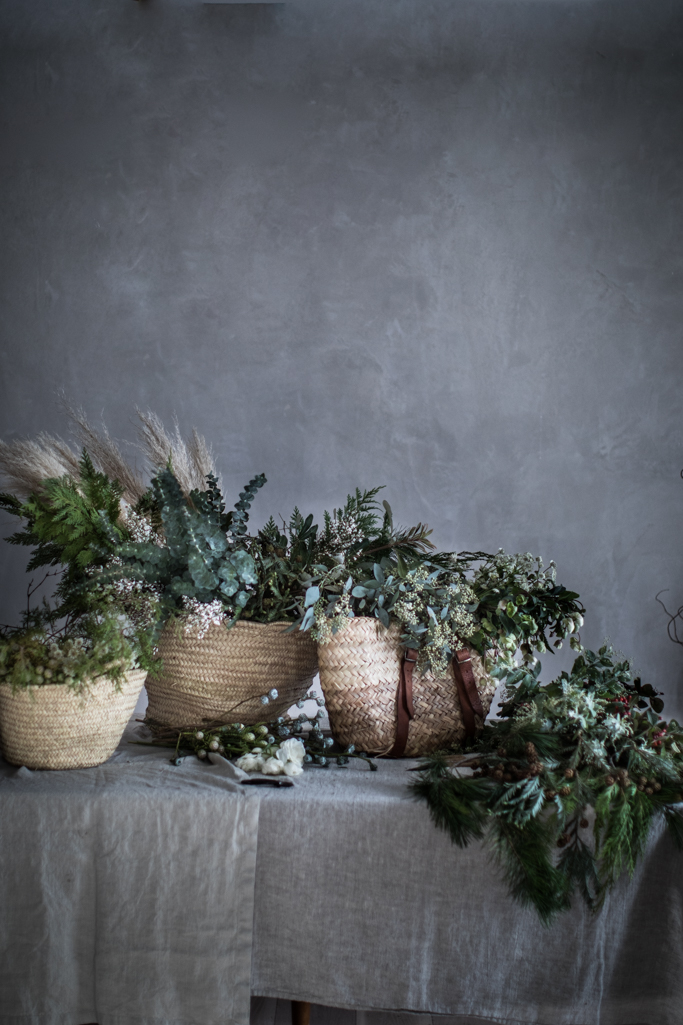
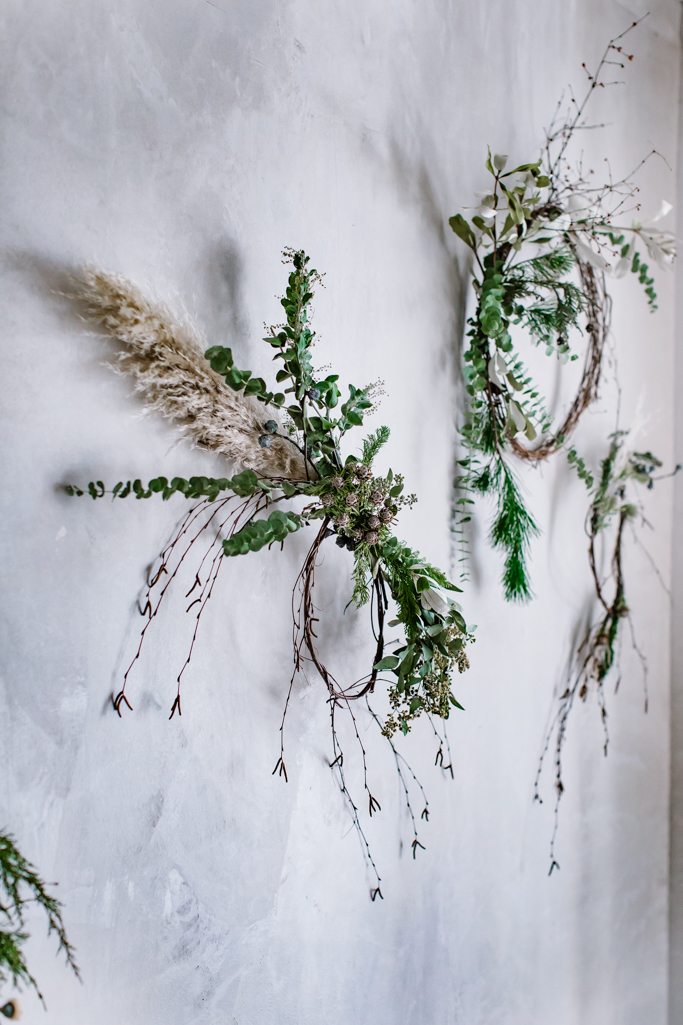
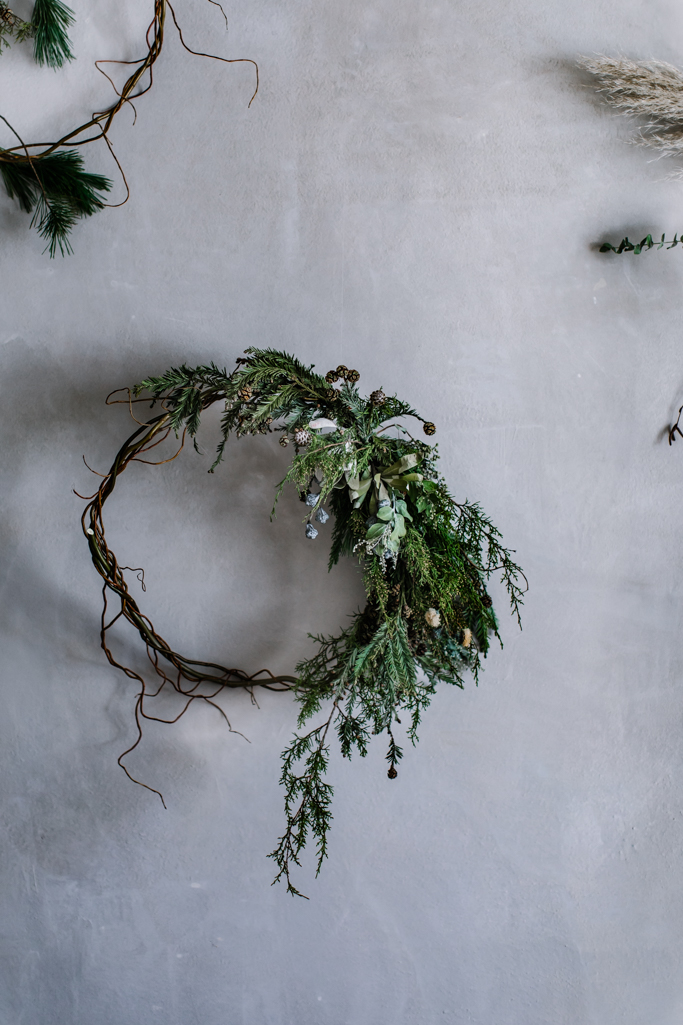
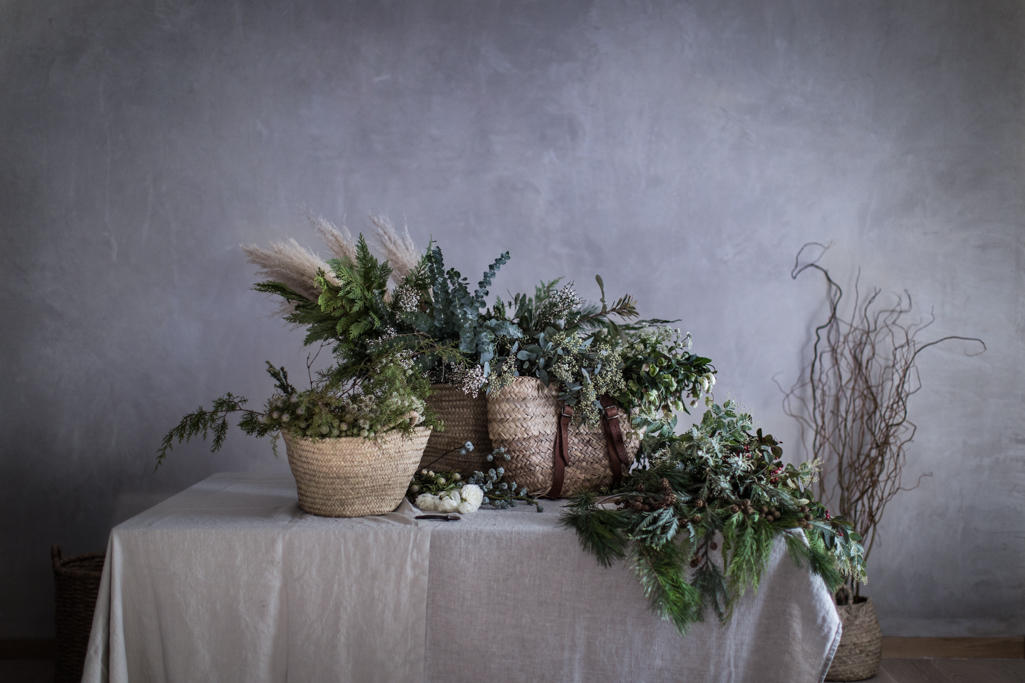
A happy winter solstice to you all—yesterday was the shortest day of the year. And so the light creeps back in. To celebrate, we invited my friend, floral & event designer Kaitlin Zermeno of Petaline (check her out for floral inspiration + she’s available to travel for events big and small worldwide), to give us a tutorial for organic, free-form wreaths. I’ve been wanting to make an explosive wreath with wild sprigs and tendrils, and now I finally know how. The dripping birch wreath (third from the right) & the one with the bit of ribbon are my attempts. I’m quite pleased with them, and given my dismal wreath efforts of the past, it was satisfying to figure out how to make the wreaths I’d long admired from afar. Along with the wreaths we have some inspiration for your winter table from ours including mini organic shaped wreaths for each place setting—same principle applies as the big ones! And also…a little peek of my new dining room!


It’s Eulalie’s first Christmas, and I’ve been working every second of the season while simultaneously fighting to fit in trips to get a tree, whip up eggnog, make wreaths, wrap presents, bake cookies, and have Christmas dinners with friends. My attitude is, basically, “It’s Christmas, dammit!” and despite the seemingly endless overwhelm I brew up for myself, nothing gets in the way of my self assigned “essential holiday activities”. Especially not when it’s her first…her not being cognizant of any of it not withstanding. It’s still a special year. We had my best friend since I was 13 years old, William, over for dinner with his wife Ellen & son Liam (he’s only 2 months older than Eula); I cooked local ribeye sous vide and served it sliced thin with yakiniku dipping sauce, Japanese rice, and miso soup around our holiday table.
I love keeping a set table (we wrap it up and lay down tall things to protect them from cats under the cover of night) during the holiday season. It’s just waiting and ready for guests. And even if you don’t do the table, a wreath wall makes an impressive holiday centerpiece to rival the tree (especially my tree as it’s currently only rocking white lights and a woven star). We avoid holes in our wall by screwing hooks into the ceiling and hanging the wreaths from clear filament (aka fishing wire).
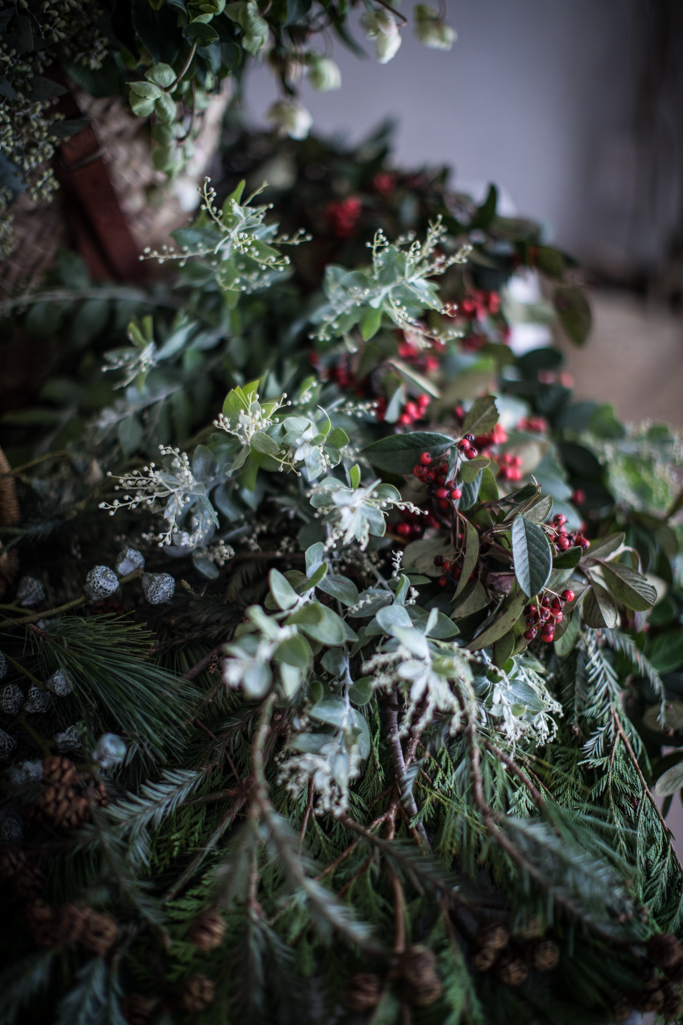
My wreath tips, aside from the detailed instruction below, are to not be hesitant—go wild, really pile it on or let the crazy sprigs be. I’m obviously a neutrals & greens girl, but you could add red berries or terracotta + flesh toned colors, which I would have loved if I had them on hand. You could even, at the last minute for a dinner, weave in a few fresh blooms. Also, when she says bend gently, bend gently. I was snapping willow left and right. I really like to let each clipping, each branch, tell me what it wants to be. Work with your materials instead of fighting them.


Asymmetrical | Organic Wreath Tutorial
SUPPLIES
- 3-5 pieces of curly willow, birch, or grapevine wreath
- Floral wire/bind wire
- Variety of greens
- Floral sheers
- Silk ribbon (optional)
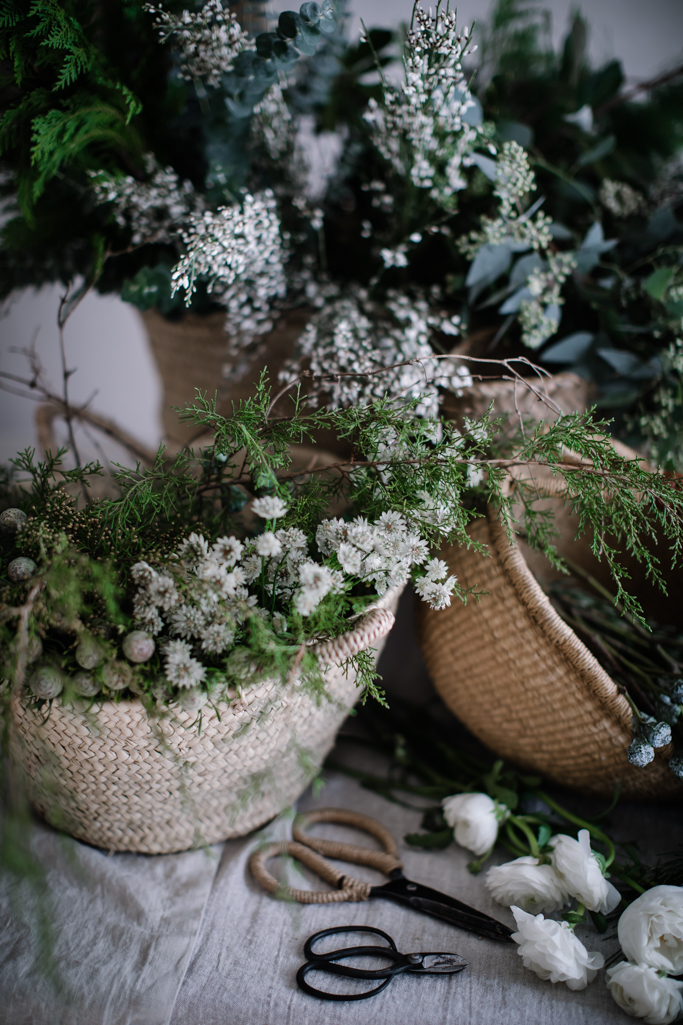
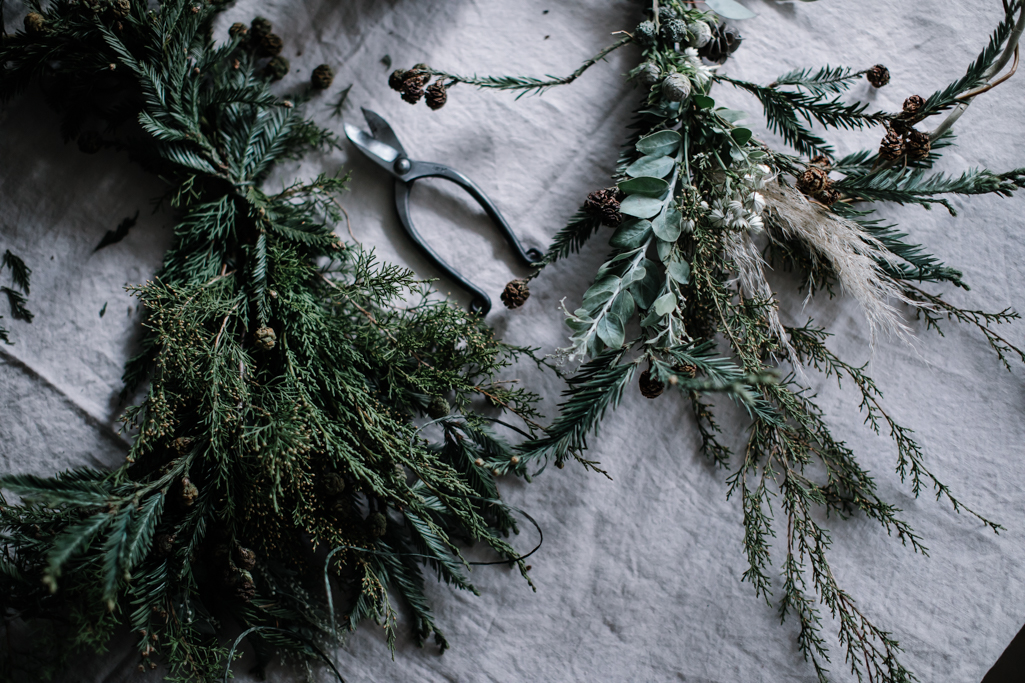
Don’t be scared to venture outside for your ingredients! Using seasonal and local materials will make your wreath feel like a natural and complementary addition to your home. Keep an eye out for plants like nandina, privet, and holly for unique leaves and berries for an added texture. Twigs, dry pods, pinecones, are all great accents. Your local Christmas tree stand should also have trimming for a very low price, or sometimes even free! A variety of textures and gradations of green will create a soft and organic look in the end. Be creative and go with what feels right!
ADVANCED
To Make Your Own Frame from Scratch:
- Starting at the straight, thicker end, gently bend each willow piece, breaking down the stiffness so that it becomes pliable and can be formed into a circle. Leave the curly ends as is.
- To connect your willow pieces: Start with your longest piece, holding it at the middle of its length. Take the thick end of your second piece and add it to your hold, so that the bottom end runs the length of the curly, bendable end of your starter piece. Wrap and intertwine the curly pieces around the second piece to start to secure it. Repeat this step with the ends of your second piece, wrapping them around the base of your first piece of willow, forming a circle in whatever size you choose. It really is as simple—just weave and twist the pieces together.
- Once you have a circle, continue to weave in as many pieces as you like. For a more tailored look, wrap all of the ends into the wreath frame. Leave some of the curly ends long and unattached/free if you want a wild and wispy end product. Trim the thick ends if needed.


BEGINNER
Using a Grapevine Wreath
You can use your frame as is for a full and hearty wreath. If you would like a more delicate wreath, follow the steps below, and you’ll get two!
- There is a thick piece of grapevine wrapped tightly around the frame to keep it bound together. Clip it, and remove it from your frame.
- Separate it into two halves, unwinding it to loosen it up.
- Wrap it back around itself in a circle form in the diameter of your choosing, leaving it as loose or tight as your preference.
DECK IT OUT

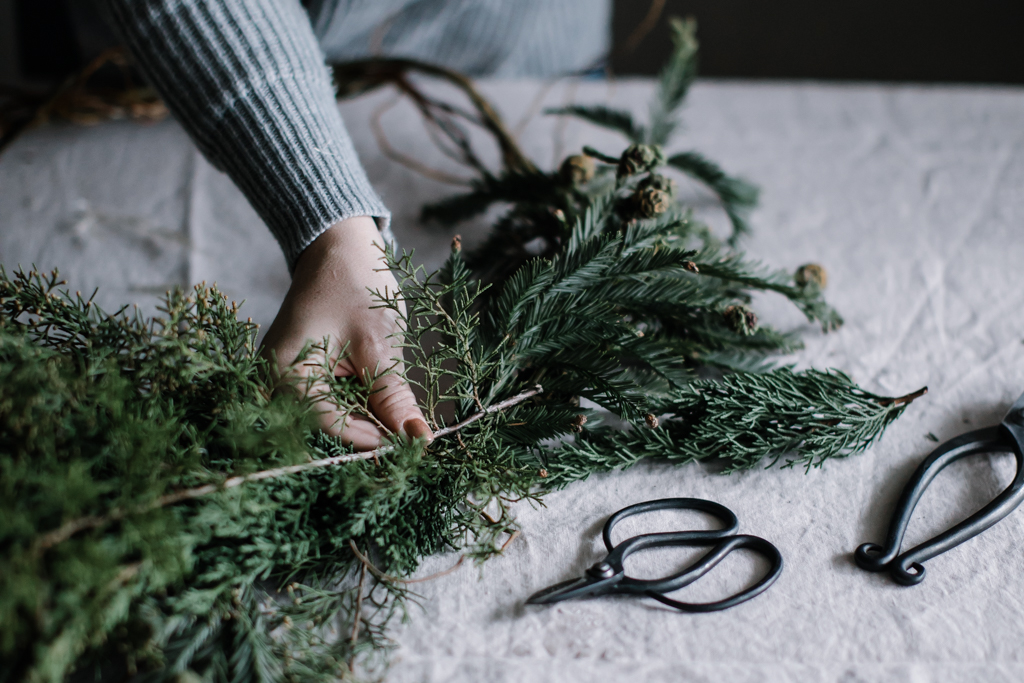
- Cut your pieces, about 15-20 to start. Cut in various lengths. Be sure to leave a few inches of stem below the leaves and bristles, you will use it to attach to the frame.
- Take a piece of wire, a couple feet long, and attach one end to your frame where two of your pieces connect to secure the pieces stay connected as you work, leaving your wire long.
- Pick out your first piece, long and wispy works great. Lay the piece on your frame where your wire is attached, the pretty end on top of the wire and the stem below. Wrap your wire tightly around the stem, wrapping down as you go, away from the wispy end. The wispy end should be loose and unattached to the frame, secured to the wreath by the stem.
- If you would like a full wreath, grab a couple pieces, holding them together at the stems. You can mix greens and lengths for an organic and lush look. Layer the greens on top of the stem and wire you just wrapped. Continue wrapping around the stem, moving your wire down the wreath away from the greenery you just added. Remember to keep the green ends loose so they can move and give, don’t let it get too tight, as your wreath will become flat.
- When you come to the end of your wire, be sure to secure it to your wreath, tying a knot tightly to the frame. Repeat Step 2 if you need more wire to finish your wreath.
- Continue Step 4 until you have covered the wreath to your liking. Be sure to add long and wispy accents as often as desired.
- When you are ready to finish, pick out your last piece. A delicate piece works well, so the thickness of your greens tapers down naturally. Turn it the opposite way of your other greens. The stem should be on top of the last stems you wired.
- Choosing a short, but full piece, layering it on top of the wire still visible, tucking the stem underneath the existing greenery.
- Do this until your mechanics (wire + stems) are covered, using small pieces, switching directions and tucking the stems underneath the greenery already attached, secure your last length of wire to the wreath, we’re almost done!
- Take a look at your wreath and see if there are any places you want to add or trim down. You can easily add pieces for needed texture and quality control. Pick pieces with a strong stem, and push them into the wire or frame. This is a good time to add those special pieces that make your wreath stand out!
- If you want, add a long trailing ribbon for a festive touch, then hang and enjoy!
ABOUT PETALINE

“I love creating with fleeting materials, walking the line between organic & wild and refined, using flowers to create unique, beautiful moments that feel both intimate and thoughtful, whether at a large event or small dinner amongst friends.”
– Kaitlin Zermeno, Floral + Event Design + Styling. Based in Chattanooga, Weddings + Events in the Southeast. Available to travel worldwide.