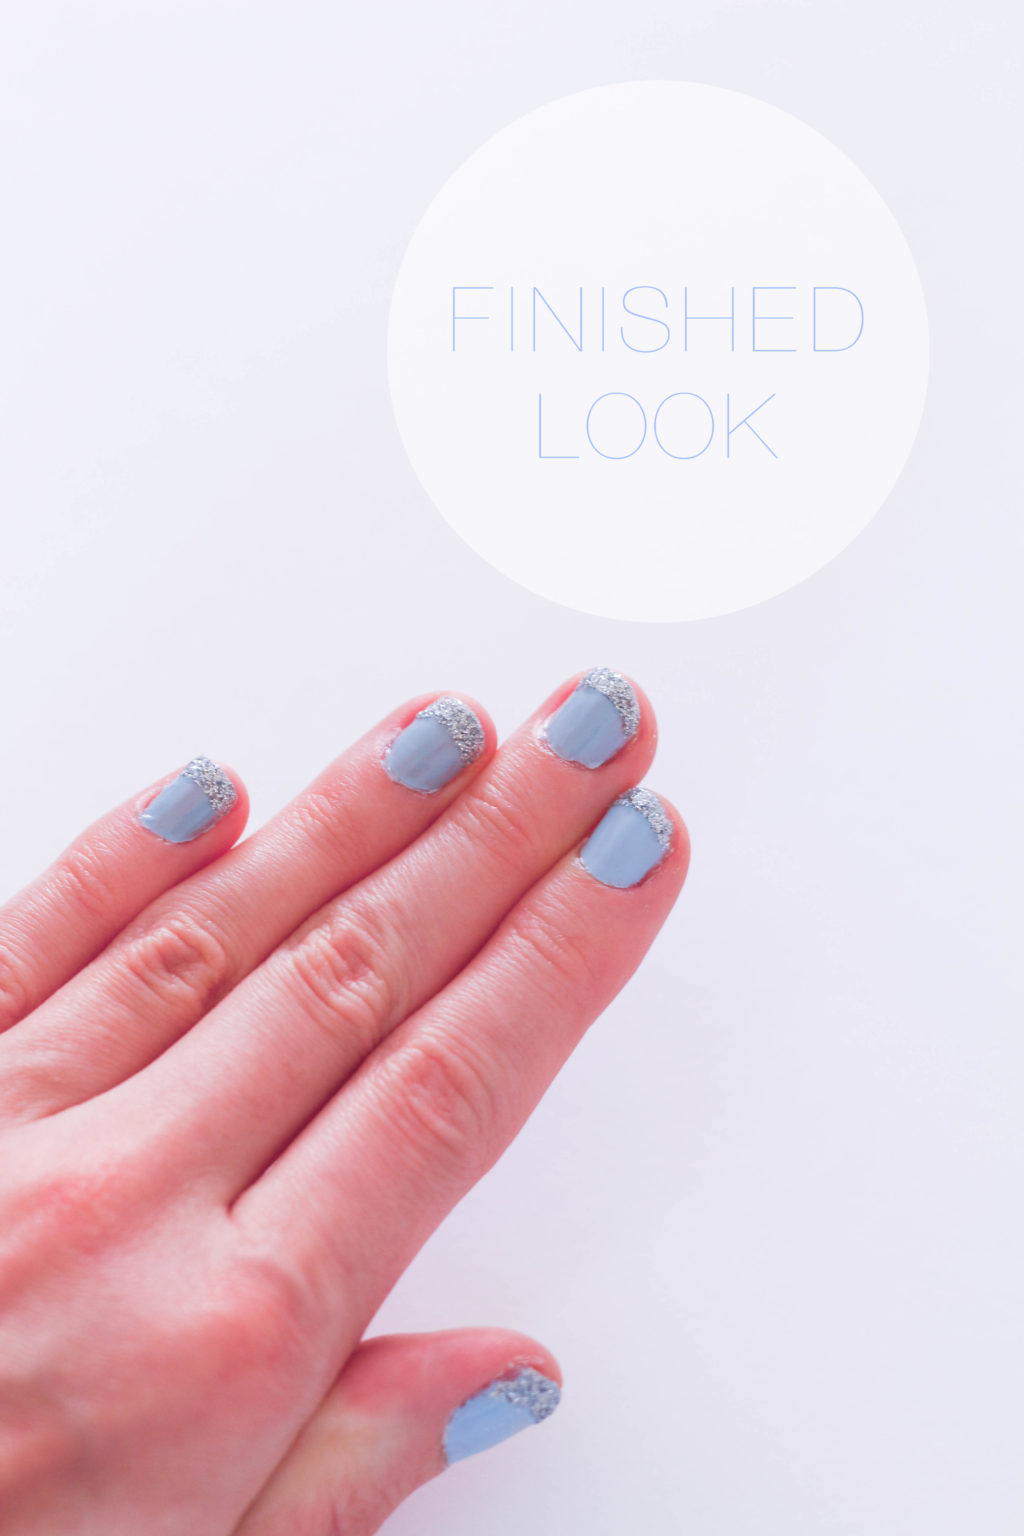
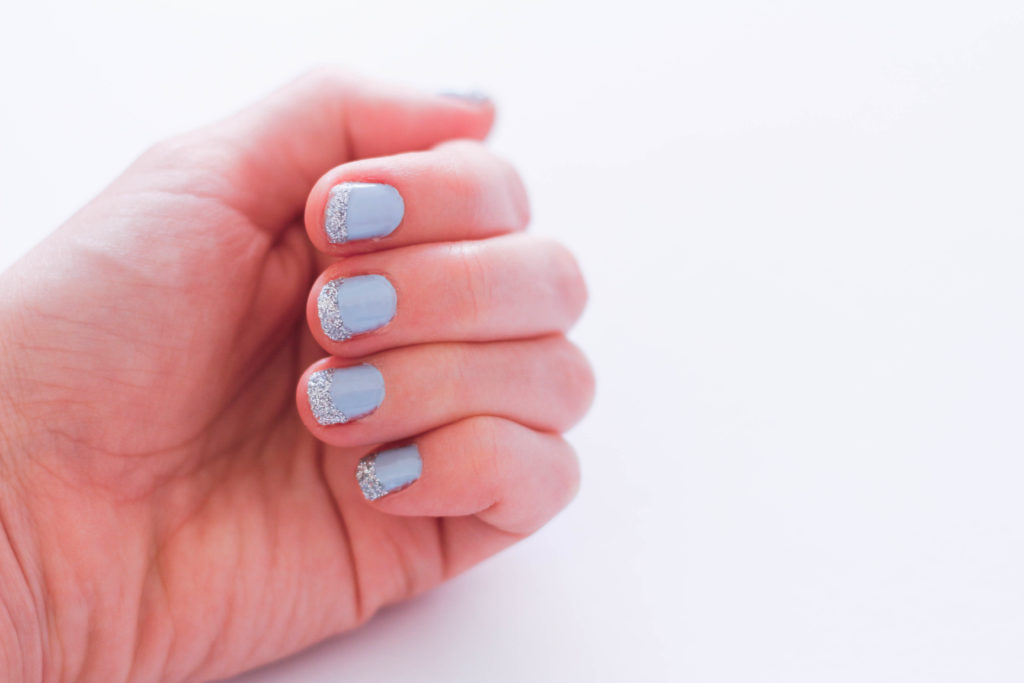
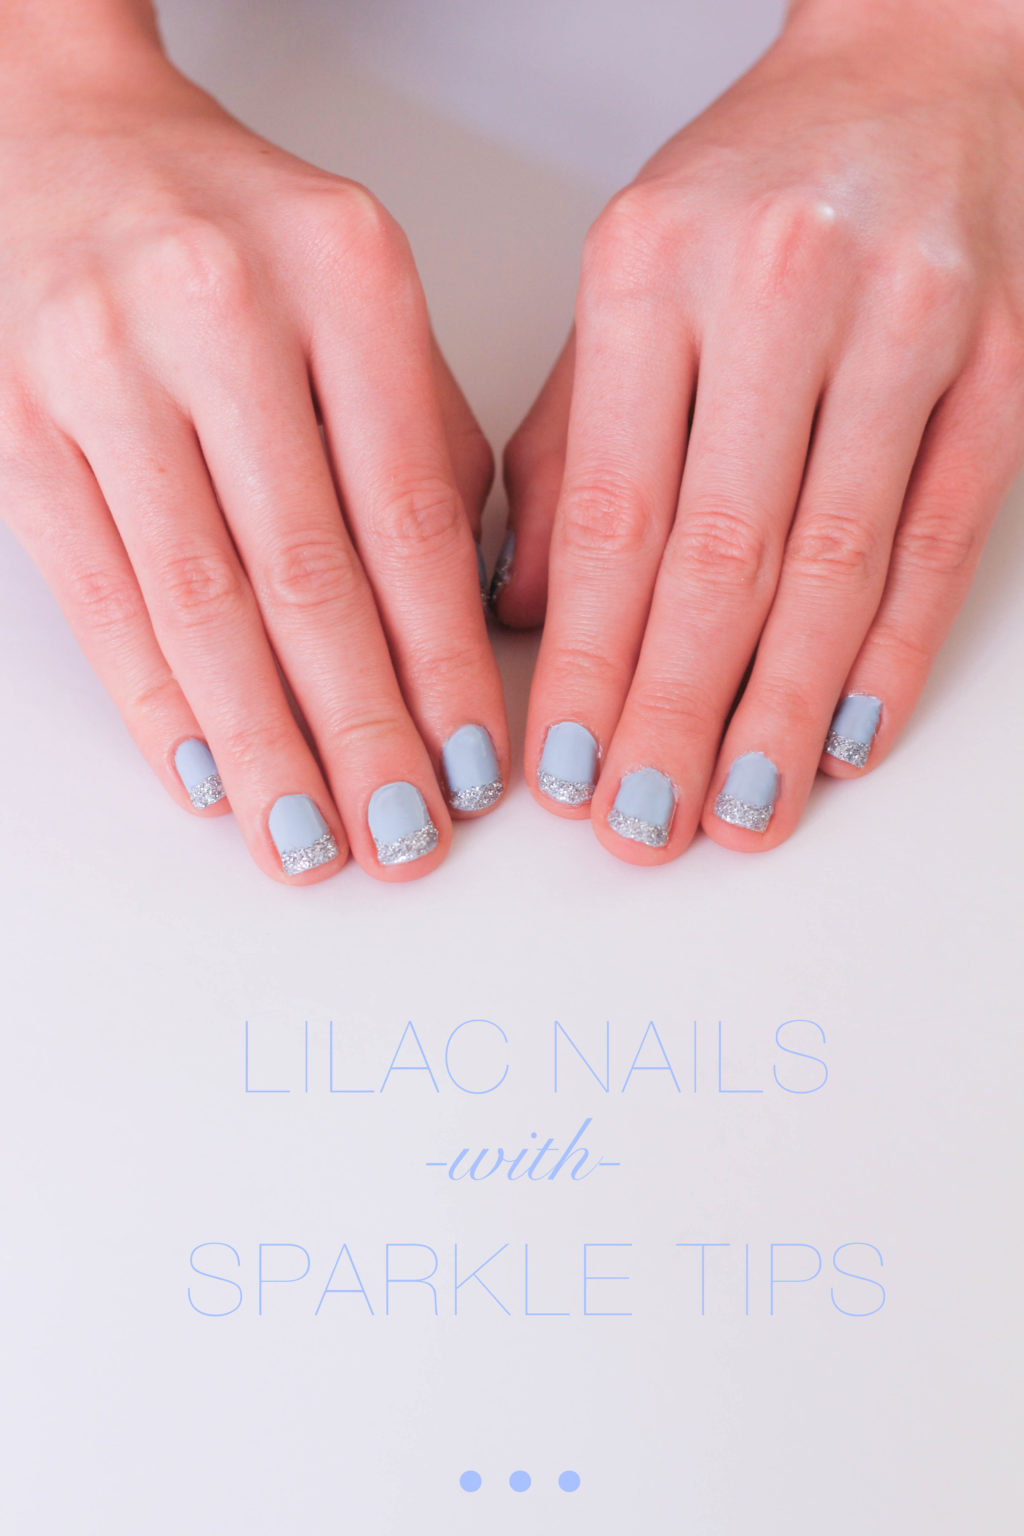
 I am not the girl who goes and gets manicured on a regular basis. Not that I don’t enjoy it every once in a while, but for the most part I find it too pricy for the amount of time that the service lasts. Although getting my nails done at a salon is a rare occasion, I do always like to have polished nails as it looks exactly that…polished. This week, instead of swiping on a couple of coats of one colour of nail polish I decided to brighten things up by adding sparkle tips. I found the end result to look just as good as if I had gotten it done at a salon and it was so easy! Keep reading to see how I did these pretty spring nails
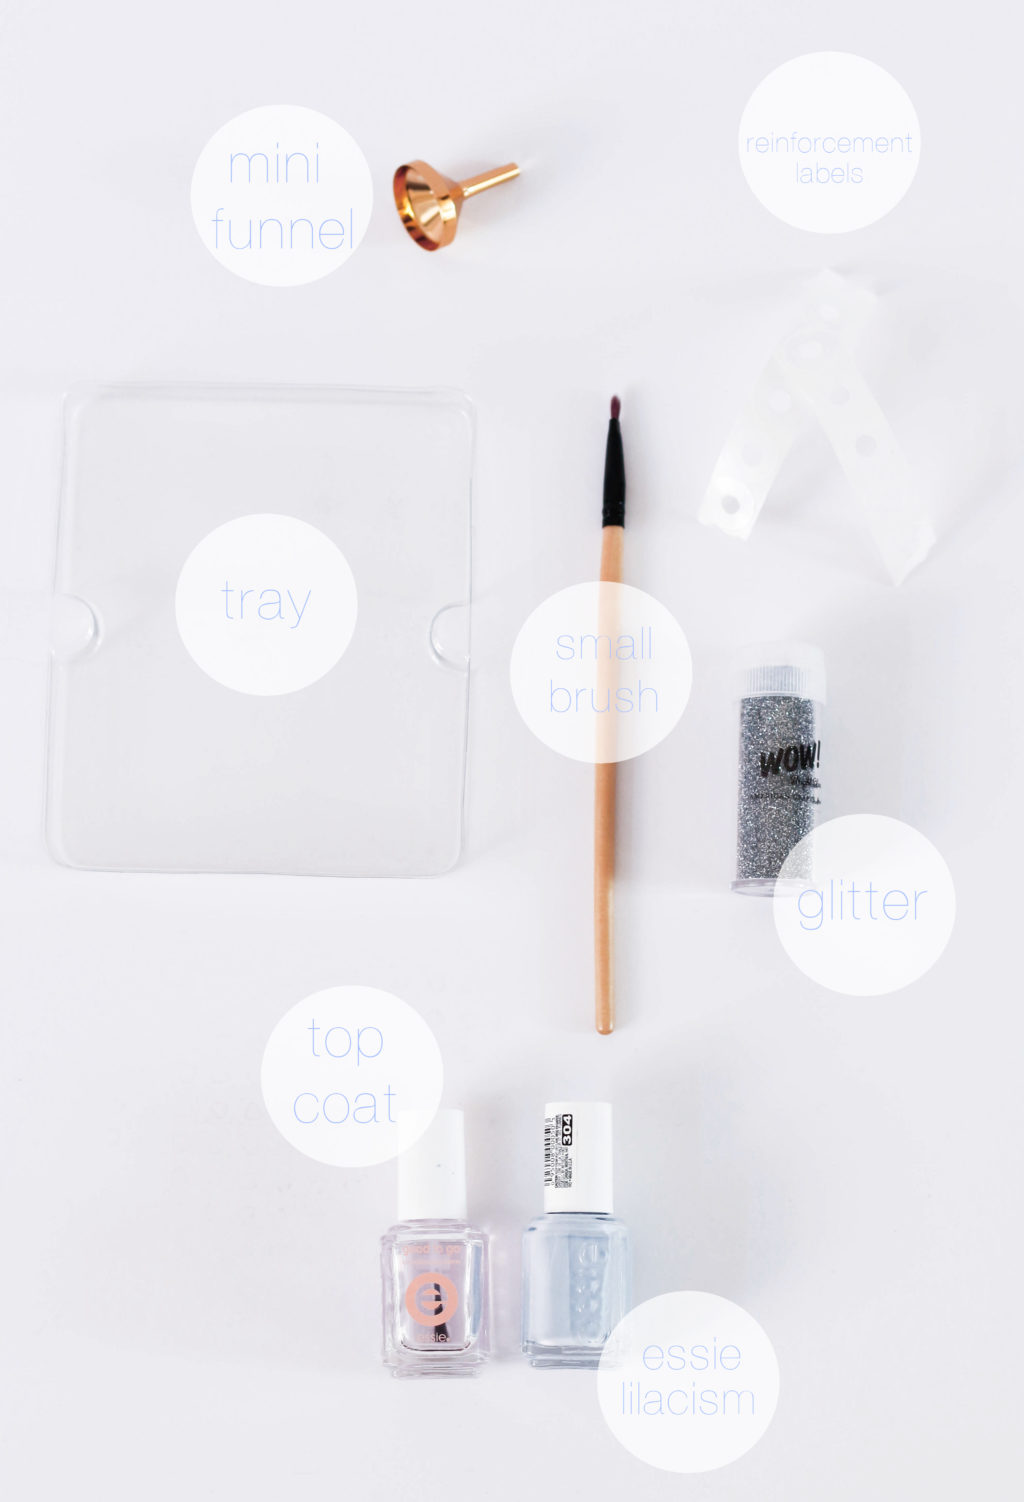
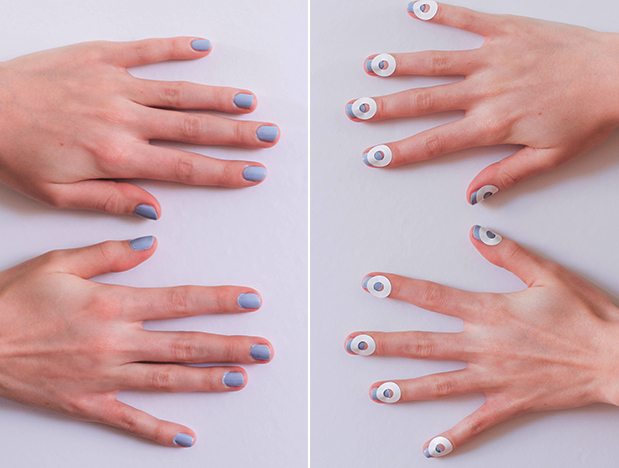 Step 1: Begin by applying 2-3 coats of nail polish (I used essie Lilacism). Make sure you allow the coats to dry completely before applying the next. Once the final coat is completely dry, stick a reinforcement label just below the tip of your nail, making sure to get each sticker as even as possible.
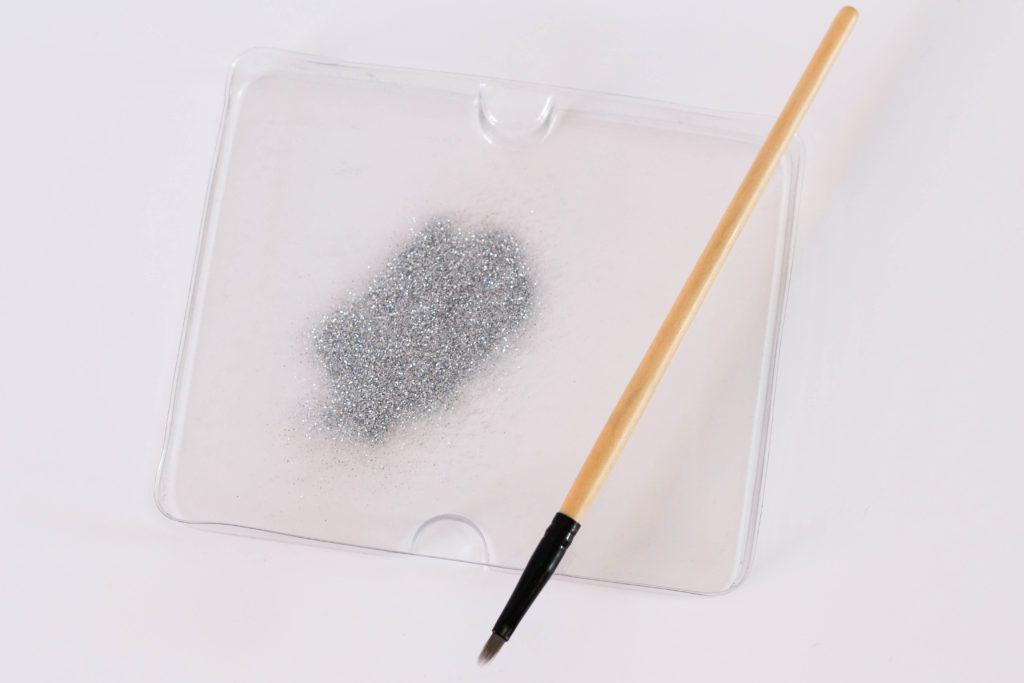 Step 2: Using your tray, pour a good amount of silver glitter into it, making sure that you will not have to add more in the middle of application, that could get messy!
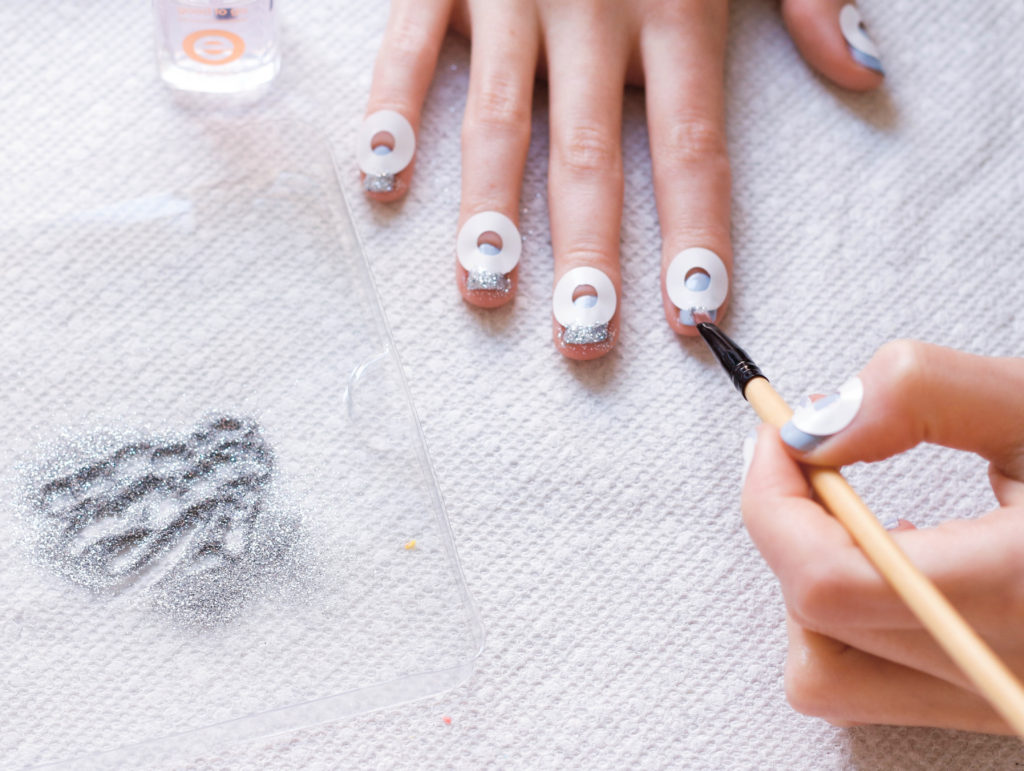 Step 3: Using your topcoat swipe a thin layer of it above the top of the sticker. Don’t worry if you get some on the sticker as it will still come off easily.
Step 4: Dab a good amount of sparkles onto your brush so that when you apply them to your nail they will easily fall off the brush. Continue to dab sparkles onto your nail pressing down gently until they are completely adhered and covered. Make sure that you do one nail at a time as the top coat will dry quickly. Remove sticker
Step 5: Swipe another top coat over the entire nail to seal in the pain and the sparkles.
Step 6: To salvage the remaining bit of sparkles left in your tray, use the funnel to gently pour them back in the container.